
How to Even Out Voice Volume on Windows
When one sentence is hard to hear and the next is too loud, turning up the whole file does not solve the difference. A compressor can reduce the gap between louder and quieter parts of a spoken recording. In the current GiliSoft Audio Editor, apply it carefully to the selected audio and compare the result before exporting.
Quick answer
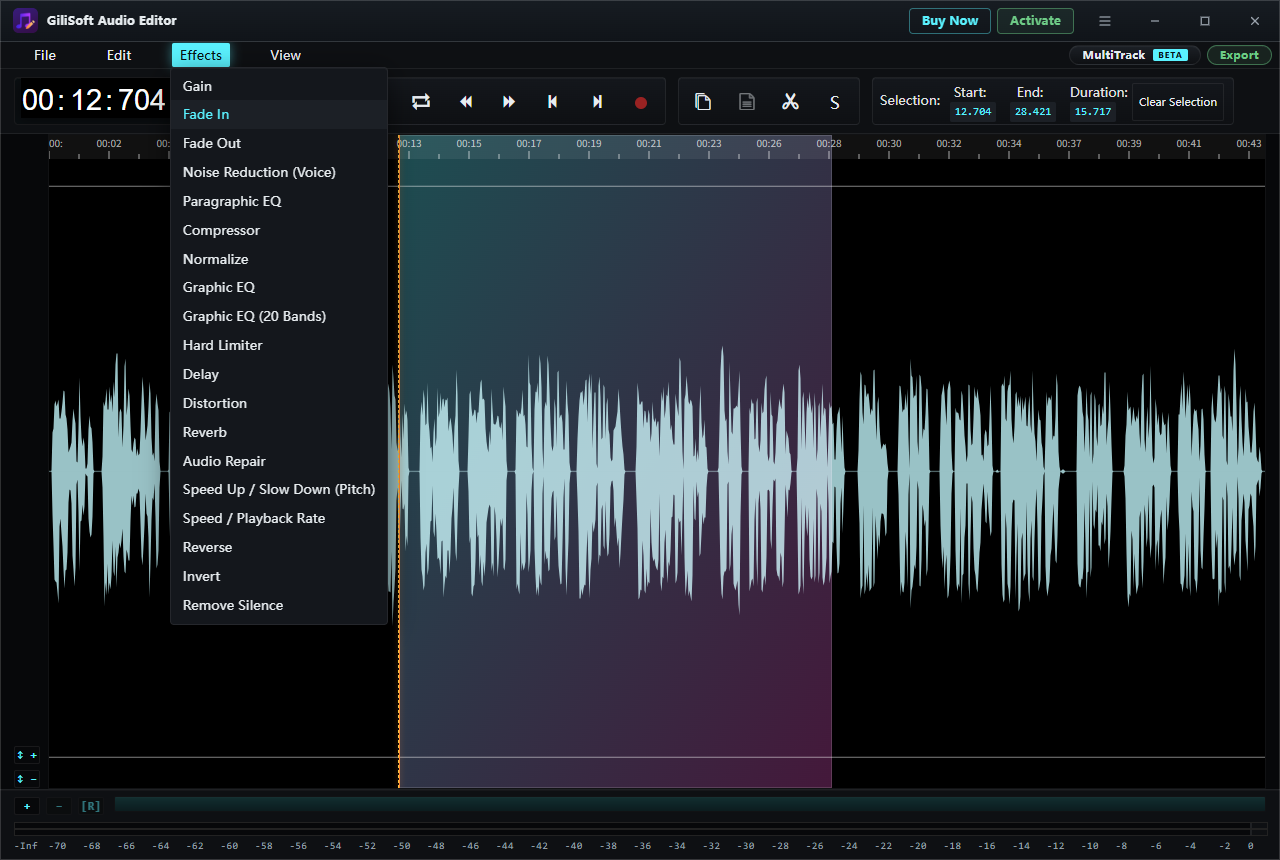
Load the voice file in GiliSoft Audio Editor, choose Edit > Select All for a full-file adjustment, then open Effects > Compressor. Review the options shown in your installed version, begin with a restrained change, and play both a quiet phrase and a loud phrase. Undo if speech sounds flattened or background noise becomes distracting. Use File > Export to save a separate copy.
Compressor, Normalize, Gain, or EQ?
| Problem | Start with | Check |
|---|---|---|
| Quiet and loud phrases alternate within a take | Compressor | Speech remains natural after the level range narrows |
| The entire file is consistently quiet | Normalize | Overall level improves without clipping |
| Only one passage is too quiet | Select that passage and review Gain | The transition into and out of the passage is not abrupt |
| Voice is muddy, thin, or harsh | EQ | Tone improves without making noise more prominent |
| The upload requires a smaller file | Choose an output codec or bitrate | File size falls while playback quality remains acceptable |
Dynamic-range compression is not file-size compression. For a smaller MP3 or WAV delivery file, see audio file compression on Windows. For a quiet file with otherwise even speech, follow the Normalize guide.
Balance a Voice Recording in GiliSoft Audio Editor
- Preserve the original
Keep an untouched source file. Work on a copy so you can compare and reverse a change that makes the voice less clear.
- Listen to both extremes
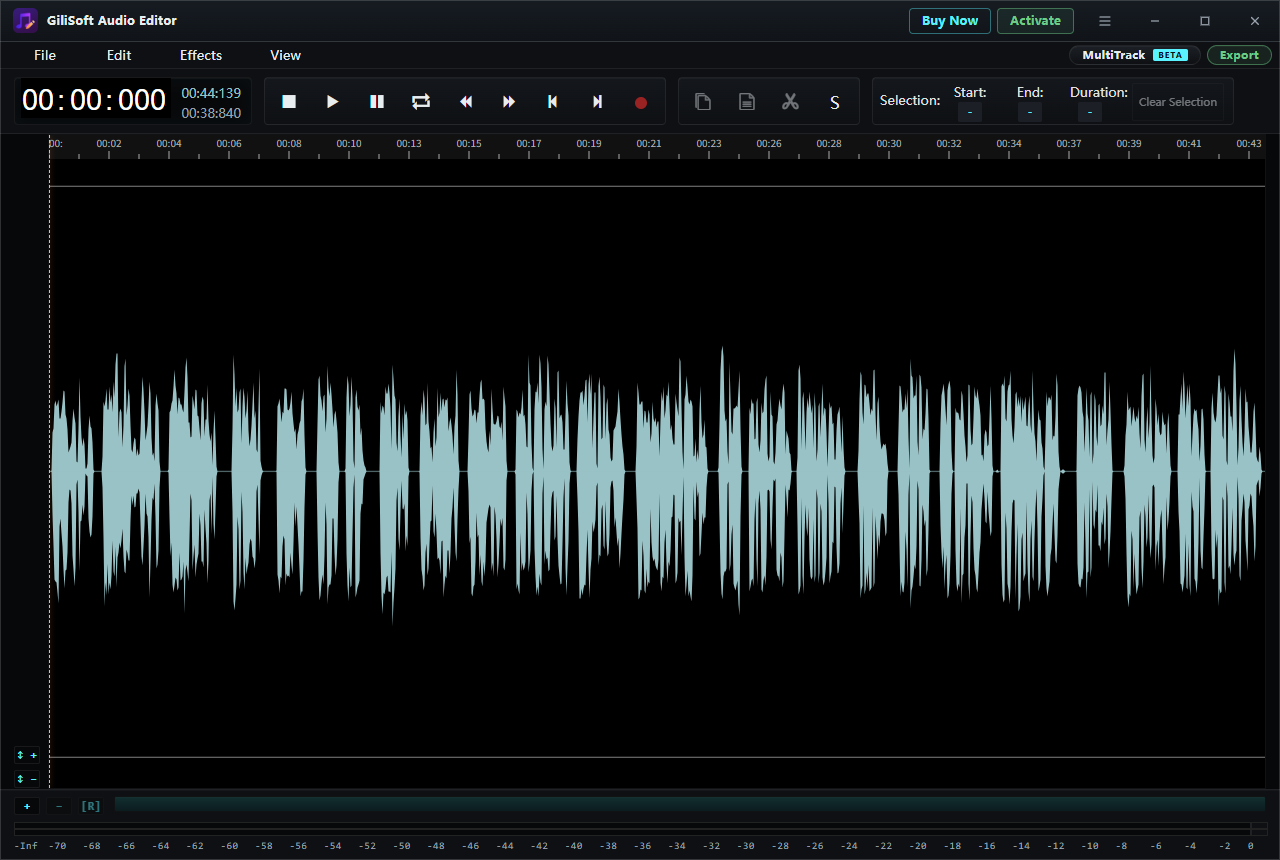
Open Audio Editing from the task hub, choose File > Load from computer, and note one quiet phrase and one loud phrase. A short test range is easier to judge than an entire long recording.
- Select the audio to process
Drag across the test passage in the waveform. If the same level variation runs through the complete file, choose Edit > Select All. Check the visible Start, End, and Duration values.
- Open Compressor
Choose Effects > Compressor. The current Effects menu confirms this entry; inspect the controls presented by your installed version and make a modest first adjustment.
- Compare at the same playback volume
Listen to the quiet phrase, the loud phrase, and a transition between them. Undo and try a gentler change if the voice pumps, loses expression, or brings room noise forward.
- Export a new copy
Choose File > Export or the upper-right Export button. Reopen the saved file outside the editor and listen through the full recording, not only the test passage.
A Practical Listening Test
Imagine a 30-second interview clip with a soft introduction followed by a much louder answer. First listen to both sections at one fixed player volume. Apply Compressor to a copy and compare the same two sections again. The aim is to make the quiet introduction easier to follow without making the answer sound crushed or exposing hiss between words.
If only the introduction is quiet, a selected Gain adjustment may be more appropriate. If every sentence is equally quiet, Normalize may be the simpler choice. Do not repeatedly stack effects just because the waveform looks more even.
What Compression Cannot Repair
- Clipped peaks and missing words cannot be recreated by lowering the remaining loud parts.
- Compression does not remove fan noise, hum, or echo; the noise may become easier to hear.
- It does not make a file smaller in bytes. Output format and bitrate control that separate task.
- Different speakers or recording locations may need separate review rather than one aggressive full-file setting.
For tonal problems rather than uneven loudness, use the voice EQ guide.
Frequently Asked Questions
Is Compressor the same as Normalize?
No. Compressor addresses differences between louder and quieter parts within the recording. Normalize adjusts an overall level and does not necessarily make every phrase equally loud.
Will this reduce the size of my audio file?
Not by itself. This guide is about dynamic range, not storage size. For smaller delivery files, review codec and bitrate choices in the file-size compression guide.
Why does my voice sound flat after compression?
The change may be too strong for the source. Undo it, try a gentler adjustment, and compare both the quiet and loud phrases at matched playback volume.
Can Compressor remove background noise?
No. It changes level variation; background sound can become more noticeable. Review the original recording and use an appropriate noise-reduction workflow when noise is the main problem.