
Choose the Right Webinar Recording Setup
The best setup depends on whether you will attend live, add commentary, or rely on a scheduled recording. Prepare the exact source and output path in advance.
| Webinar situation | Recording setup | Main preparation |
|---|---|---|
| Attend live without speaking | Webinar window + Computer Sound | Keep the webinar audible and mute unrelated applications. |
| Attend and ask questions | Webinar window + Computer Sound + Microphone | Use headphones and test both audio sources together. |
| Scheduled webinar | Scheduled start + Computer Sound | Keep the PC awake, logged in, powered, and connected. |
| Presentation plus presenter webcam | Window or region containing both | Confirm that the selected area includes every layout change. |
| Host provides an official replay | Use the authorized replay when suitable | An official file may be more complete and avoids an unnecessary local capture. |
Record a Webinar on Windows: Step by Step
Confirm that recording is allowed
Check the host notice, event terms, organizational policy, and applicable consent rules before starting.
Prepare the webinar and desktop
Open the webinar link, close private windows, silence notifications, and choose a stable display layout.
Choose the recording area
Select the webinar window or a custom region containing the presentation and any presenter video you need.
Set audio and schedule options
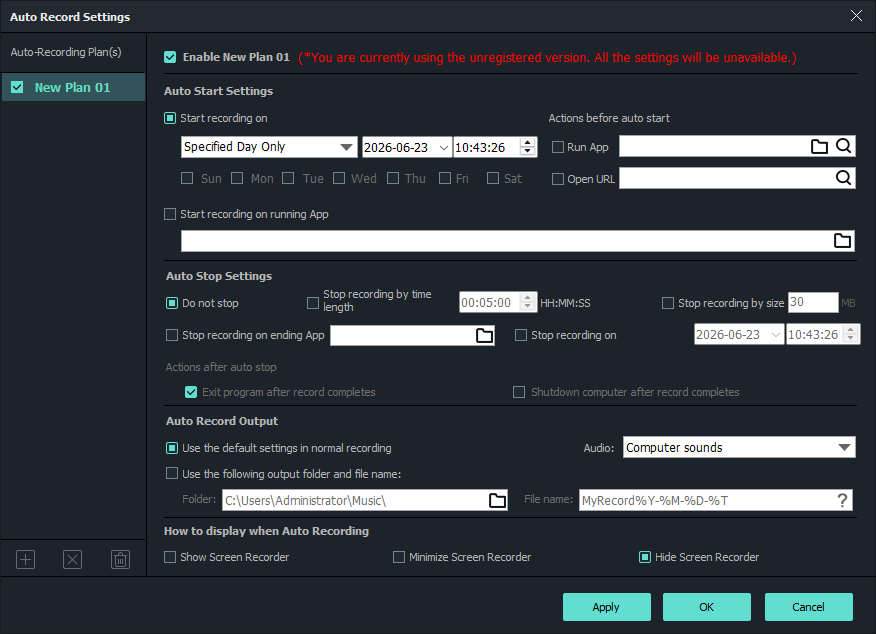
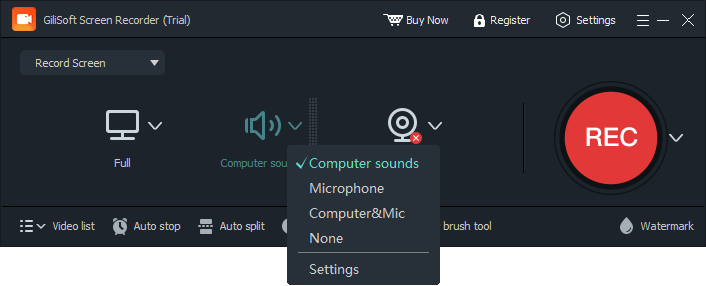
Enable Computer Sound. Add Microphone only for participation or commentary. Configure scheduled start and automatic stop when required.
Run a realistic test
Play sample audio in the webinar application and verify picture, sound, available storage, and the output folder.
Record and review the replay
Start early enough to capture the intended opening, then review the saved file for audio, slides, layout changes, and synchronization.
Prepare a Better Webinar Replay
Use a stable layout
Keep slides, presenter video, and captions inside the selected area when the webinar changes views.
Silence notifications
Pause chat and system alerts that are unrelated to the recorded event.
Plan for long duration
Connect power, prevent sleep, verify storage, and use automatic splitting when a very long file would be difficult to manage.
Review before distributing
Check the opening, several points in the middle, and the ending rather than assuming the complete webinar recorded correctly.
Common Webinar Recording Problems
- No webinar sound: enable Computer Sound and check the webinar application in Windows Volume mixer.
- Missing narration: enable Microphone, select the correct input, and confirm Windows desktop-app access.
- Scheduled recording did not start: check date, time, application condition, login state, sleep, and power.
- Slides are cut off: resize the custom area or record the complete webinar window.
- Black presentation video: test ordinary desktop content and determine whether the source uses protected playback or a graphics path that needs another capture mode.
Frequently Asked Questions
Can I record a webinar on Windows?
Yes, when the host, event terms, and applicable policies allow it. Inform or obtain consent from participants where required.
Can a webinar recording include computer audio?
Yes. Enable Computer Sound and test the webinar application before the event begins.
Can I schedule the recording?
Yes. Configure the start and stop plan in advance, then test it with the same PC power, sleep, and application conditions.
Should I enable my microphone?
Enable it only when your questions or commentary need to be part of the replay. Otherwise, computer sound alone is usually cleaner.
How do I record a long webinar reliably?
Connect power, prevent sleep, confirm free storage, test the output path, and consider automatic file splitting.
Why is the official webinar replay sometimes better?
A host-provided replay may contain cleaner source video, captions, or edited pauses. Use it when authorized and when it meets the intended purpose.
More Screen Recording Guides
Continue with the workflow or troubleshooting guide that matches the next recording task.