
Plan the Conference Recording Before the Call
A useful meeting recording depends on consent, source selection, and a short test. Decide what the record must contain before participants join.
| Decision | Recommended choice | Why it matters |
|---|---|---|
| Permission | Tell participants and follow organizational policy | Recording laws and workplace rules vary; consent must be handled before capture begins. |
| Capture area | Conference window or a carefully selected region | Avoids recording private messages, unrelated tabs, or desktop notifications. |
| Audio | Computer sound plus microphone when you will speak | Preserves participant audio and your contribution in one synchronized file. |
| Webcam | Enable only when presenter video adds value | A shared-screen archive often does not need a separate camera feed. |
| Output plan | Choose storage, naming, and retention before recording | Meeting records may contain confidential or personal information. |
Record a Video Conference on Windows: Step by Step
Confirm permission and storage rules
Tell participants that the session will be recorded. Confirm where the file may be stored, who may access it, and how long it should be retained.
Prepare the conference window
Open the meeting application, close private chats and unrelated windows, and enable Do Not Disturb to prevent notification content from appearing.
Choose the capture area
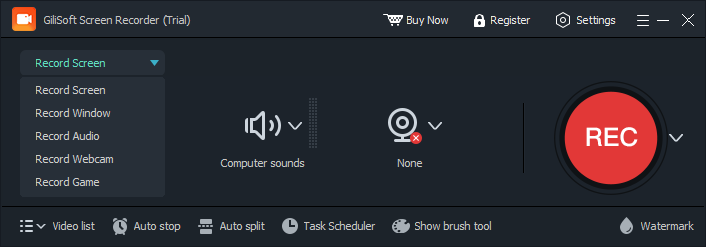
In GiliSoft Screen Recorder Pro, select Record Window or a custom region that includes shared content, participant video, and meeting controls you need.
Set the audio sources
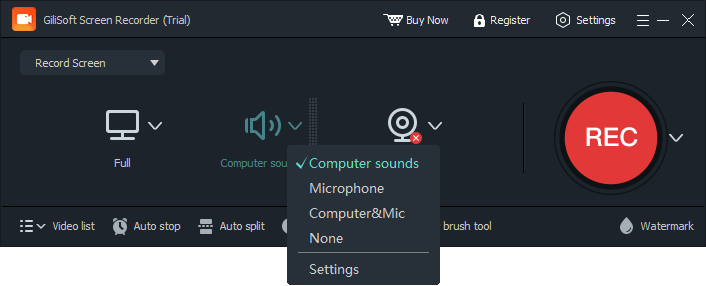
Enable Computer Sound for participant audio. Enable Microphone if your own voice must be included, and use headphones to reduce echo.
Record a short test
Test the same conference application, output device, microphone, and window layout planned for the real call. Check sound balance and picture clarity.
Record and verify the meeting
Start before the required discussion, stop when the authorized session ends, and review the beginning, middle, and end before filing or sharing it.
Conference Recording Checklist
Protect private information
Close unrelated windows and pause notifications before sharing or recording the desktop.
Use headphones
Headphones reduce the chance that participant audio will re-enter the microphone as echo.
Keep the PC awake
Disable sleep for the planned duration and connect power before a long call.
Check available storage
High-resolution meetings can create large files; leave enough room for the full session.
If Part of the Conference Is Missing
- If participant audio is missing, confirm that Computer Sound was enabled and the meeting application was not muted.
- If your own voice is missing, check Microphone selection and Windows microphone permission.
- If shared content is outside the frame, switch to the conference window or resize the custom region before restarting.
- If the meeting window becomes black, test normal desktop capture and review the black-screen troubleshooting guide.
- If recording stopped early, inspect automatic-stop rules, available storage, sleep settings, and unexpected application closure.
Frequently Asked Questions
Can I record a video conference on Windows?
Yes, when the meeting application and your organization permit it. Inform participants and comply with applicable consent, privacy, and retention requirements.
Which audio sources should I enable?
Enable Computer Sound for participant audio. Add Microphone when your own voice must be recorded.
Should I record the whole desktop?
A conference window or carefully selected region is usually safer because it reduces the chance of capturing private notifications or unrelated work.
Can I schedule a conference recording?
Screen Recorder Pro includes scheduled recording controls. Test the plan in advance and make sure the PC is awake, powered, and ready.
How do I prevent echo?
Use headphones when computer sound and microphone are active together, and avoid routing speaker playback back into the microphone.
What should I check after recording?
Review picture, participant audio, microphone audio, synchronization, and the beginning and end before storing or distributing the file.
More Screen Recording Guides
Continue with the workflow or troubleshooting guide that matches the next recording task.