
Place photos, short clips, music, narration, and subtitle material in clearly named folders.
GiliSoft Slideshow Maker Help Center
Slideshow Maker User Guide for Windows
Create a photo slideshow video with music using GiliSoft Slideshow Maker.
- Import photos and clips and arrange them on the timeline
- Add music, voiceover, titles, transitions, and effects
- Preview the complete project and export the finished video
Prepare the slideshow before editing
A little preparation makes the timeline faster to build and keeps the finished photo movie consistent.
Select an aspect ratio that matches the intended playback screen before detailed editing.
Choose background music and decide whether the project also needs microphone narration on a separate Voiceover track.
Plan the scene sequence so the slideshow develops deliberately instead of randomly.
1. Import photos and short video clips
Bring the source material into one project
- Open GiliSoft Slideshow Maker and start a project.
- Click Import, or drag photos and short clips into the media area.
- Preview sources to confirm orientation and content.
- Preview each source before adding it to the timeline.
Importing adds a file to the project library. Add it to the timeline in the next step to include it in the final slideshow.
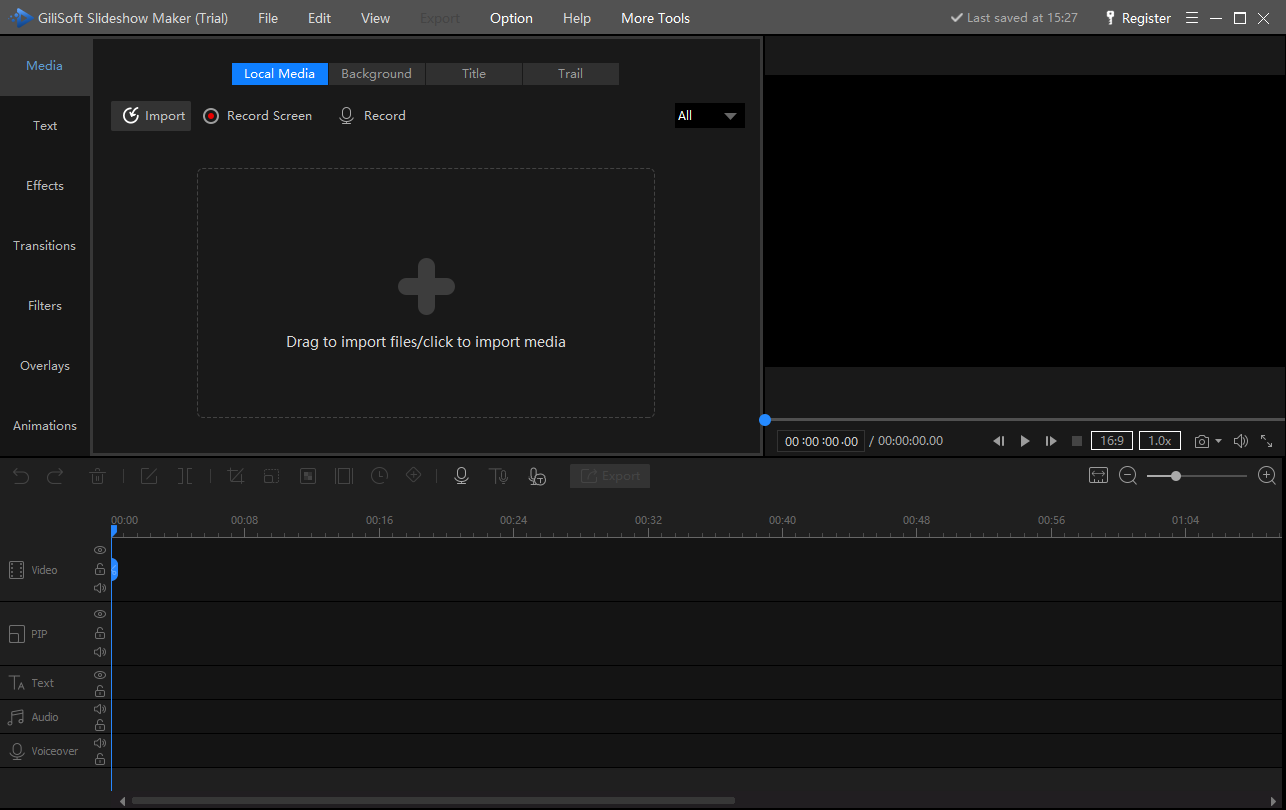 Import local photos and short video clips into the media library
2. Arrange scenes on the multi-track timeline
Build the sequence and keep each element on the right track
- Add photos and clips to the main Video track.
- Drag scenes left or right to establish the viewing order.
- Use PIP for layered visuals and Text for titles or captions.
- Keep music on Audio, narration on Voiceover, and visual treatments on Effects.
Separate tracks make it easier to adjust one part without disturbing every other element.
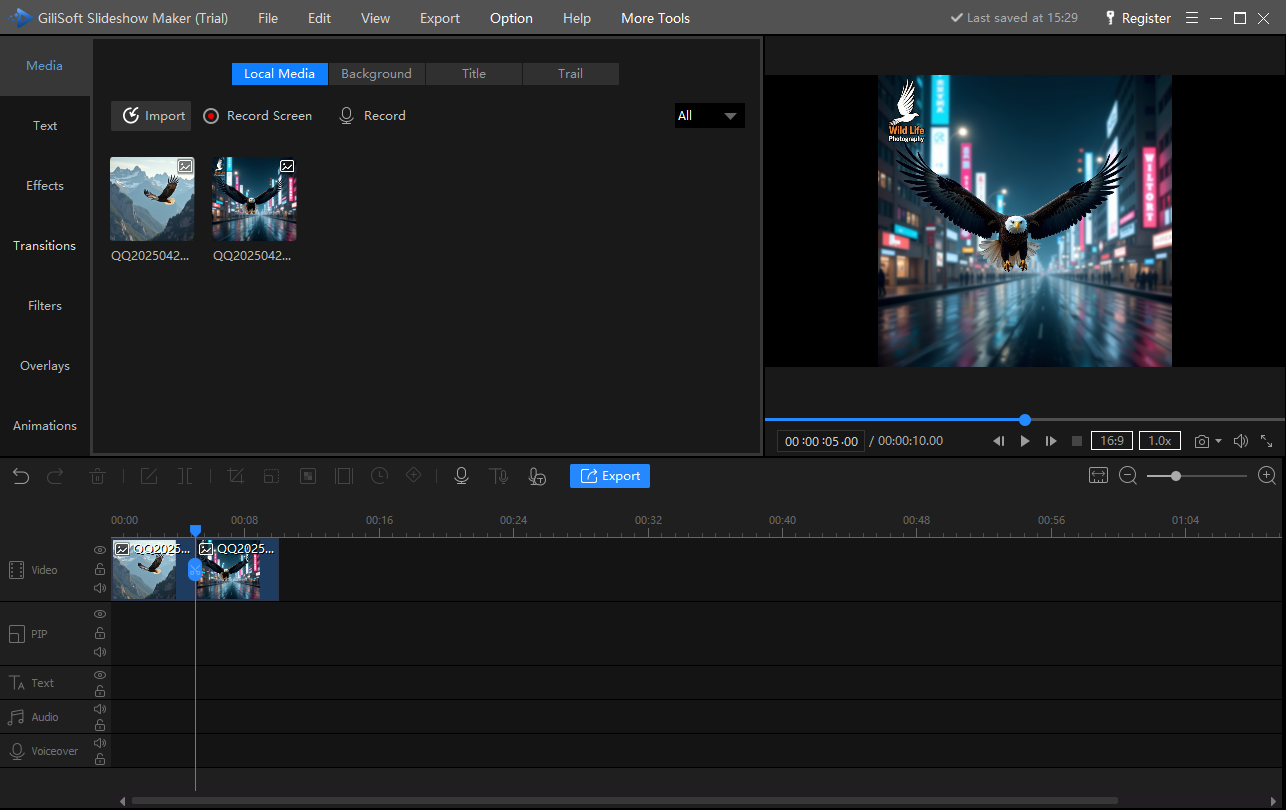 Timeline tracks for video, PIP, text, audio, voiceover, and effects
3. Add and preview transitions
Connect scenes without making the slideshow feel busy
- Select the position between two scenes.
- Open the transition library and browse its categories.
- Preview a transition before applying it.
- Use a small, consistent set of transitions across the project.
Simple, consistent transitions usually look more polished than a different effect between every photo.
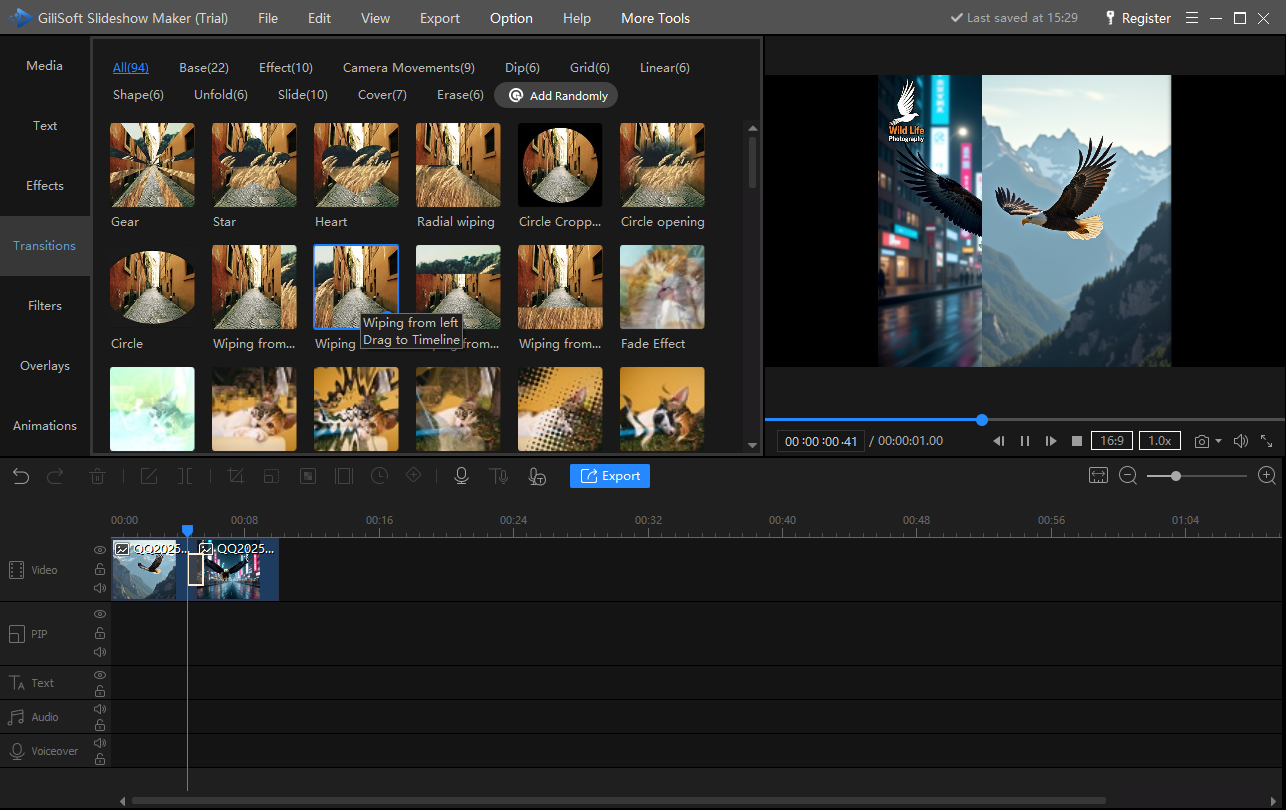 Browse and place transitions between photos or clips
4. Add titles, captions, and subtitles
Give the slideshow context without covering the subject
- Choose a title, lower-third, credit, or speech-style template.
- Add the text element to the Text track.
- Edit wording, position, timing, and style.
- Import subtitle material when prepared captions already exist.
Keep important text inside the safe viewing area and display it long enough to read comfortably.
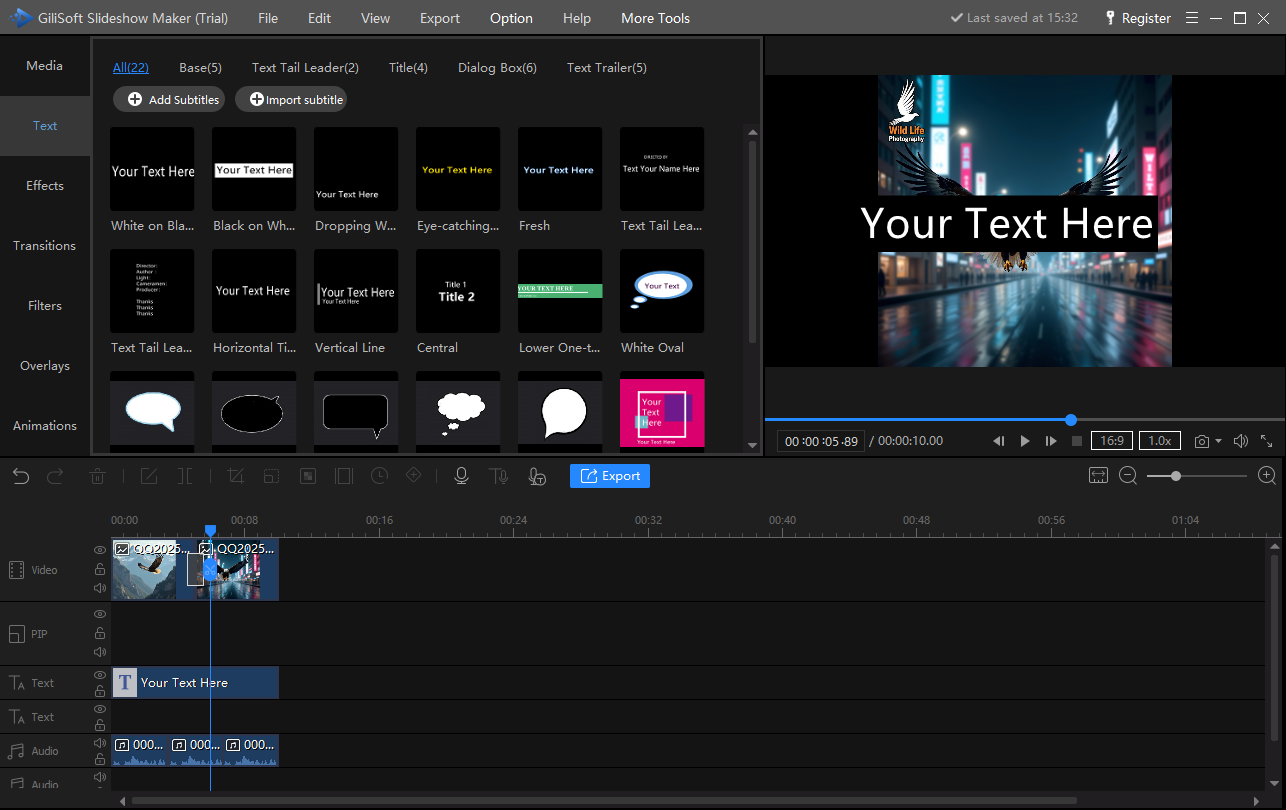 Titles, captions, credits, and subtitles on the Text track
5. Add background music and voiceover
Build a soundtrack that follows the story
- Add music to the Audio track under the intended scenes.
- Record microphone narration on the Voiceover track so spoken audio remains separate.
- Preview the beginning, scene changes, and ending.
- Balance music and narration so speech remains clear.
Separate Audio and Voiceover tracks are useful for lessons, travel stories, family histories, and product presentations.
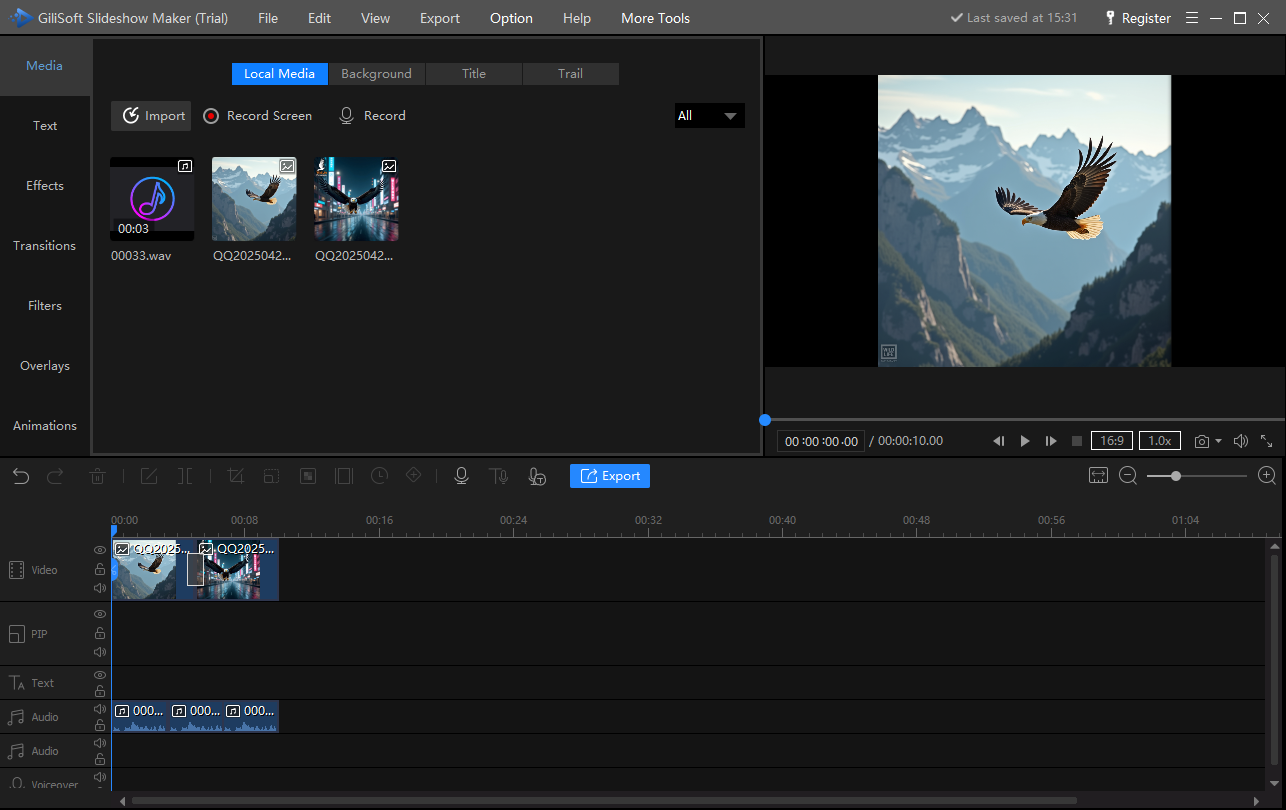 Place music and narration on dedicated tracks
6. Apply effects, overlays, and animated stickers
Use visual treatments to support a scene or mark an event, while keeping the main photo, clip, and captions readable.
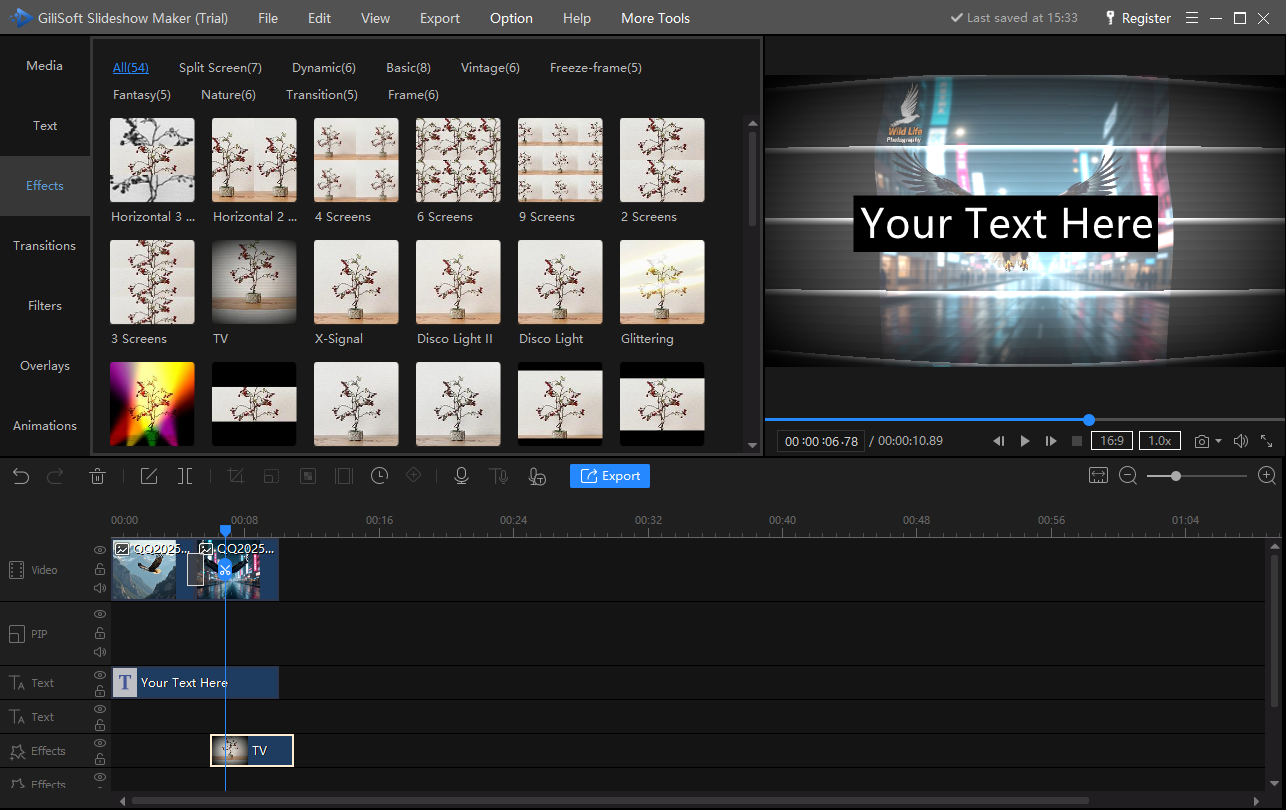 Effects, filters, overlays, frames, and split-screen treatments
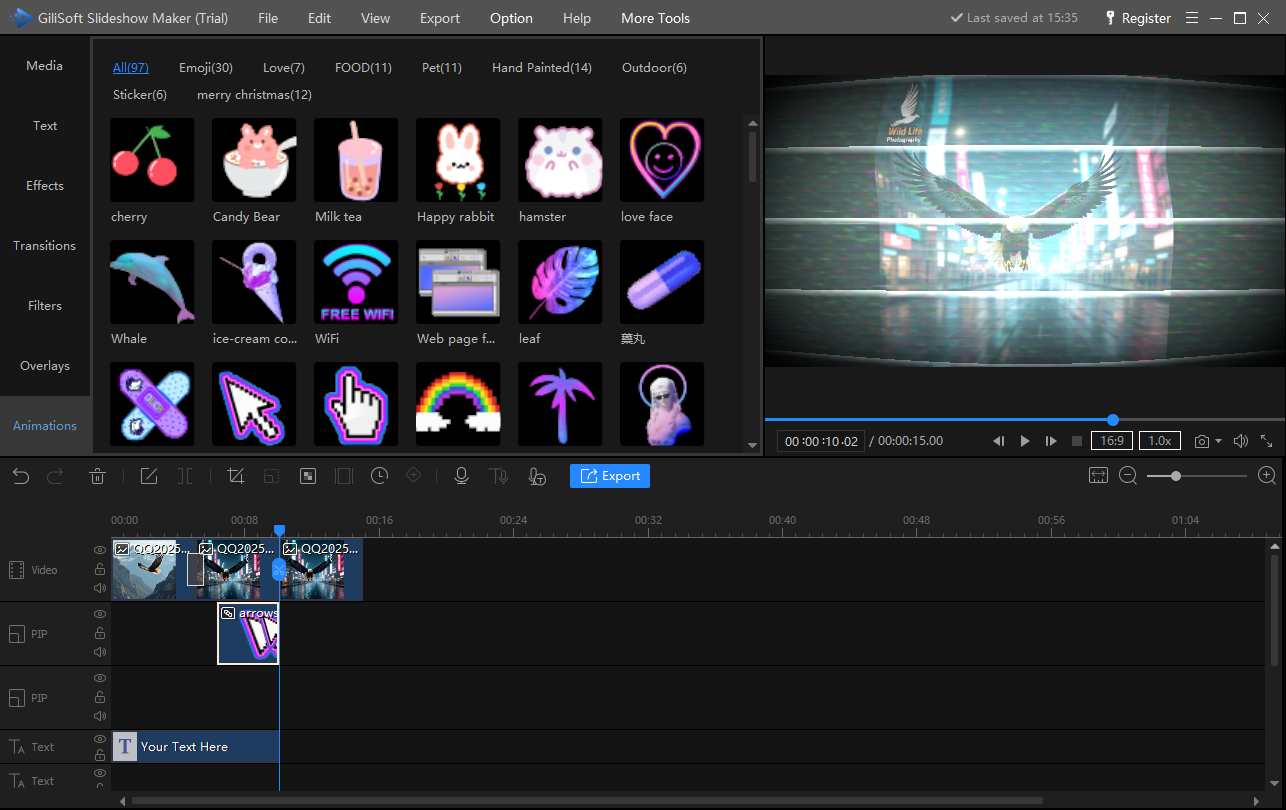 Animated stickers and layered elements for selected scenes
Preview the complete scene after adding decorations and confirm that faces, captions, and important details remain visible.
7. Preview and export the slideshow video
Review the full project before creating the final file
Play the slideshow from beginning to end, then use Export when the project is ready.
Scene order and durationAspect ratio and framingTransition consistencyText timing and readabilityMusic and voiceover balanceClean opening and ending
Final export checklist
Choose output settings suitable for the intended display or sharing destination, export the video, and play the completed file once outside the editor.
The timeline interface includes the Export command. There is no separate export screenshot because final settings depend on the output selected.
Practical slideshow editing tips
Control slide duration
Give detailed or text-heavy scenes more viewing time, while simpler images can move faster.
Keep transitions consistent
Reserve stronger transitions for clear chapter changes instead of using them everywhere.
Match music to the timeline
Preview where the soundtrack starts and ends so the closing feels deliberate.
Use the correct track
Keep PIP, Text, Audio, Voiceover, and Effects content separated for predictable editing.
Common photo slideshow projects
Wedding and birthday videos
Combine chronological photos, short clips, titles, music, and gentle transitions.
Travel photo stories
Organize scenes by location, add captions, and narrate important moments.
School and event recaps
Use titles, voiceover, stickers, and short video inserts to summarize an activity.
Product presentations
Mix product photos, demonstrations, text callouts, PIP layers, and voice explanation.
Slideshow Maker troubleshooting and FAQ
Why is an imported photo not visible?
Importing adds it to the library. Add it to the Video track and confirm it is inside the active sequence.
Why is a transition not showing?
Confirm it is placed between the intended scenes and preview across the scene boundary.
How do I make music cover the slideshow?
Compare audio placement with project duration, then adjust scene timing or music position and preview the ending.
Can I use voiceover and music together?
Yes. Put music on Audio and narration on Voiceover, then balance them so speech remains clear.
How can I avoid black bars?
Choose the project aspect ratio early and review how portrait or differently shaped photos fit the frame.
What should I check before export?
Review order, framing, transitions, text timing, effects, music, narration, and the opening and ending.
Ready to create a photo slideshow video?
Arrange photos and clips, add music and narration, apply titles and effects, and export a finished slideshow video on Windows.


