 How to Make a File be Read Only in Windows 11, 8, 7, Vista, and XP
Protect your files from accidental deletion or editing by turning on write-protection. Perform this with every files you own and then you don't have to be worry about the file being deleted or edited by someone other than you. This isn't permanent; you can always go back and change the setting at any time.
This article provides a quick and easy way to set files to be read-only in Windows 11, 8, 7, vista, and XP. Gilisoft File Lock Pro does exactly that, and it does it easily and well. Just start protecting your files, folders and disk drives with File Locker, please download the File Lock software via button below:
The following steps will tell us how to use Gilisoft File Lock Pro to set files to be read-only in Windows 11, 8, 7, Vista, and XP.
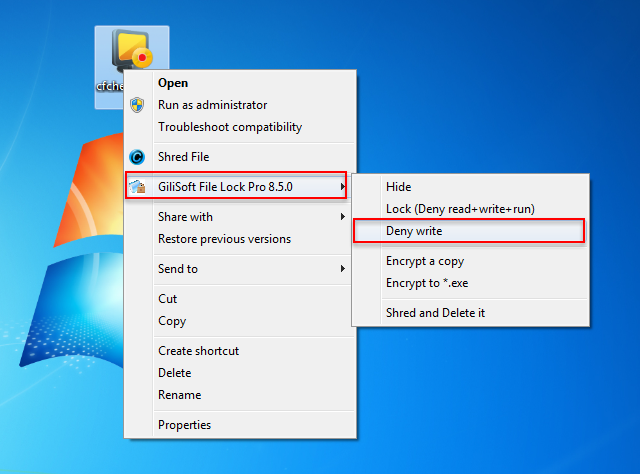
Step 1: Right-click on a file and select "GiliSoft File Lock Pro", and then select "Deny Write".
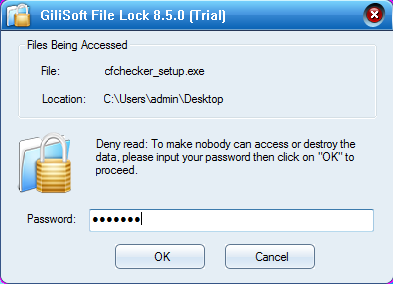
Step 2: You will be asked to enter your password for Gilisoft File Lock Pro when try to write protect a file. And then the file will be write protected (can be read-only) and others can't modify or delete it without authority.
 Password protect files, folders and disk drives.


Enter your email address to get our latest newsletter