
Place the photos, short clips, music, and any written narration in folders that are easy to find.
GiliSoft Slideshow Maker for macOS Guide
How to Make a Slideshow with Photos, Videos, and Music on Mac
Create a timeline-based slideshow from photos and short video clips, then add music, titles, recorded audio, text to speech, transitions, filters, overlays, stickers, and visual effects before export.
PhotosClipsMusic
Build Timeline
TitlesNarrationVideo
Before You Start the Mac Slideshow
A small amount of preparation makes timeline work faster and keeps the final story consistent.
Use a widescreen ratio such as 16:9 for TV, presentations, and most online video destinations.
Arrange files by time, topic, event, or chapter before importing a large collection.
Use photos, clips, music, stickers, and other material that you own or are authorized to include.
Create or Reopen a Slideshow Project
Begin with the project settings that match the screen where viewers will watch the slideshow.
- Open GiliSoft Slideshow Maker for macOS.
- Select the required aspect ratio.
- Choose New to create a slideshow from the beginning.
- Use Load Project when continuing saved work.
- Give the project a clear name before importing a large media collection.
Save the project regularly so timeline arrangement, titles, effects, and audio changes remain available for later editing.
 Project start screen with aspect ratio and saved projects. Click to enlarge.
Import Photos and Video Clips to the Timeline
The timeline is where the slideshow story takes shape.
- Open Material and choose Local Sources.
- Import the photos and video clips needed by the project.
- Add media to the timeline in the intended viewing order.
- Move scenes when the sequence needs to change.
- Preview the timeline after each important rearrangement.
 Media library, preview, and timeline tracks. Click to enlarge.
Add Music, Titles, Narration, and Text to Speech
Use sound and text to explain the story instead of relying only on visual scene changes.
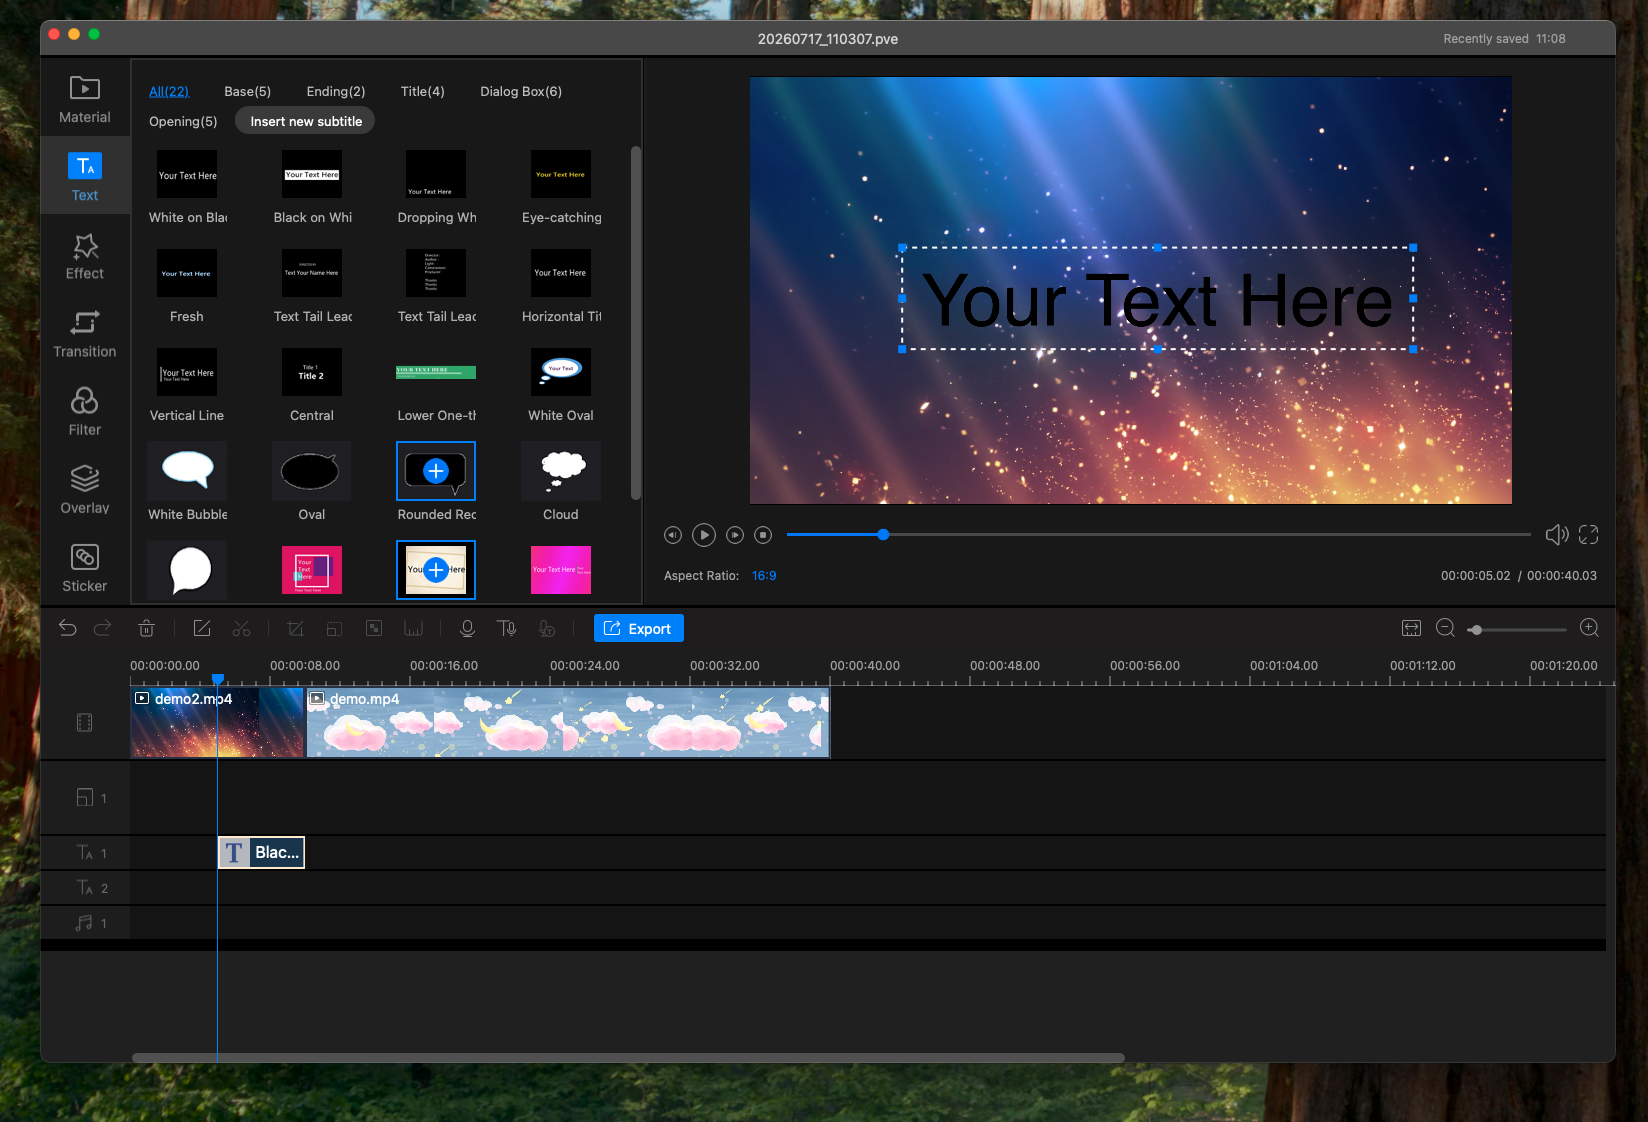
Add Titles and Captions
Choose opening, ending, title, dialog, or caption styles, then edit the wording and place the text in the preview.

Record Audio
Record computer sound or spoken material, control timeline muting, and add the recording to the slideshow project.
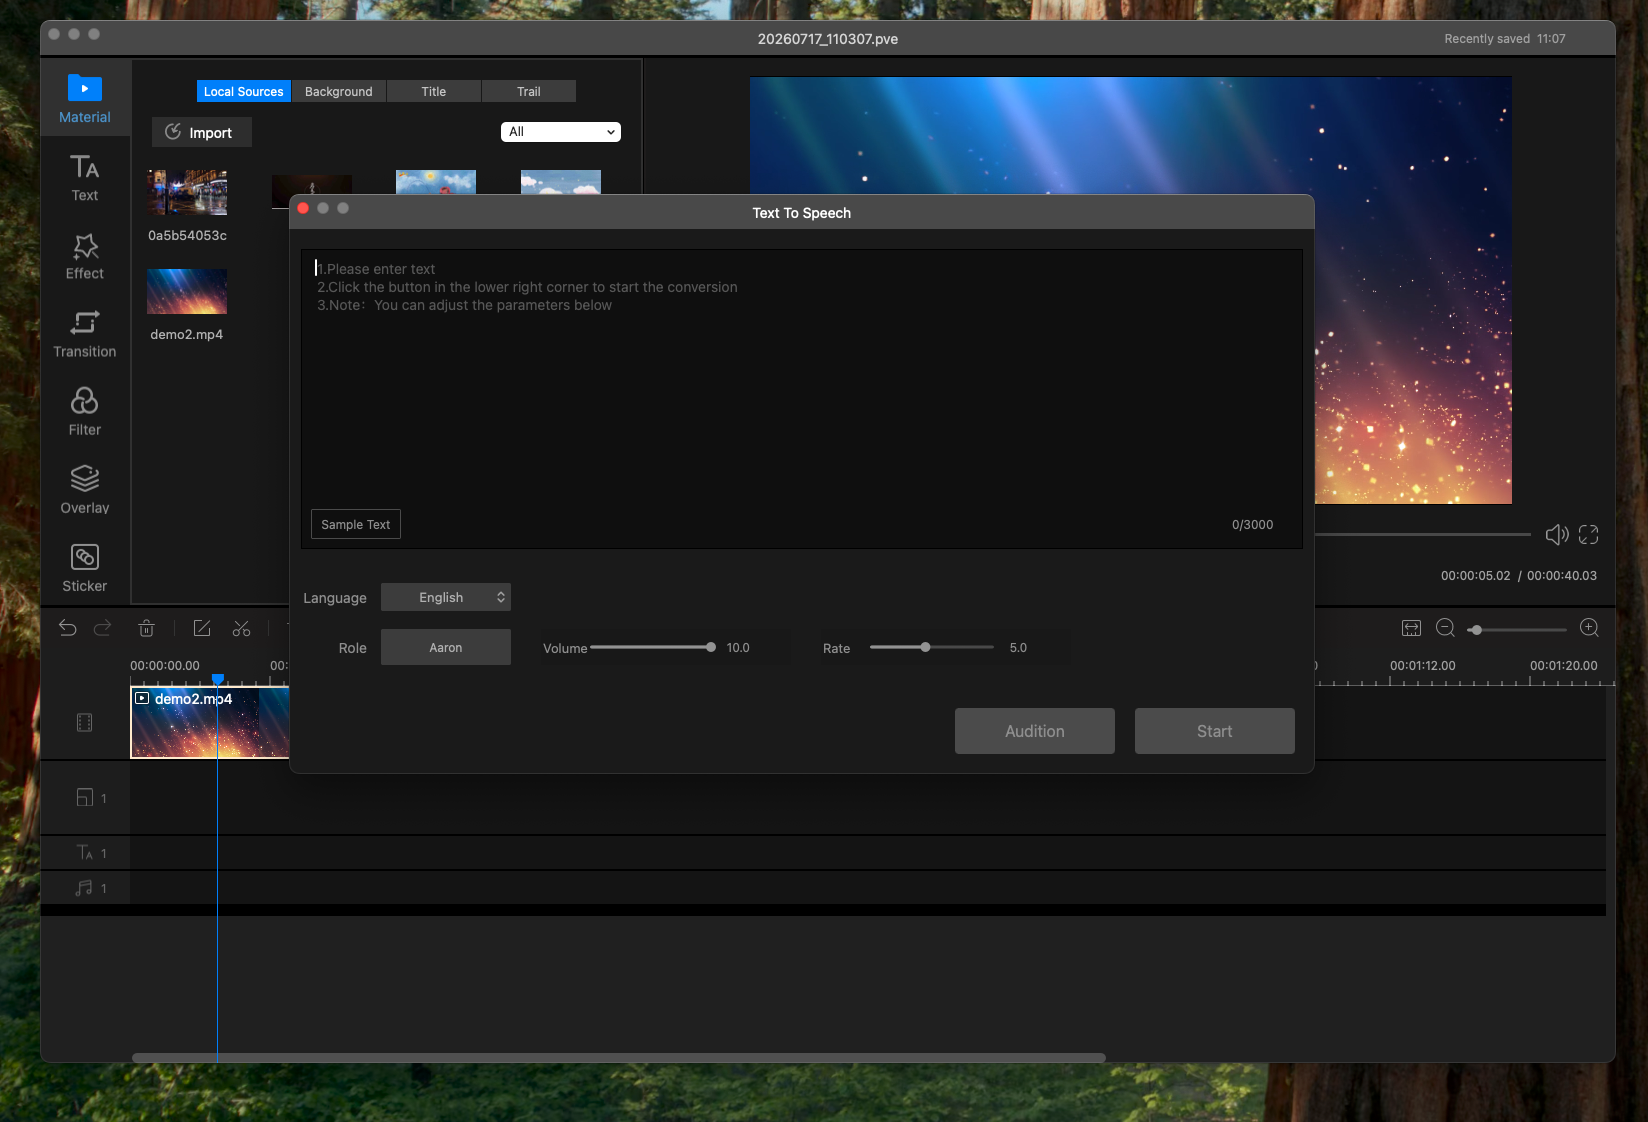
Turn Written Text into Speech
Enter the script, choose language and voice, adjust volume and rate, audition the result, and generate spoken audio.

Keep Media on the Right Track
Add video and supporting audio to the intended timeline tracks so visual and spoken elements remain organized.
Add Transitions, Filters, Overlays, Stickers, and Effects
Build a consistent style by using a small group of visual choices repeatedly rather than applying every effect in one project.

Transitions
Browse scene-change and camera-movement categories, apply a selected transition, or add transitions randomly.
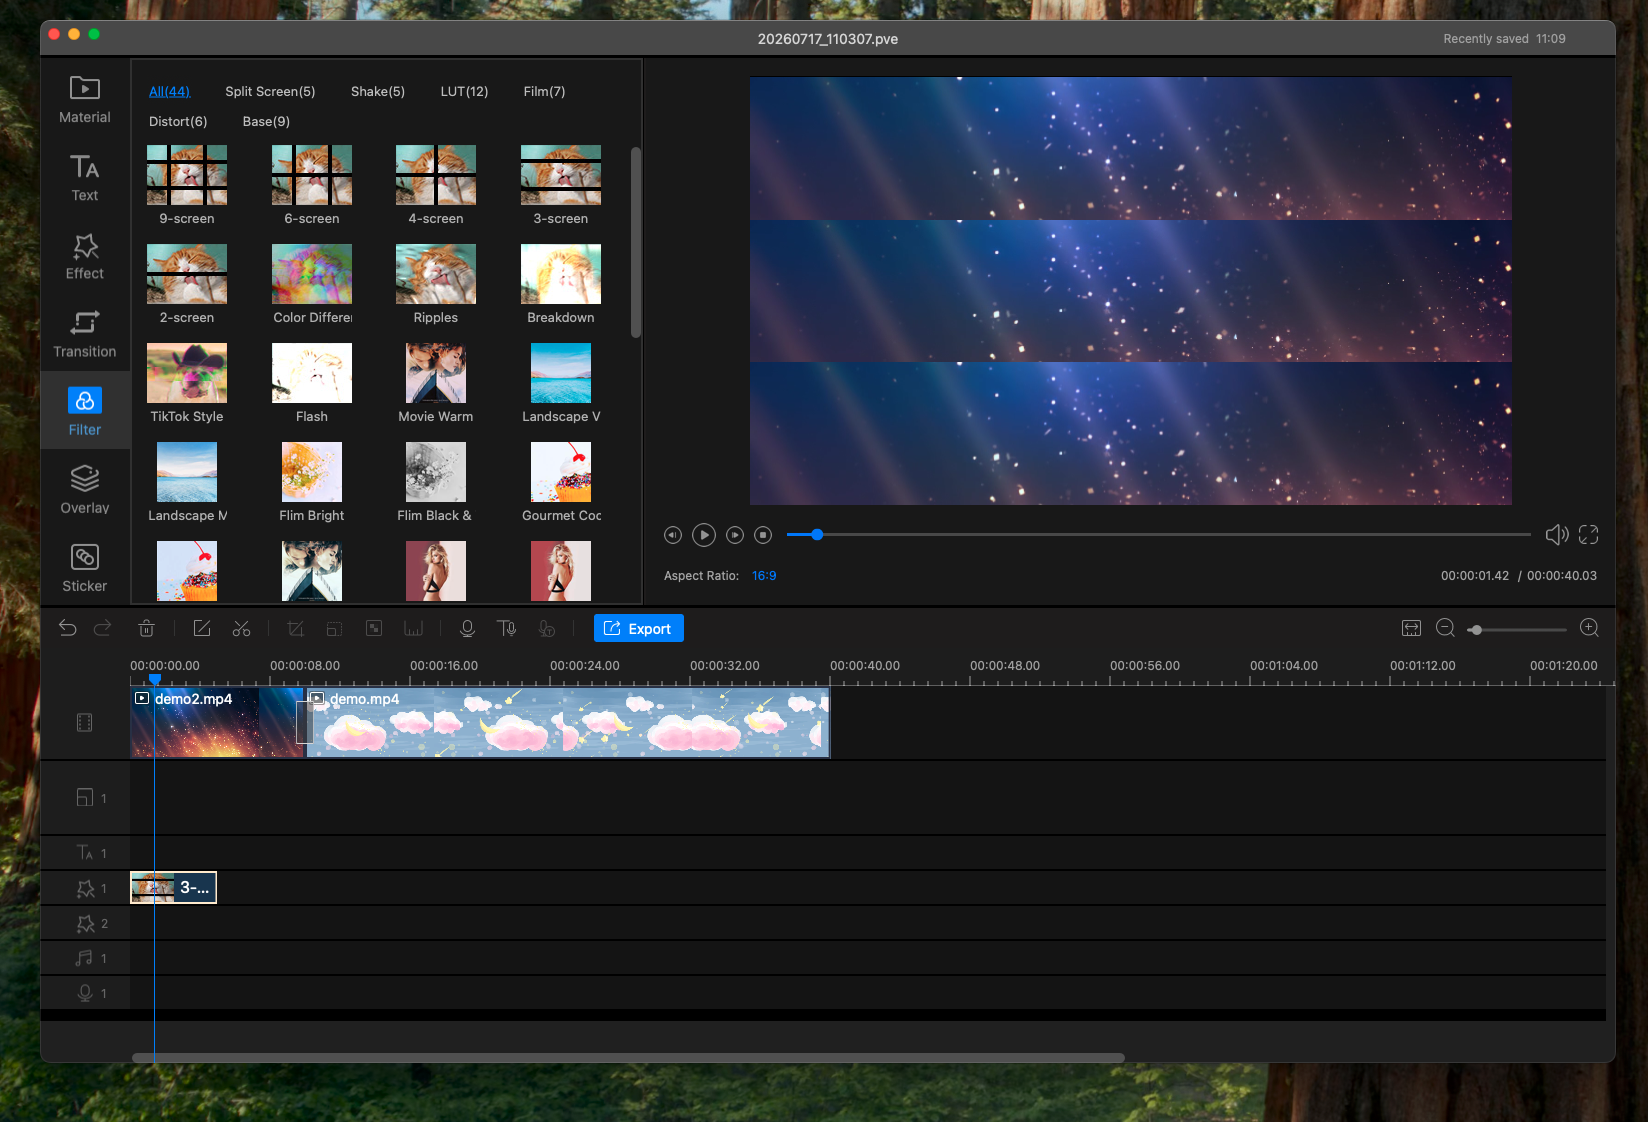
Filters and LUT Looks
Choose split-screen, shake, LUT, film, distortion, and other filters that suit the slideshow material.
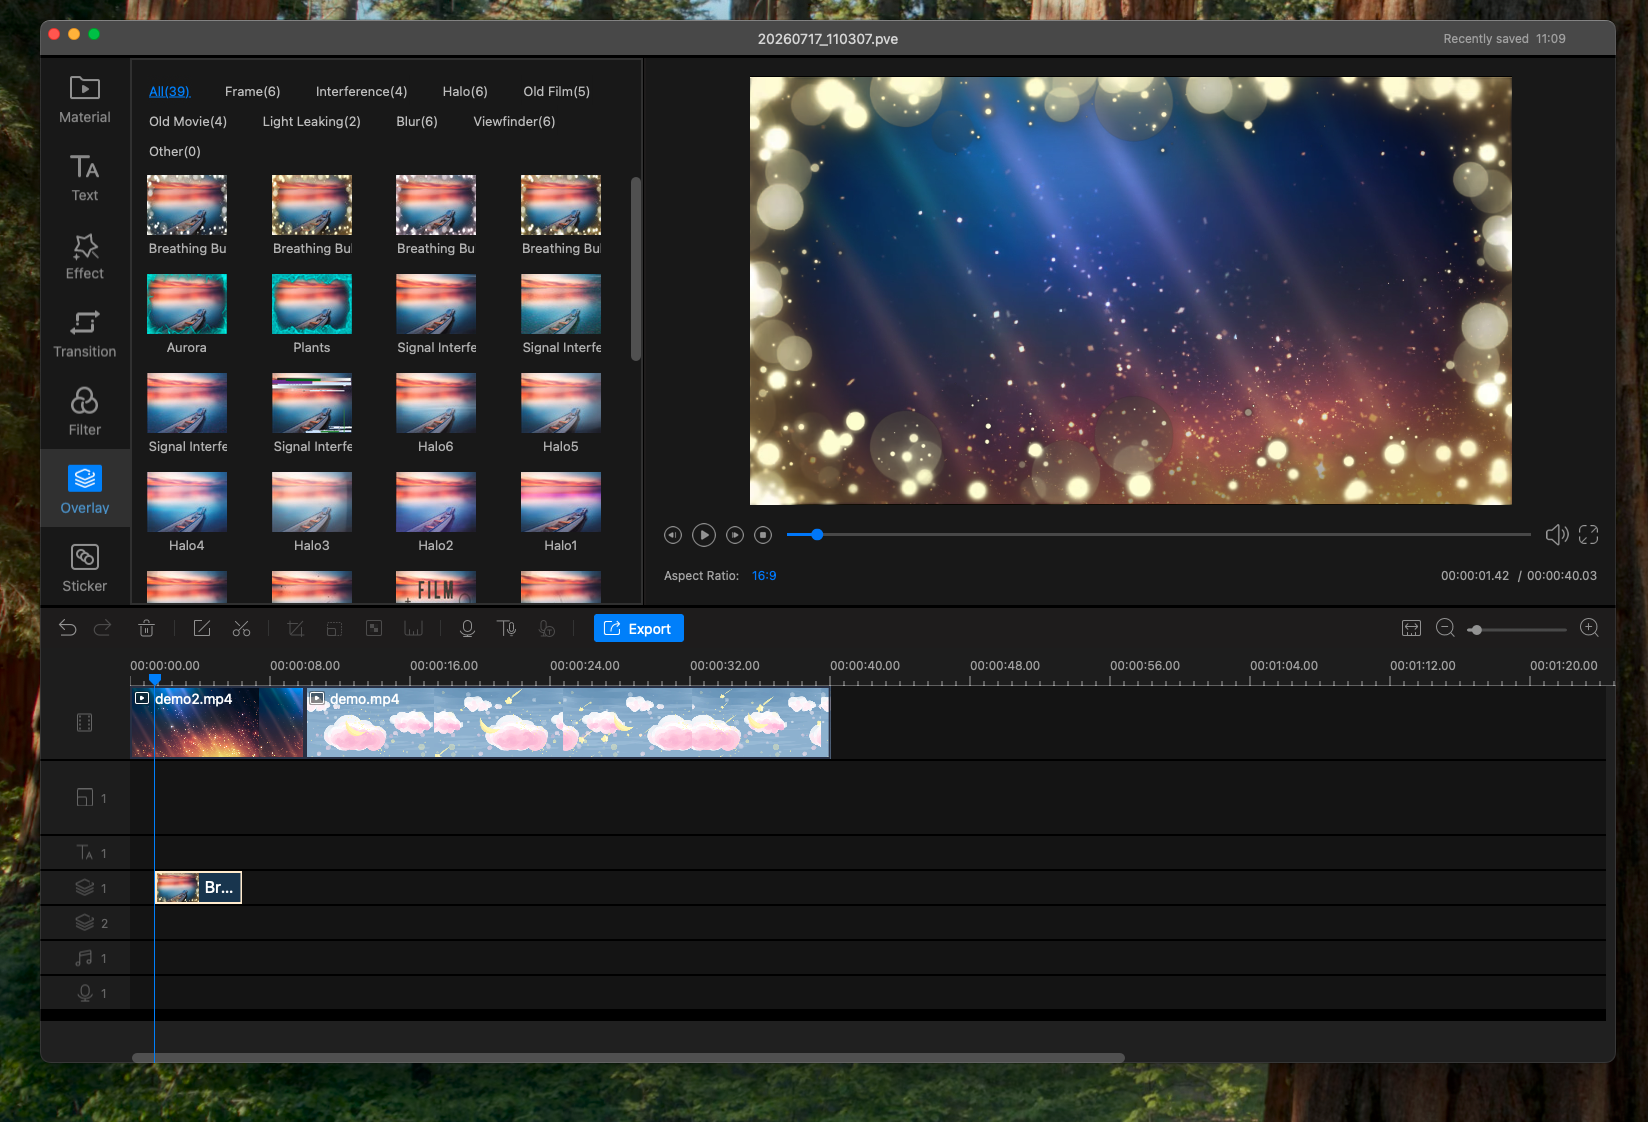
Overlays
Add frames, light leaks, old-film looks, viewfinders, and other visual layers over selected timeline scenes.

Stickers and Visual Effects
Add decorative elements, position and resize them in the preview, and use effects only where they support the story.
Refine Individual Slideshow Clips
Open clip editing when a particular photo or video needs focused correction or emphasis.

Crop the Visible Area
Remove unwanted edges and make the selected scene fit the project frame more cleanly.

Adjust Clip Audio
Review and change the sound attached to an individual video clip before balancing it with music or narration.

Add Mosaic Where Needed
Cover a selected visual area when a face, number, or other detail should not remain clearly visible.

Adjust Color and Appearance
Use color, beauty, and animation controls selectively so edited scenes still feel consistent with the rest of the slideshow.
Preview and Export the Slideshow
Review the complete timeline before creating the final file.
- Play the slideshow from the beginning and check scene order.
- Review transitions, text timing, overlays, stickers, music, and narration.
- Open Export and choose Video or Audio output.
- For video, select MP4, AVI, WMV, MKV, MOV, or GIF.
- Choose the required quality and resolution, then start export.
- Play the exported file and check its beginning, middle, and end.
MP4 is a practical first choice for broad playback and sharing. Choose another format only when the destination requires it.
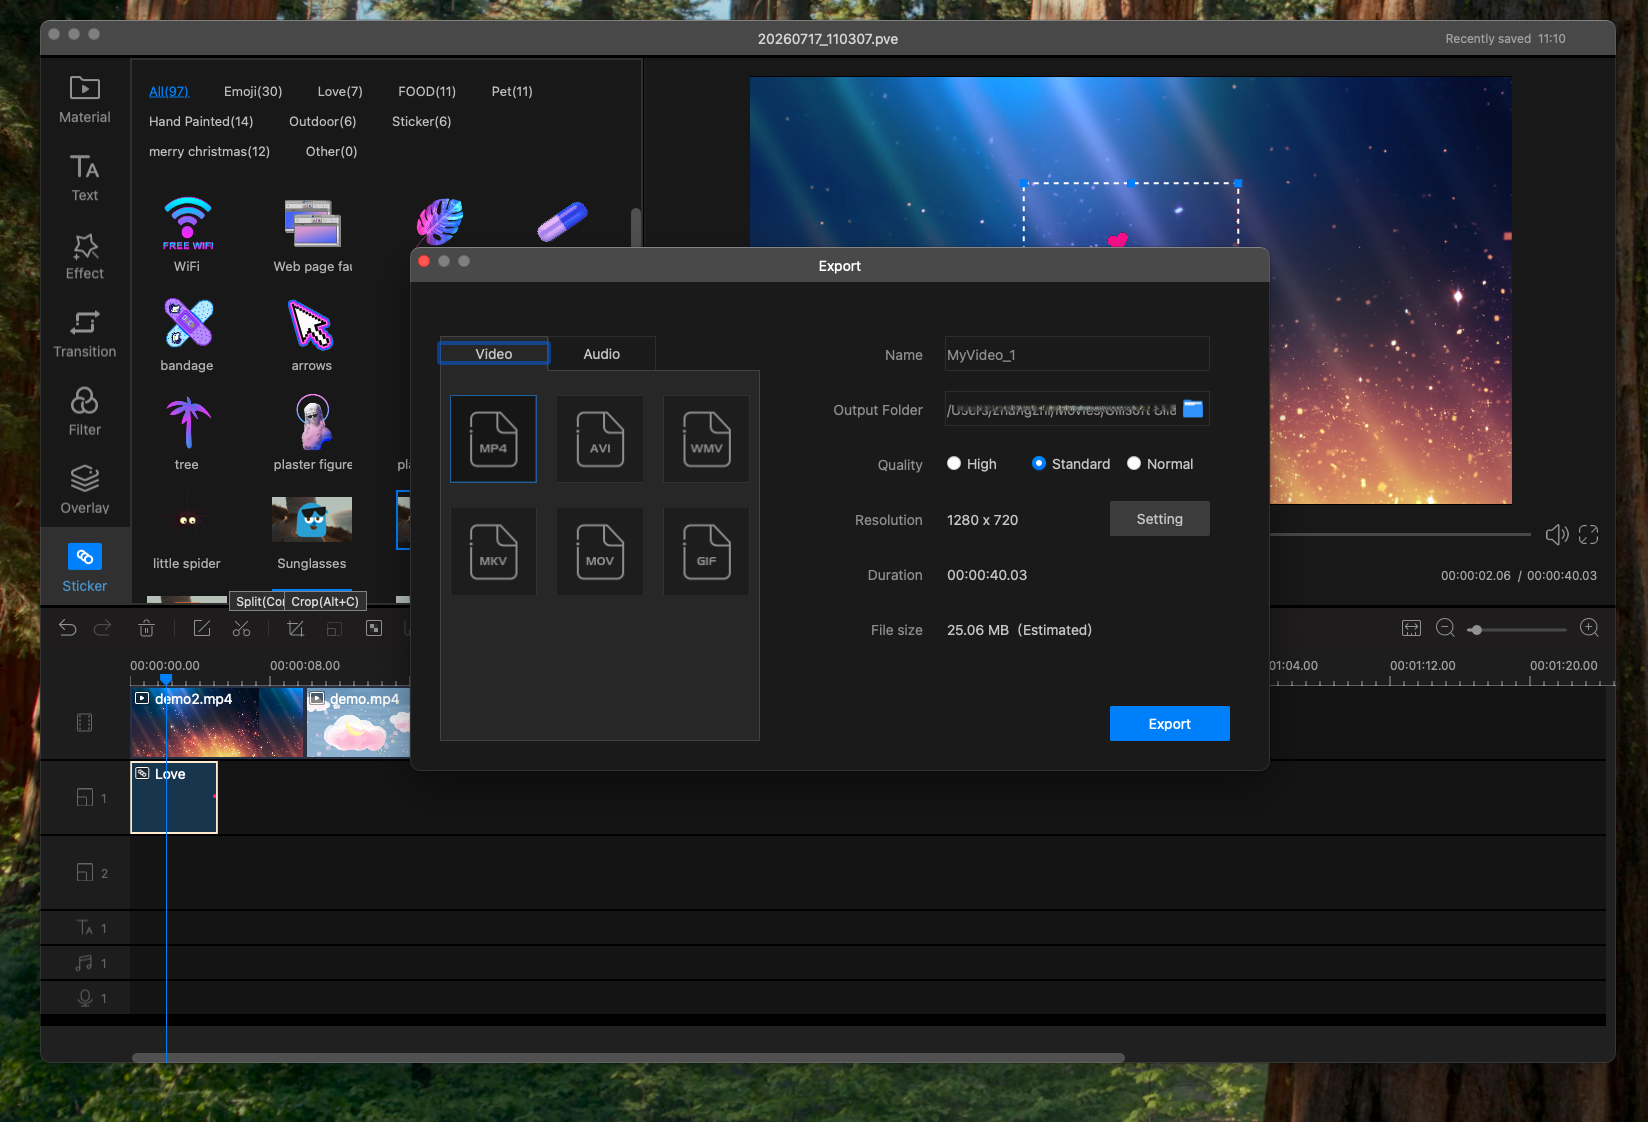 Video and audio export settings. Click to enlarge.
Final Mac Slideshow Checklist
Slideshow Maker for Mac FAQ
Can I combine photos and video clips in one slideshow?
Yes. Import both media types and arrange them together on the timeline.
Can I add music and record audio directly?
Yes. Add soundtrack material and use the built-in recording window for computer sound or spoken material.
Does the Mac slideshow maker include text to speech?
Yes. Enter text, select language and voice, adjust volume and rate, preview the speech, and generate audio for the project.
Which video formats can I export?
The export screen includes MP4, AVI, WMV, MKV, MOV, and GIF, together with quality and resolution controls.
How do I change the slideshow aspect ratio?
Select the aspect ratio when starting the project so the timeline and preview are prepared for the intended screen.
Can I continue editing a saved project later?
Yes. Use Load Project from the start screen to reopen saved slideshow work.
Create Your Photo and Video Slideshow on Mac
Arrange photos and clips, add music, titles, narration, text to speech, transitions, effects, and export the finished story from one Mac slideshow workspace.
Download Trial Buy Slideshow Maker


