

There may be files on your computer that you do not want other people to rename, edit, move, or delete. Windows does not apply this kind of protection automatically, so you need to choose and configure a suitable protection method.
This guide follows three practical approaches: changing Windows file permissions, protecting the file with GiliSoft File Lock Pro, or hiding the target file from ordinary File Explorer views. Each method works differently, so choose according to how visible and accessible the file should remain.
Method 1. Protect a File by Changing Windows Permissions
This method uses Windows Advanced Security Settings and does not require another application. It is best suited to administrators or experienced Windows users because an incorrect Deny rule can also affect opening, saving, moving, or deleting the file.
- Right-click the file you want to protect and choose Properties.
- Open the Security tab and select Advanced.
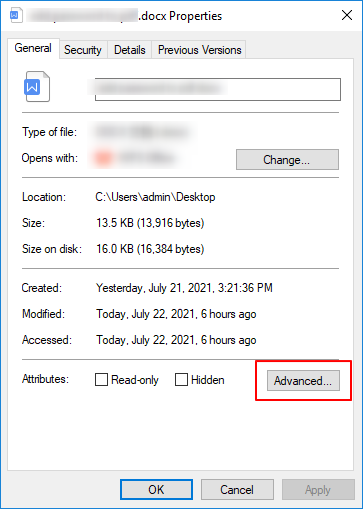 Open the Security tab and choose Advanced.
- In Advanced Security Settings, review the owner and inherited permission entries. Select Disable inheritance only if the file needs a separate explicit rule.
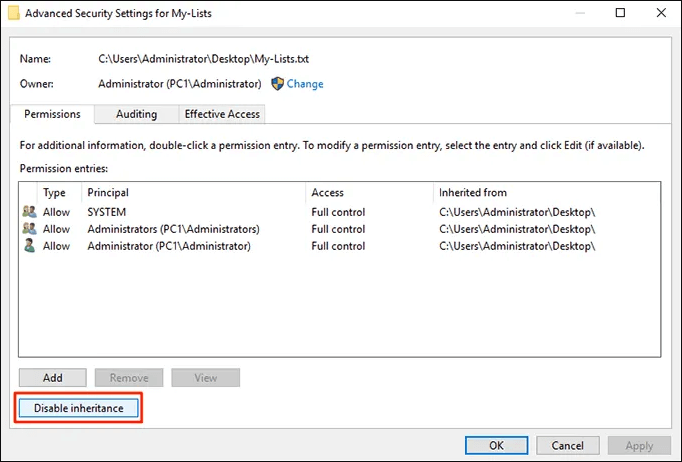 Disable inheritance before creating a separate permission rule.
- Choose Convert inherited permissions into explicit permissions so the existing entries remain available for review.
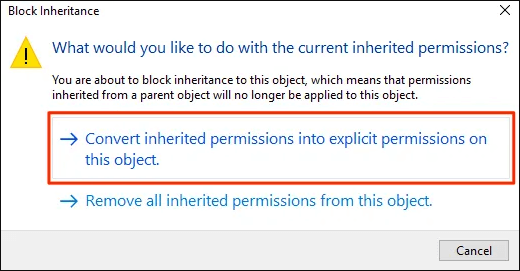 Convert the inherited entries instead of removing every rule immediately.
- Select the user or group to restrict, choose Edit, and configure the minimum permission needed to stop unwanted rename or delete operations.
- Apply the change, then test rename, open, save, move, and delete behavior with the restricted Windows account.
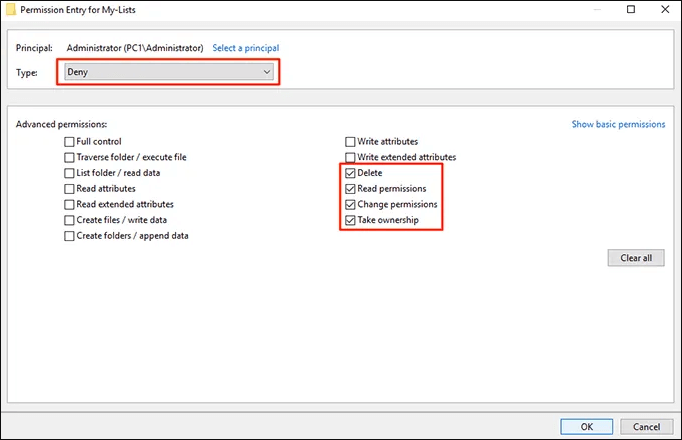 Apply a narrowly scoped rule to the correct user or group.
Method 2. Prevent Renaming with GiliSoft File Lock Pro
If you prefer an easier method, use GiliSoft File Lock Pro. It is designed to lock, hide, and protect files, folders, local drives, external drives, and shared folders without requiring you to build Windows permission rules manually.
For a file that should remain visible and readable but should resist unwanted changes, use the Protecting File function.
- Open GiliSoft File Lock Pro and enter the master password.
- Choose Local Disk > Protecting File.
- Select Protect Files/Folders and add the target file, folder, or drive.
- Apply protection and confirm that unauthorized rename, move, edit, or delete operations are blocked.
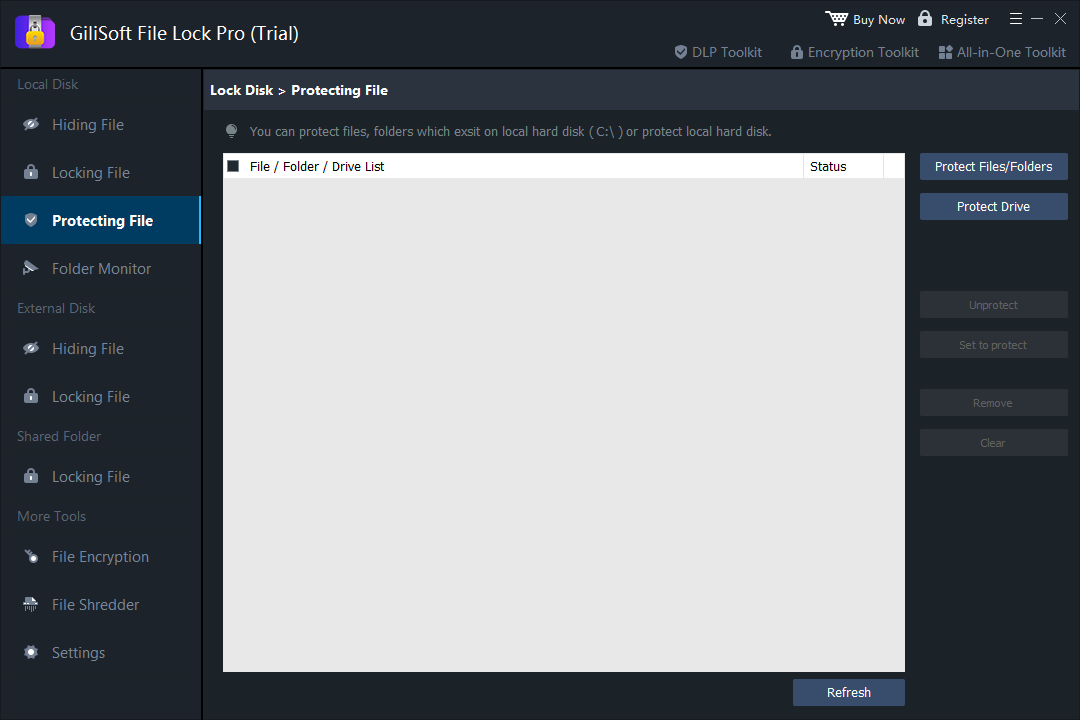 Add a file, folder, or drive to the Protecting File list.
Protect files without editing NTFS permission entries
File Lock Pro provides visible file protection, password-controlled locking, hiding, encryption, folder monitoring, and secure deletion from one Windows application.

Method 3. Protect the Target File by Hiding It
Another option is to hide the target file so it does not appear in ordinary File Explorer views. This can reduce accidental access, but it is not equivalent to rename protection because anyone who enables hidden items can reveal the file again.
- Right-click the target file and choose Properties.
- Under the General tab, select the Hidden attribute.
- Choose OK to apply the change.
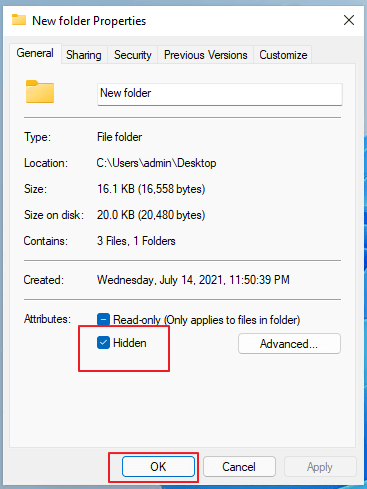 The Hidden option reduces casual visibility but does not add access control.
How to View Hidden Files Again
- Open File Explorer.
- On Windows 11, choose View > Show > Hidden items. On Windows 10, open the View tab and select Hidden items.
- Return to the file Properties dialog and clear the Hidden attribute when you no longer need it concealed.
Final Words
Windows permissions can prevent renaming when they are configured carefully, but they require account-specific testing and can affect related file operations. Hiding a file is useful only for reducing casual visibility. For a simpler way to keep important files visible while controlling unwanted changes, GiliSoft File Lock Pro provides a dedicated Protecting File mode together with locking, hiding, monitoring, encryption, and secure deletion tools.
Frequently Asked Questions
Does the Read-only attribute prevent a file from being renamed?
No. Read-only can affect how some applications save content, but it does not reliably stop File Explorer from renaming or deleting a file.
Can I protect a whole folder instead of adding files one by one?
Yes. File Lock Pro can protect a selected folder, which is more practical when several related files need the same protection.
Keep important files under your control
Use GiliSoft File Lock Pro to protect files and folders from unwanted renaming, editing, moving, or deletion.
View GiliSoft File Lock Pro