
How to Permanently Delete Sensitive Files on Windows
Ordinary deletion removes a file from normal view but may leave recoverable storage until it is reused. A trustworthy workflow starts by finding every copy, deciding whether the target is one file or an entire device, and choosing a method appropriate to the storage technology.
Quick answer
For selected local files on supported storage, verify the exact paths and use the File Shredder in GiliSoft Privacy Protector. Also remove authorized copies from temporary folders, sync services, email, and backups according to retention rules. For SSDs, managed devices, regulated data, or a computer leaving your control, follow a validated media-sanitization process rather than assuming file overwrite reaches every physical block.
Choose File Deletion or Media Sanitization
| Situation | Recommended approach | Check carefully |
|---|---|---|
| One selected file on a local drive | Use file shredding after confirming the path | Temporary, synced, emailed, and backup copies |
| SSD or managed endpoint | Follow device and organization sanitization guidance | Wear leveling, remapped blocks, snapshots, and encryption state |
| Whole computer or drive leaving control | Use a documented clear, purge, or destroy process | Verification, custody, and disposal requirements |
| Cloud-synchronized file | Delete through the authorized cloud workflow too | Version history, retention, recycle bins, and other devices |
Step-by-Step Workflow
- Confirm authorization and retention
Make sure the file may legally and operationally be deleted. Pause if a backup, record-retention rule, litigation hold, or shared owner applies.
- Find every relevant copy
Check exports, temporary folders, synchronized folders, email attachments, backups, removable drives, and recipient systems you control.
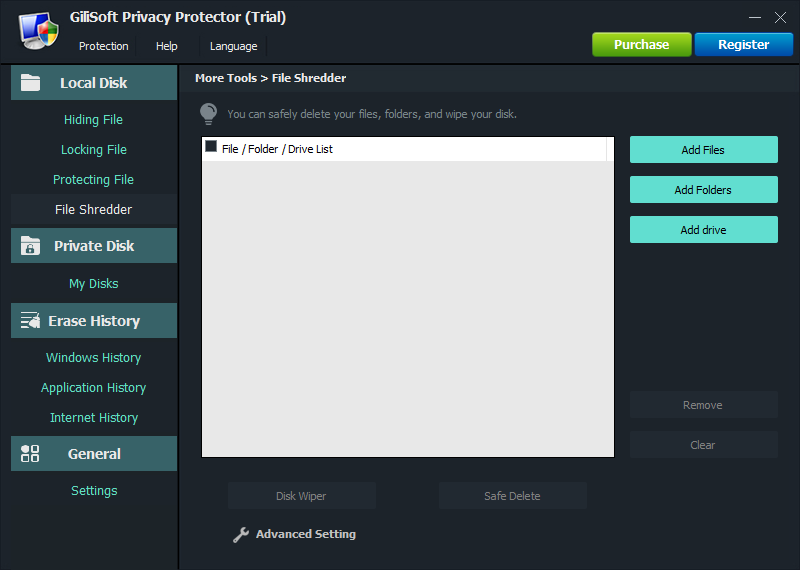
- Select exact targets in File Shredder
Open GiliSoft Privacy Protector, add only the intended files, and verify names, paths, sizes, and the destination drive before starting.
- Run the supported deletion and review errors
Start the shredding process, note locked or skipped files, and confirm the selected paths no longer contain the targets.
- Escalate whole-device cases
For disposal or high-sensitivity media, use a validated sanitization method designed for that storage type and document the result.
For every product control and supported cleanup category, see the Privacy Protector user guide.
GiliSoft Privacy Protector Interface
These real product screenshots connect the guidance to the local Windows workflow.

Review Before You Finish
- Sign out of browsers, cloud services, and work accounts when the computer will change hands.
- Check synchronized devices and cloud dashboards separately; deleting a local record may not delete its cloud copy.
- Keep a verified backup of anything you may need before clearing history or shredding selected files.
- Test the result from a standard user account and restart the PC when the workflow calls for it.
Frequently Asked Questions
Is Shift+Delete permanent deletion?
It bypasses the normal Recycle Bin, but it is not a complete media-sanitization process.
Can shredding guarantee every SSD copy is gone?
Do not assume that. SSD controllers, wear leveling, remapped blocks, snapshots, and encryption state require device-specific handling.
Should I shred every ordinary file?
No. Use stronger deletion only when sensitivity and retention rules justify it. It is irreversible and should be carefully targeted.
What if the file is synchronized to the cloud?
Use the authorized cloud deletion and retention workflow as well, then check recycle bins, version history, and other synchronized devices.