
When macOS asks, allow the microphone and other recording permissions required by the selected source.
GiliSoft Audio Recorder for Mac Guide
How to Record System Audio and Microphone on Mac
Capture Mac system sound, microphone input, or both together, then manage long sessions with auto stop, automatic splitting, and organized MP3, M4A, or WAV output.
Mac audioMicrophoneOnline sound
Record
MP3M4AWAV
Before You Start Recording
Confirm permissions, input, format, and storage before a long session so the saved recording contains the sound you expected.
Decide whether the task needs Mac system audio, microphone input, or both together.
Use MP3 or M4A for practical sharing and smaller files, or WAV when uncompressed output is preferred.
Choose a clear output folder and confirm that enough free space is available for the expected duration.
Choose Mac System Audio, Microphone, or Both
Select the input that matches the recording job before pressing Record.
- Open the audio input selection panel.
- Choose Mac system audio for browsers, media players, meetings, online music, and app sound.
- Choose the microphone for narration, interviews, lectures, or voice notes.
- Select both sources for lessons, demonstrations, commentary, and calls that need computer sound plus voice.
- Speak and play a short sample to confirm that the expected source is active.
Using headphones can reduce echo when system sound and microphone input are recorded together.
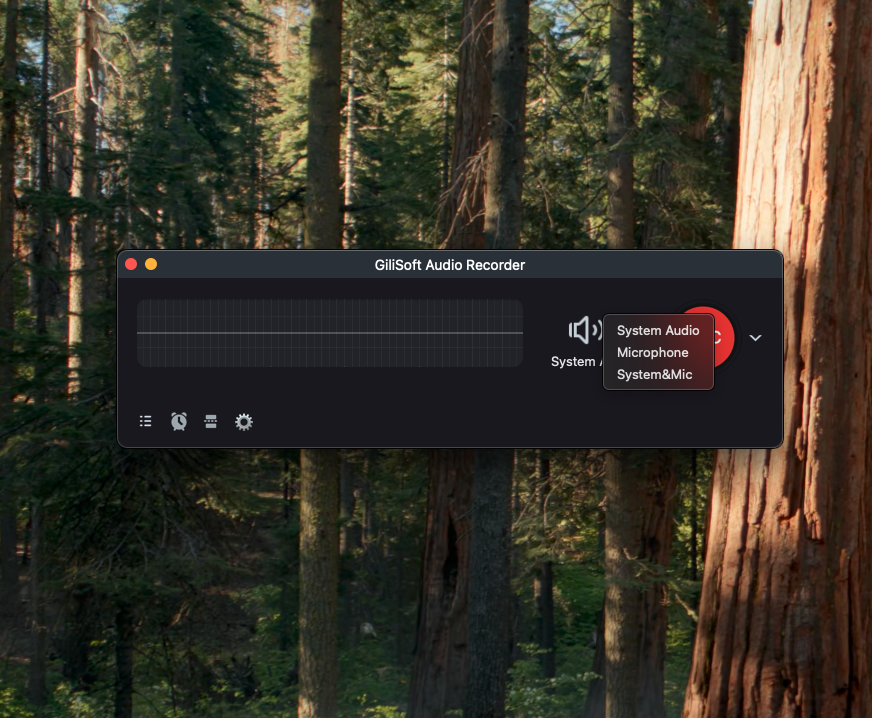 Audio input selection. Click to enlarge.
Create and Start a Recording Task
Set the recording source and output before capturing the full session.
- Open the recording task from the main workspace.
- Confirm the selected system-audio and microphone sources.
- Choose MP3, M4A, or WAV and review the available quality settings.
- Select the output folder and any required stop or split behavior.
- Record a short test, listen to it, then begin the full session.
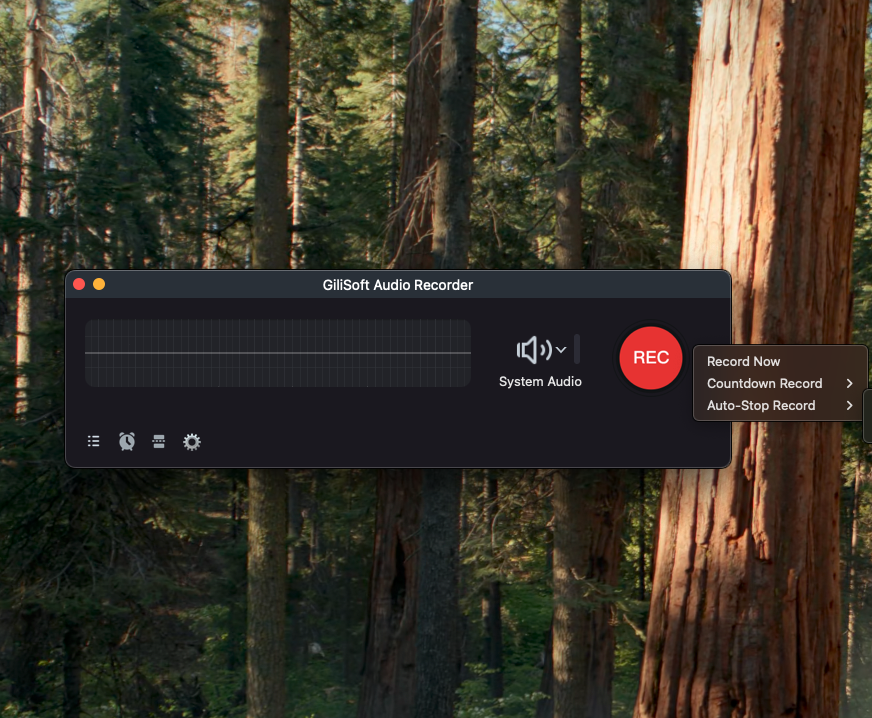 Recording task setup. Click to enlarge.
Monitor the Recording While It Runs
Use the live status screen to confirm that capture is active and the elapsed time is advancing.
- Check that the status shows an active recording.
- Watch the timer during the session.
- Pause and continue when the recording needs a temporary break.
- Stop when the session is complete.
- Open the saved result and check the beginning, middle, and end.
For important meetings, lectures, or streams, keep the Mac awake and avoid changing the selected audio device during recording.
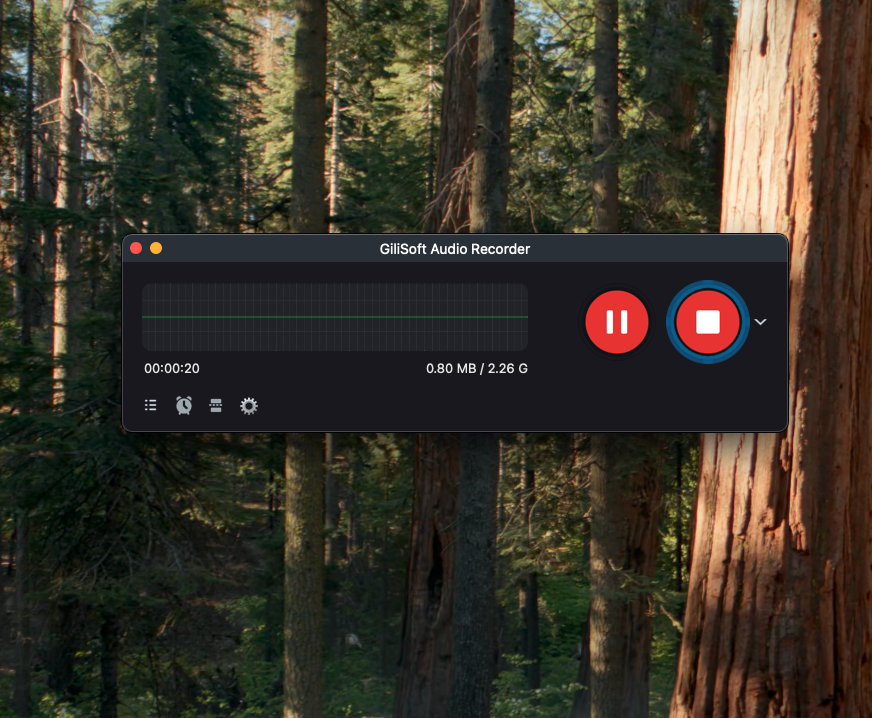 Live recording status. Click to enlarge.
Manage Planned and Long Recording Sessions
Auto stop and automatic splitting reduce manual work during radio programs, livestreams, interviews, lessons, and other long captures.

Set Auto Stop
Choose the ending condition so a planned recording can finish without waiting for a manual Stop command.

Split by Time or File Size
Divide long sessions automatically by duration or file size so lectures, streams, and interviews remain easier to store and manage.
For a recording that must begin at a planned time, configure the scheduled task in advance and keep the Mac powered on with the required audio source available.
Review Recording and Saving Settings
Use the settings panel to keep recurring recording jobs consistent.
- Open Settings from the main workspace.
- Review output, saving, and recording behavior.
- Confirm the preferred destination and file organization options.
- Check silence-related or automatic behavior when it is relevant to the task.
- Save the settings and run another short test.
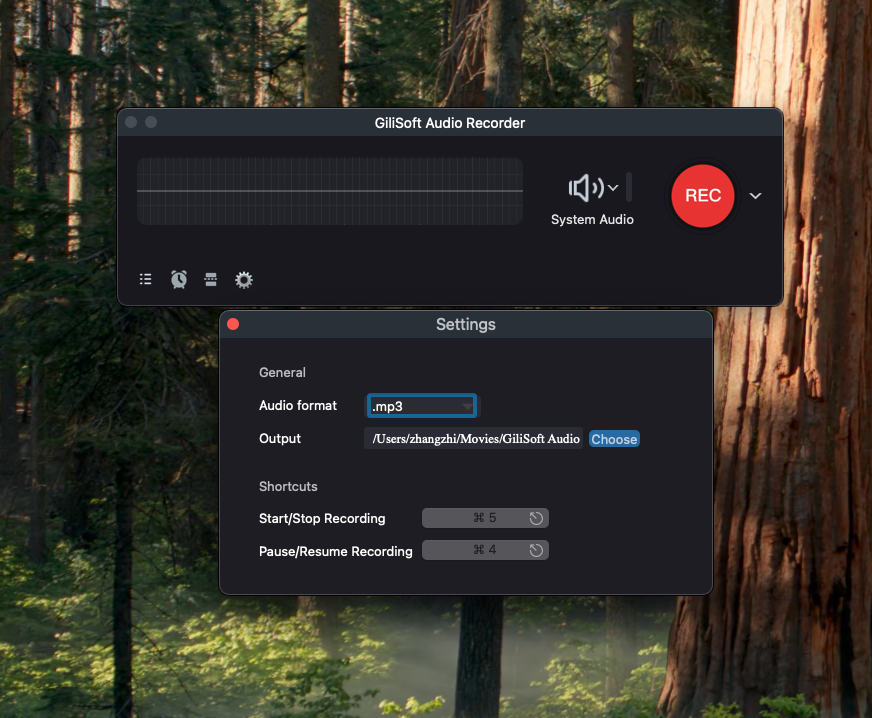 Recording preferences and saving behavior. Click to enlarge.
Review and Manage Recorded Files
The file list provides a clear place to find and check completed sessions.
- Open the recorded file list after stopping the task.
- Confirm the file name, format, duration, and saving location.
- Play the recording and check voice, system sound, and synchronization.
- Open the output folder when the file is ready for editing, sharing, or archiving.
- Rename and organize important sessions outside the temporary working folder when needed.
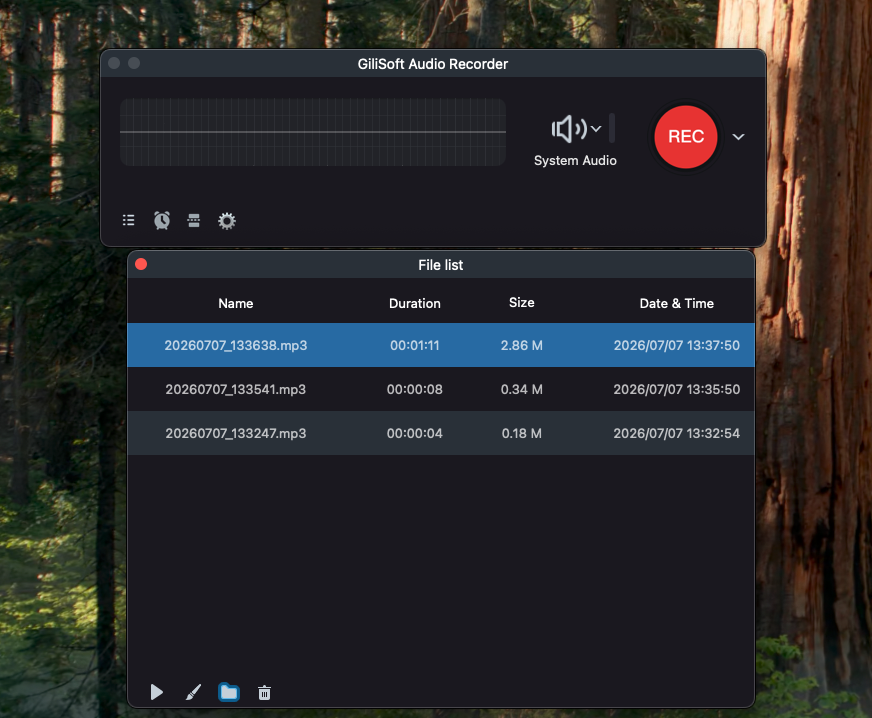 Saved recording list. Click to enlarge.
Mac Audio Recording Checklist
Audio Recorder for Mac FAQ
Why is Mac system audio missing?
Confirm that system audio is selected, required macOS permissions are allowed, and the application producing sound is playing through the active Mac output device.
Why is the microphone silent?
Select the correct built-in, USB, or external microphone and allow microphone access in macOS privacy settings.
How can I reduce echo?
Use headphones when recording system sound and microphone together, and prevent the microphone from capturing speaker playback.
How do I avoid one very large file?
Enable automatic splitting by duration or file size before starting the long recording.
Which output format should I choose?
MP3 is practical for broad sharing, M4A suits many Apple workflows, and WAV is useful when uncompressed audio is preferred.
Where are recordings saved?
Check the destination selected in the task or settings, then use the recorded file list to open the saved result.
Record Mac Audio with the Right Source and Settings
Capture system audio, microphone input, or both together, then manage scheduled and long sessions with organized output.
Download Trial


