

Which PowerPoint protection method should you use?
| Method | What it controls | Best use | Important limitation |
|---|---|---|---|
| GiliSoft Copy Protect | Password access, copy, clipboard, print, screenshot, and device rules | Controlled delivery outside your PC | Recipients open a protected GCP or EXE package rather than the source PPTX |
| Encrypt with Password | Opening the presentation | Confidential PPTX shared with trusted recipients | After opening, slide content can still be reused |
| Microsoft 365 IRM | Per-user read, edit, print, copy, and expiration permissions | Managed Microsoft 365 organizations | Requires supported accounts and rights-management services |
| PDF or video export | Removes normal slide-object editing | Fixed-layout review or playback | The exported file can still be copied or captured |
| Mark as Final | Discourages editing | Preventing accidental changes | Microsoft states that it is not a security feature |
Method 1. Deliver the presentation with GiliSoft Copy Protect
Use this method when customers, students, partners, or contractors should be able to view the presentation without receiving an ordinary reusable PPT or PPTX file. Copy Protect accepts PowerPoint and other Office documents alongside PDFs, videos, images, audio, web pages, and mixed folders.
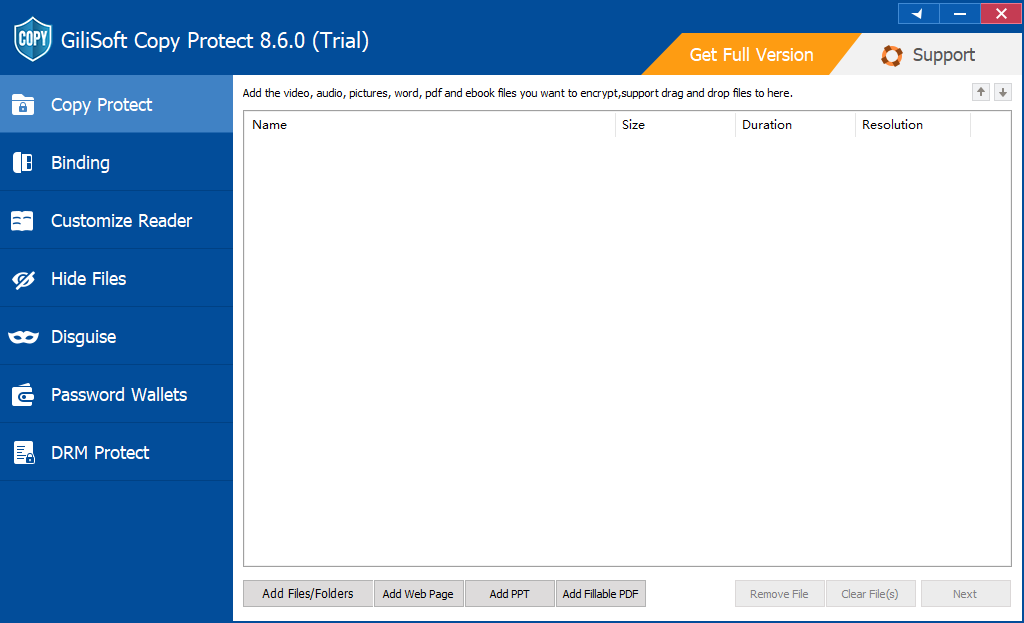
- Open Copy Protect, add the PPT or PPTX file, and include any supporting PDFs, videos, fonts, or handouts needed for the delivery.
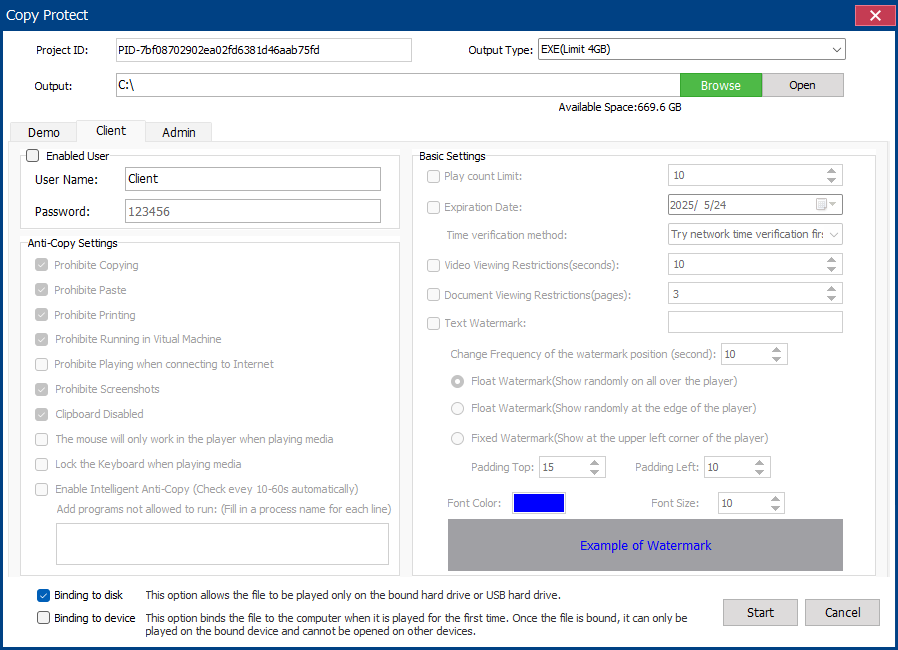
- Choose the output format: GCP for flexible protected delivery or EXE when the package is within the 4 GB limit.
- Set the opening password and configure client permissions for copying, printing, clipboard use, screenshots, and related viewing behavior.
- Add PC or USB binding when the presentation should open only on an approved device, then build and test the package on a separate Windows PC.
Use Copy Protect when the presentation leaves your control
This is the strongest GiliSoft recommendation for paid training slides, sales presentations, design proposals, internal briefings, and client deliverables that should be viewed but not distributed as editable source files.
Method 2. Encrypt the PowerPoint presentation with a password
Use an open password when only people who know the password should view the PPTX. This encrypts access to the presentation, but it does not stop an authorized viewer from copying slide text, images, or other content after opening it.
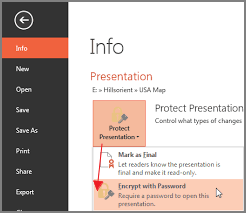
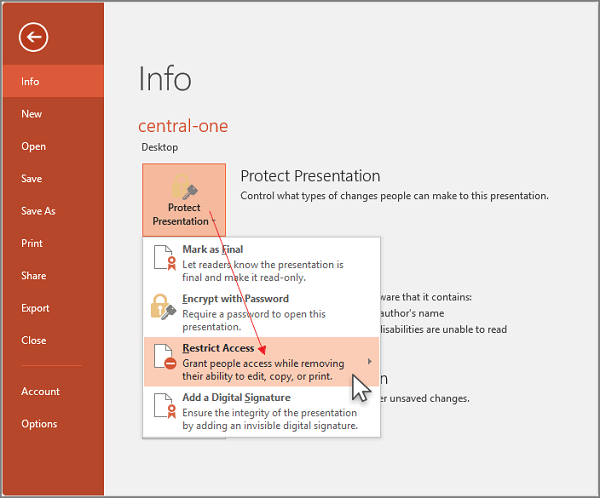
- Open File > Info.
- Select Protect Presentation > Encrypt with Password.
- Enter and confirm a strong password, save the file, then close and reopen it to verify the prompt.
Method 3. Restrict named users with Microsoft 365 IRM
Information Rights Management is the most relevant Microsoft-native option when presentations stay inside a managed Microsoft 365 environment. An administrator can support policies that assign Read, Change, or Full Control permissions to particular users or groups. Read permission can prevent editing, printing, and copying unless those actions are explicitly allowed.
- Save the presentation, then open File > Info.
- Select Protect Presentation > Restrict Permission by People > Restricted Access.
- Add approved users, select the permission level, and set expiration or print and copy options where available.
- Test the file with a recipient account before relying on the policy.
Method 4. Use a modify password or Mark as Final
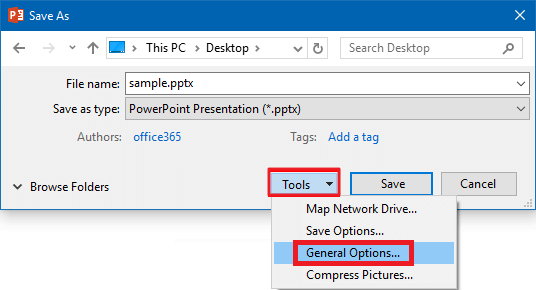
These options are useful when the main concern is accidental editing rather than copying. A modify password lets a recipient open the deck as read-only without the editing password. Mark as Final displays a completed-document notice and disables normal editing commands until the recipient chooses to edit anyway.
Method 5. Export the presentation as PDF, video, or slide images
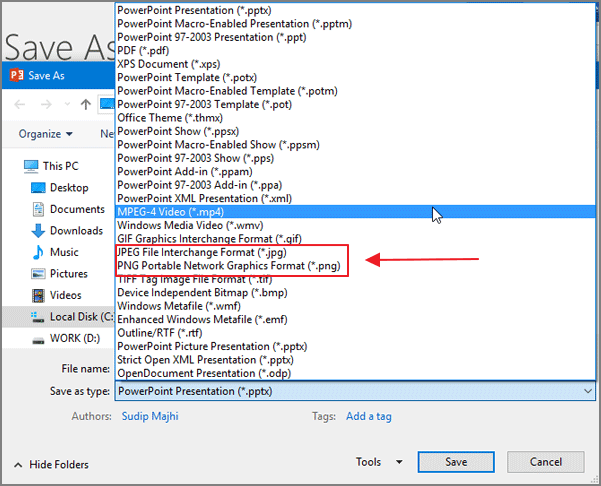
Exporting removes the ordinary editable slide structure. PDF freezes the page layout, video preserves a playback sequence, and PNG or JPEG creates one image per slide. These formats reduce easy editing, but they do not prevent file copying, screenshots, OCR, or recreation.
Add a visible watermark before any external delivery
A watermark does not stop copying, but it makes ownership, recipient identity, or confidentiality visible on every slide. Put it in Slide Master so it remains consistent across layouts, and use recipient-specific text when traceability matters.
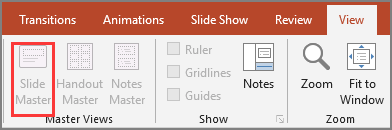
- Open View > Slide Master.
- Select the parent master or the layouts that require the watermark.
- Add a text box or logo, reduce opacity, and keep it away from essential slide content.
- Return to Normal view and inspect title, content, and image-heavy layouts.
Recommended setup for common presentation scenarios
PowerPoint copy protection FAQ
Can PowerPoint completely stop a presentation from being copied?
No single PowerPoint switch does that. Passwords control opening, Mark as Final discourages editing, and IRM applies managed permissions. Controlled delivery software can restrict common copy paths, but any visible content can still be photographed or manually recreated.
Is a PDF safer than a PPTX?
A PDF is harder to edit as a slide deck because the normal PowerPoint objects are removed. It is not automatically copy-protected, so recipients can still duplicate the PDF or extract content with other tools.
Should I use File Lock Pro or Copy Protect?
Use File Lock Pro to protect the source presentation on your own Windows computer, external disk, or shared folder. Use Copy Protect when the presentation must be delivered to another person under controlled viewing rules.
Official references
- Microsoft: Password protection for presentations in PowerPoint
- Microsoft: Restrict access with Information Rights Management
- Microsoft: Mark a file as final
- Microsoft: Save PowerPoint presentations as PDF files
Deliver the presentation, not the editable source file
Create a protected GCP or EXE package and configure how recipients can view, copy, print, capture, and open the presentation.
View GiliSoft Copy Protect