
How to Securely Delete Files on Windows
Ordinary deletion removes directory references but may leave recoverable storage until reused. Secure deletion needs a clear target and realistic understanding of SSD remapping, snapshots, cloud copies, and backups.
Quick answer
For individual files on a supported local drive, use the File Shredder in GiliSoft Privacy Protector and verify the target before starting. For device disposal or highly sensitive media, follow an organization-approved sanitization process designed for that storage type.
Choose File Deletion or Media Sanitization
| Situation | Recommended approach | Check carefully |
|---|---|---|
| Routine sensitive file on a local drive | Use file shredding after verifying the path | Copies in recycle bin, temp, sync, and backup locations |
| SSD, encrypted device, or managed endpoint | Follow vendor and organizational sanitization guidance | Wear leveling, snapshots, and cryptographic erase support |
| Whole device leaving control | Use a documented media-sanitization or destruction process | Evidence, custody, and disposal requirements |
Step-by-Step Workflow
- Find every relevant copy
Check exported versions, temporary folders, synchronized folders, email attachments, backups, and removable media before deleting the working file.
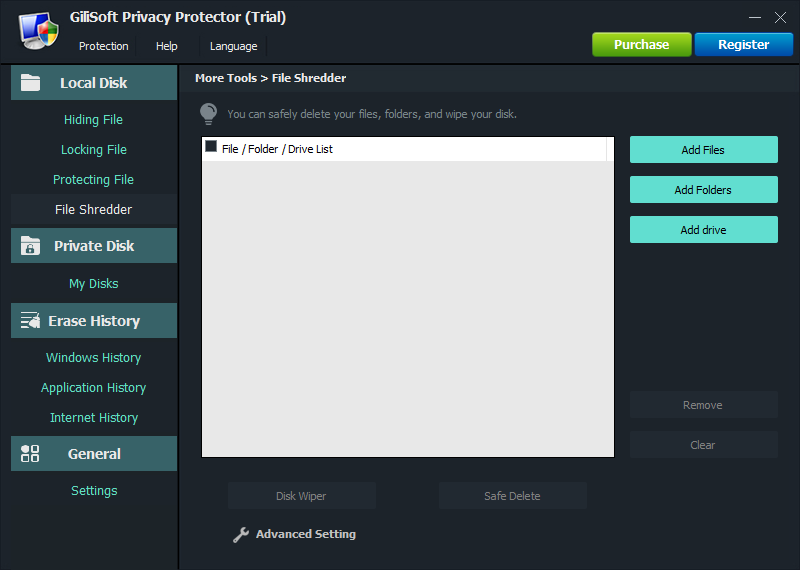
- Select the exact file in Privacy Protector
Open File Shredder, add only the intended targets, and check filenames, paths, and business retention requirements.
- Run the deletion and review the result
Start the supported shredding process, note any errors or locked files, and verify that the target no longer appears in its original location.
- Use a media-aware process when required
For disposal, SSDs, managed devices, or regulated data, use an approved sanitization method appropriate to the media rather than assuming file overwrite covers every physical copy.
For every product control and supporting task, see the Privacy Protector user guide.
GiliSoft Privacy Protector Interface
These real product screenshots connect the advice above to the Windows workflow.

Review Before You Finish
- Keep the untouched source or a verified backup before changing protected data or media.
- Test the finished result in the real destination, recipient, or restart workflow.
- Document passwords, recovery material, ownership, and exceptions in an appropriate controlled location.
- Do not treat one product control as a replacement for authorization, backups, endpoint security, and policy.
Frequently Asked Questions
Is emptying the Recycle Bin secure deletion?
No. It removes ordinary references but is not a complete sanitization process.
Can file shredding guarantee every SSD copy is gone?
Do not make that assumption. SSD controllers, remapped blocks, snapshots, and backups require storage- and system-specific handling.