
How to Use GiliSoft Face Swap
Choose the photo or video tutorial below. The screenshots show where to import your media, select the face to replace, and export the result.
Import a photo or video
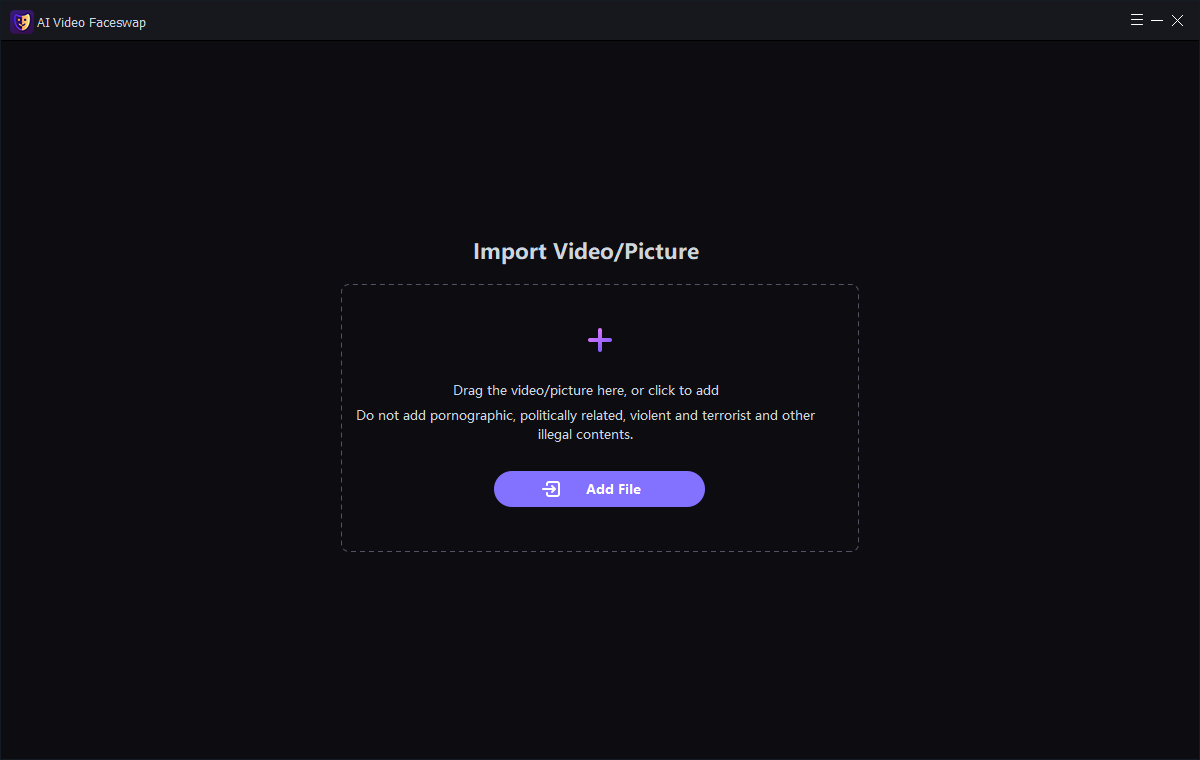
In Import Video/Picture, click Add File or drag in the photo or video that contains the face you want to change. This is the target. Keep a separate, sharp portrait ready to use as the replacement face.
Swap a face in a photo
Open the target photo
Import the photo that contains the person you want to change. It appears on the left.
-
Add a reference portrait and select the face
Choose Add face image on the right and load a clear, front-facing portrait. Use Replace in that panel to change the reference portrait. If there are several detected faces, select the thumbnail of the person you want to change.
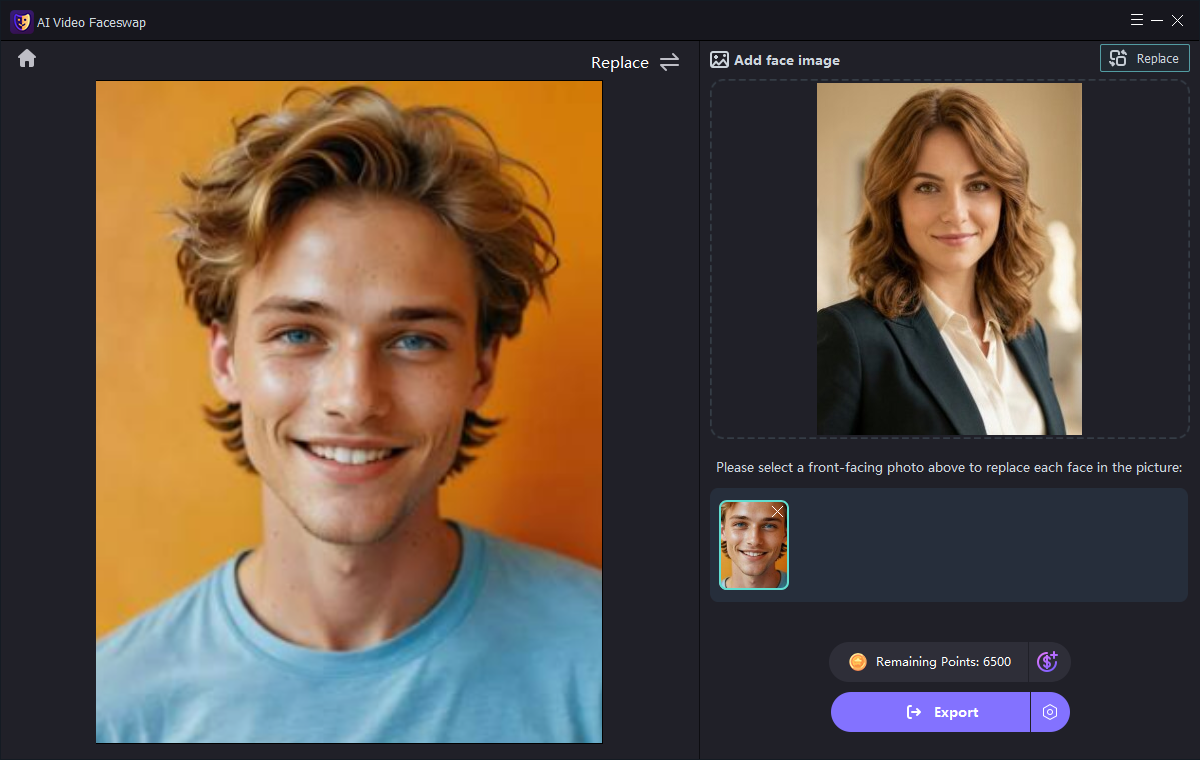
The target photo, reference portrait and detected face before export. Export and inspect the photo
Choose Export. Open the saved image at full size and check the eyes, hairline and jaw for visible blending issues.
See the photo tutorial for choosing a reference portrait and improving the result.
Swap a face in a video
-
Trim or crop the target clip
In Cut/Crop, use the timeline handles or Start Time and End Time to keep the section you want. To change the framing, adjust the crop box or Crop Size. Select Next Step when the range and framing are set.
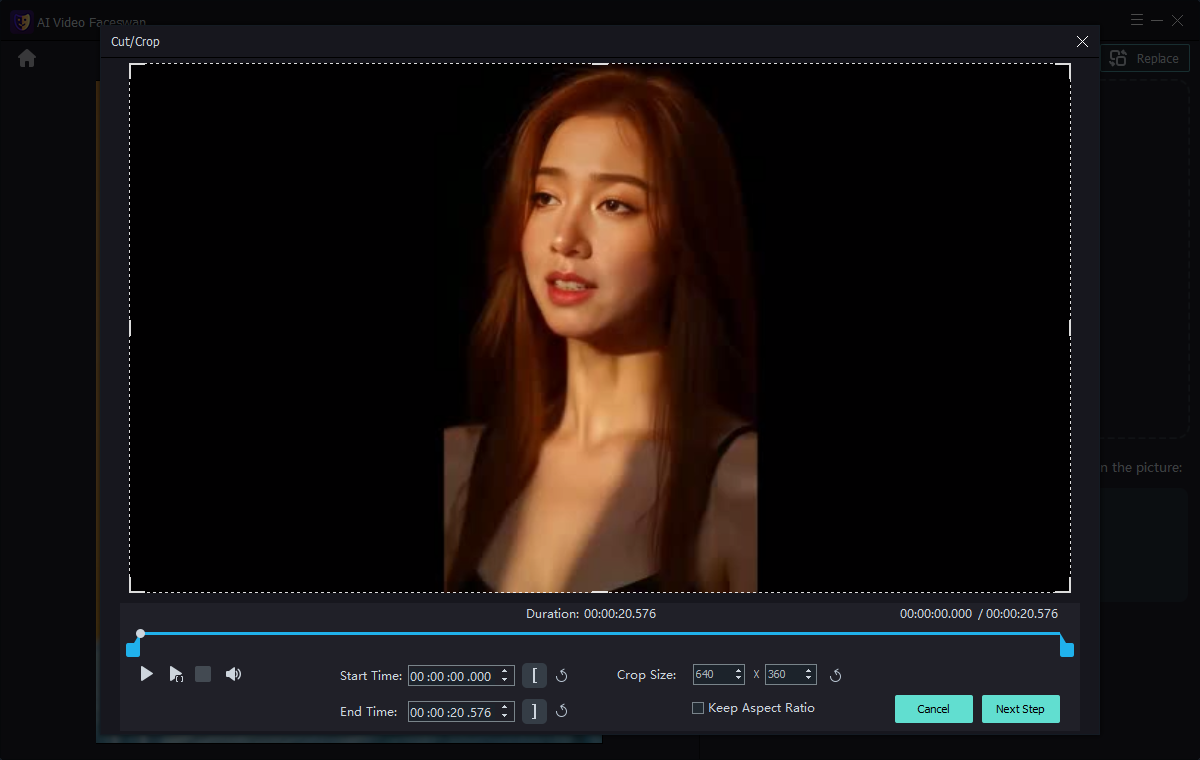
Test a short segment that includes the movements you want to check. -
Identify the face and add its replacement
Choose Identify Faces to find the faces in the clip. Select the intended face thumbnail and use Add face image to load its replacement portrait.
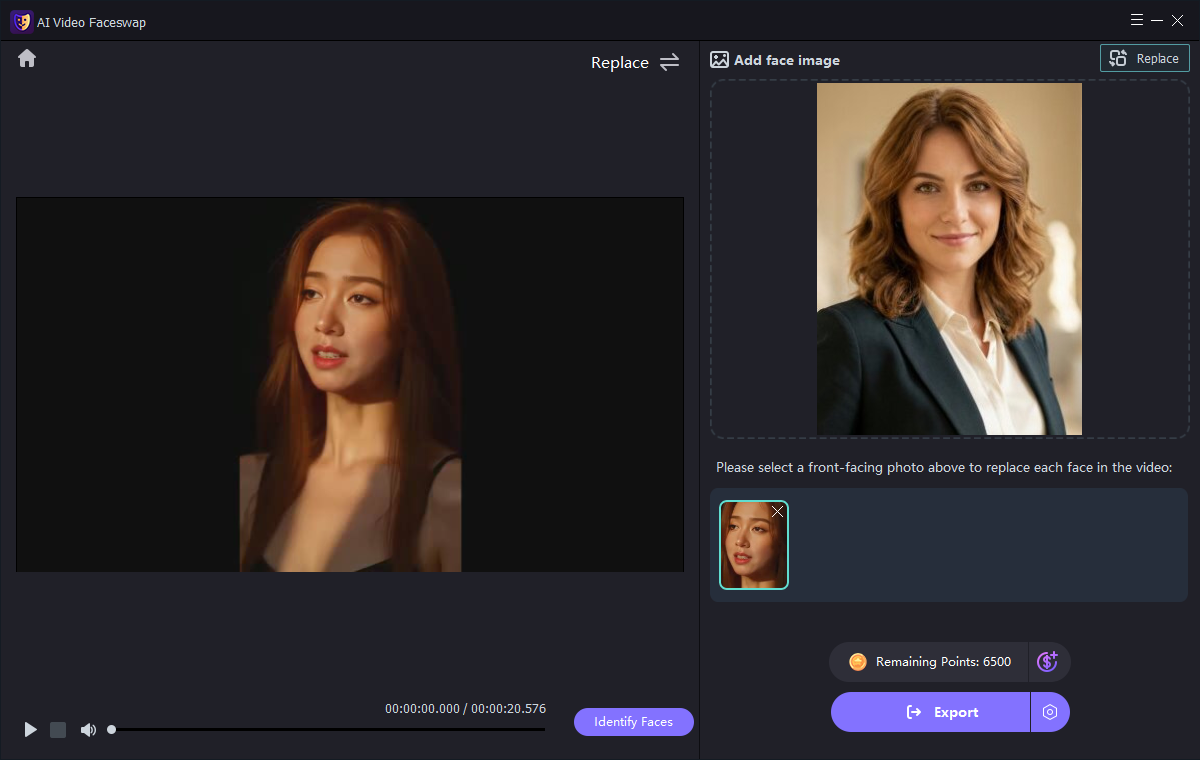
Video setup before processing. The points balance is an example from the screenshot. Export a test clip
Check the selected face and reference, then choose Export. Play the saved clip and look for flicker during head turns and speech before processing the full video.
See the video tutorial for input selection and video quality checks.
Choose cloud or local processing
Cloud Face Swap sends the selected media online for processing and uses a separate usage-based points model. Review the job's requirements in the app before exporting.
Offline FaceSwap Master processes photos and videos on your Windows PC without sending them to the cloud for processing. It uses a separate offline license. Its controls may differ from the points-based screens shown above.
Export and check the result
Choose Export and save the result separately from the original. Inspect photos at full size for mismatched skin tone or rough face edges. In video, look for flicker or drift around head turns, speech and partial obstructions.
Try a sharper portrait or a shorter segment if a face looks unstable. Check the new export before processing the full clip.