

Choose the Audio Sources the Recording Actually Needs
“Screen recorder with audio” can mean three different setups. Choosing the right one before recording prevents silent clips, duplicated sound, and unnecessary background noise.
| Audio setup | Best for | Why choose it |
|---|---|---|
| Computer sound only | Webinars, application playback, browser audio, and software demonstrations | Keeps desktop playback without room noise |
| Microphone only | Voice-led tutorials, support explanations, and walkthroughs | Captures narration without unnecessary application audio |
| Computer sound + microphone | Training, product demos, online lessons, and narrated meetings | Keeps playback and explanation in one synchronized recording |
Screen Recorder with Audio: Step by Step
Choose the screen area
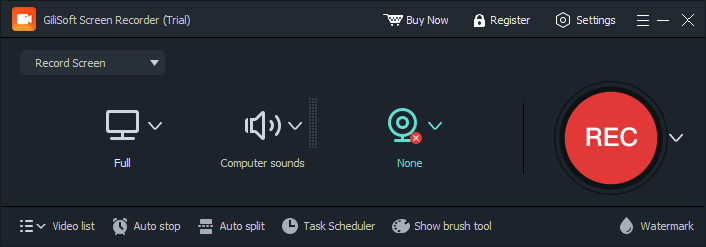
Open GiliSoft Screen Recorder Pro and select the full desktop, a window, or a custom region. Exclude notifications and private applications before continuing.
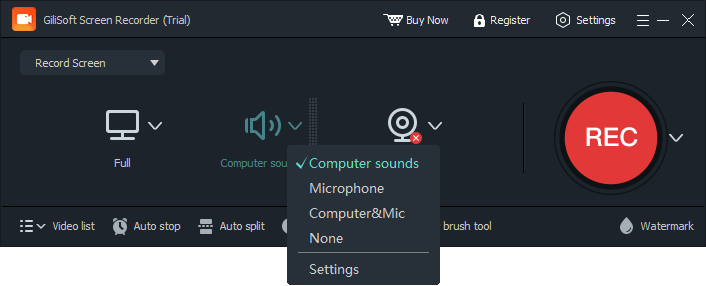
Set computer sound and microphone
Open the audio source control. Enable the source or combination required by the recording, then select the intended microphone rather than relying on an unknown default device.
Record a 10-second test
Speak at the volume you will use, play representative computer audio, and review the result for clarity, balance, and synchronization.
Record and review the complete session
Start the full capture, keep the microphone distance consistent, stop when finished, and check the beginning and end before sharing the file.
Make Screen Recording Audio Easier to Understand
Balance voice and computer sound
Keep narration clearly above background playback. Lower the application volume before recording when it competes with speech.
Use headphones for mixed capture
Headphones prevent speaker output from entering the microphone and creating echo or a delayed duplicate.
Control the recording environment
Silence notifications, close noisy applications, and move away from fans, keyboards, and hard reflective surfaces.
Leave a short pause
Wait briefly before speaking and before stopping. Clean lead-in and tail space makes later trimming easier.
If the Screen Recording Has No Sound
- Confirm that the correct audio source is enabled in the recorder.
- Check Windows microphone access when narration is missing.
- Verify the selected input device in Windows Sound settings and test it before recording again.
- Make sure the application is producing sound and is not muted in the Windows volume mixer.
- Try a short local recording instead of risking another complete session.
Frequently Asked Questions
Can I record computer sound and microphone at the same time?
Yes. Enable both audio sources before recording, then make a short test to confirm that narration and desktop playback are balanced.
Should I use headphones while recording?
Headphones are recommended when computer sound and microphone are active together because they reduce echo and repeated playback entering the microphone.
Why does my recording have video but no audio?
The wrong source may be selected, the application may be muted, or Windows microphone permission may be disabled. Check each source separately.
Can I record only one application window?
Yes. Select the application window when you do not want the entire desktop visible. Confirm that menus or dialogs will remain inside the capture area.
How should I test audio before a long recording?
Record about 10 seconds with normal speech and representative playback, then listen through the full sample for volume, noise, echo, and synchronization.
Which format should I use for sharing?
MP4 is a practical starting point for broad playback and sharing. Choose another supported format only when an existing workflow requires it.
More Screen Recording Guides
Continue with the recording setup or troubleshooting guide that matches the next task.