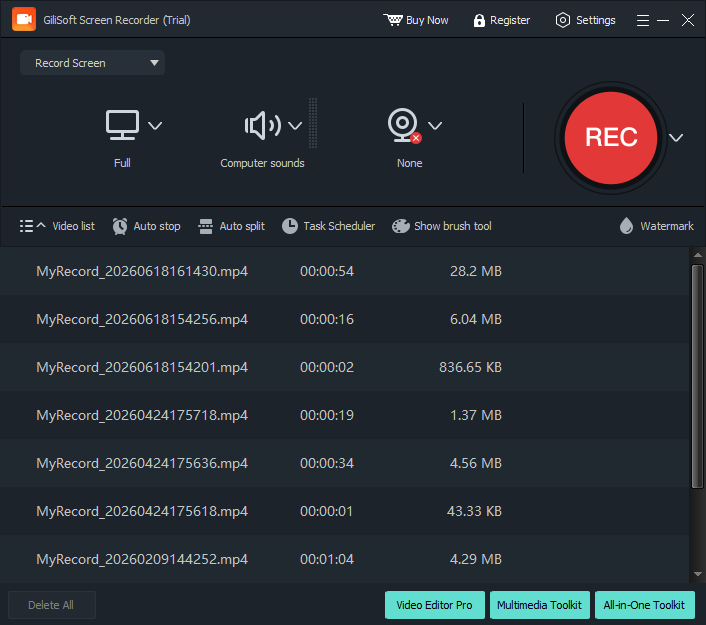
Select the full screen, a custom region, an application window, or another available recording target.
GiliSoft Screen Recorder Pro Help Center
Screen Recorder Pro User Guide for Windows
Record the screen, webcam, system audio, and microphone with GiliSoft Screen Recorder Pro.
- Capture full screen, a region, an app window, or webcam
- Record system sound and microphone narration together
- Trim, join, annotate, convert, and export recordings

Before you start recording
Confirm the capture target, sound sources, output quality, and save location before pressing Record. These choices prevent most silent, cropped, or unexpectedly large recordings.
Enable system sound, microphone input, or both, then verify the correct devices are selected.
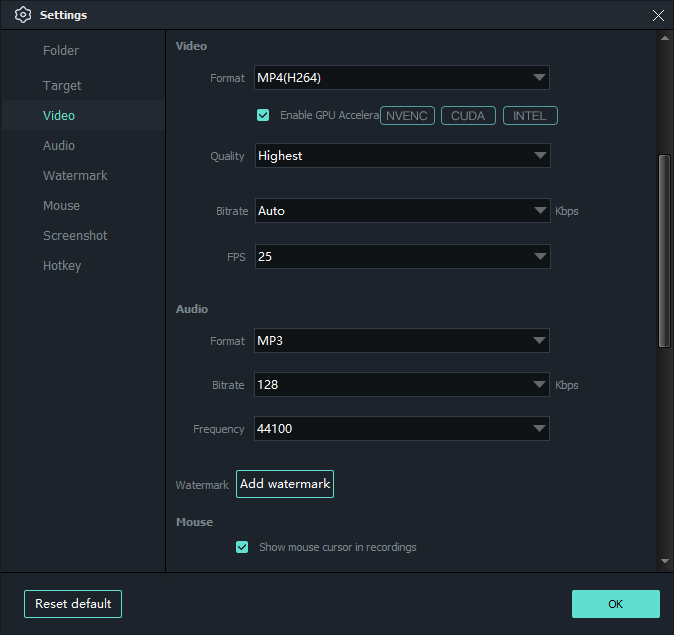
Choose MP4, AVI, WMV, or FLV, then review frame rate, quality, and H.264 hardware encoding settings.
Review the output folder, start and stop hotkeys, cursor settings, auto-stop, and auto-split behavior.
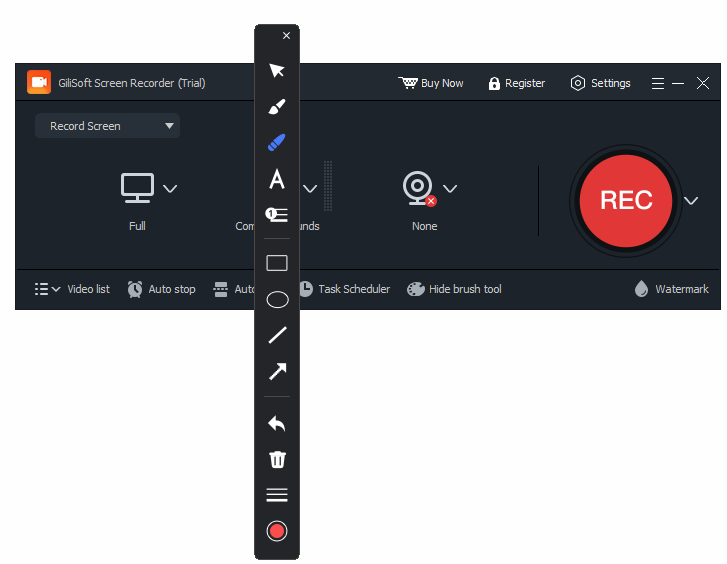
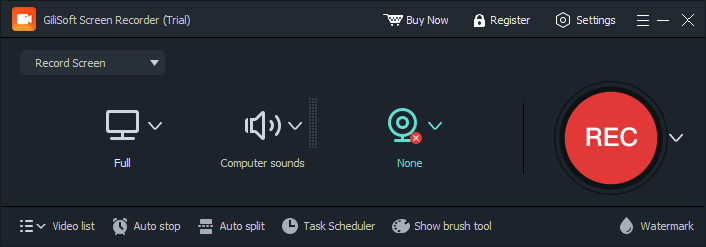 Review the capture mode, sound sources, webcam, settings, and output controls before recording
Quick start: record a Windows screen video
Choose full screen, region, window, webcam, or screen plus webcam.
Select system audio and microphone sources and check their input levels.
Use the main control or hotkey to start, pause, resume, and stop recording.
Open the recorded video list, play the file, and move into editing when needed.
Start from the recording workspace
- Open Screen Recorder Pro and choose the Recorder tool.
- Select the recording area and audio sources.
- Enable webcam, cursor effects, annotations, watermarking, or scheduling only when the task needs them.
- Record a short test before beginning a long class, webinar, demonstration, or meeting.
Screen Recorder Pro includes the recording capabilities of GiliSoft Screen Recorder, then adds a broader set of tools for editing, conversion, download, audio, and media preparation.
 Set the screen, webcam, system sound, and microphone before capture
Choose the screen, webcam, and audio sources
The capture setup should match the job: full-screen lessons, application demonstrations, selected-region tutorials, webcam presentations, meetings, or screen-plus-camera instruction.
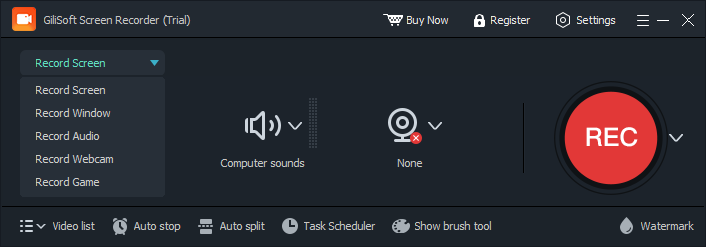 Choose full screen, a window, or a custom recording region
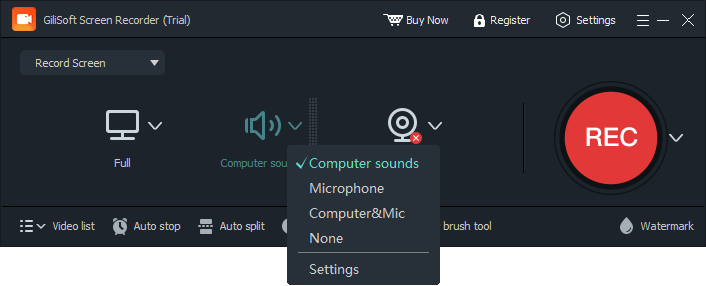 Capture system sound, microphone narration, or both together
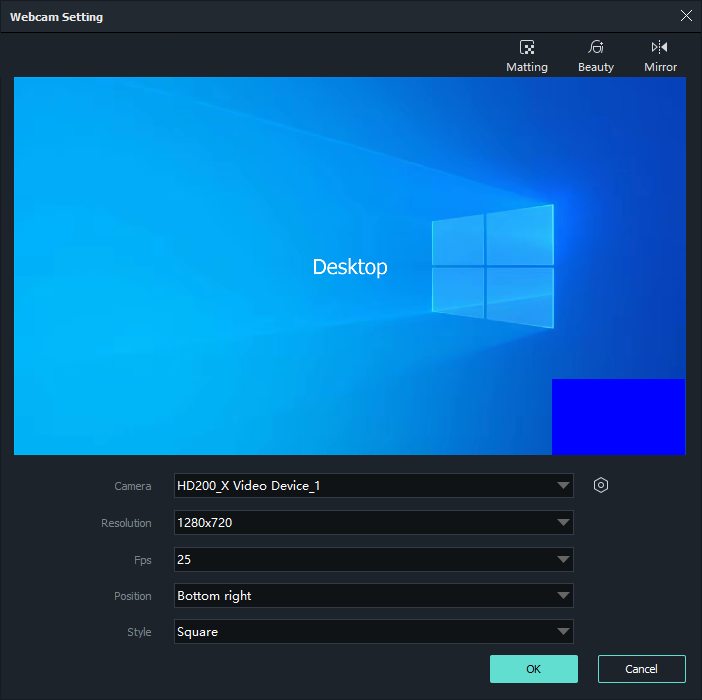
For picture-in-picture recording, enable the webcam layer and position it where it will not cover buttons, captions, or important application content.
Recording controls for clearer, more manageable captures
Each control below is paired with its actual interface so you can recognize where the setting appears before starting a recording.
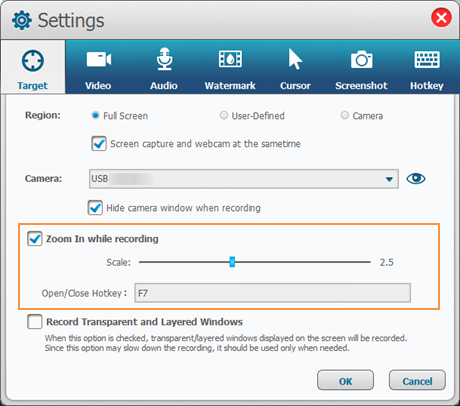
Zoom while recording
Magnify the cursor area during tutorials and demonstrations so small interface details remain visible.
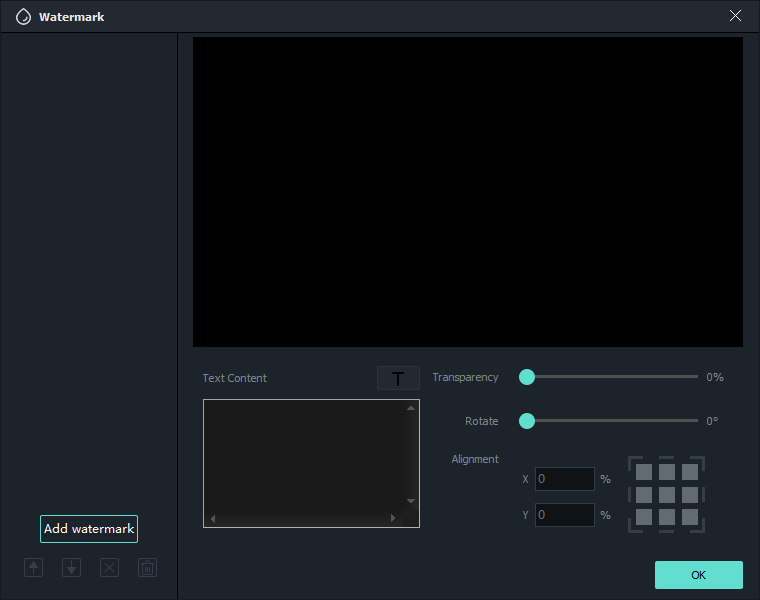
Visible watermark or logo
Add text or image branding when recordings need ownership, project context, or client identification.
System sound and microphone
Record application audio, online meetings, narration, or both sound sources in sync with the screen.
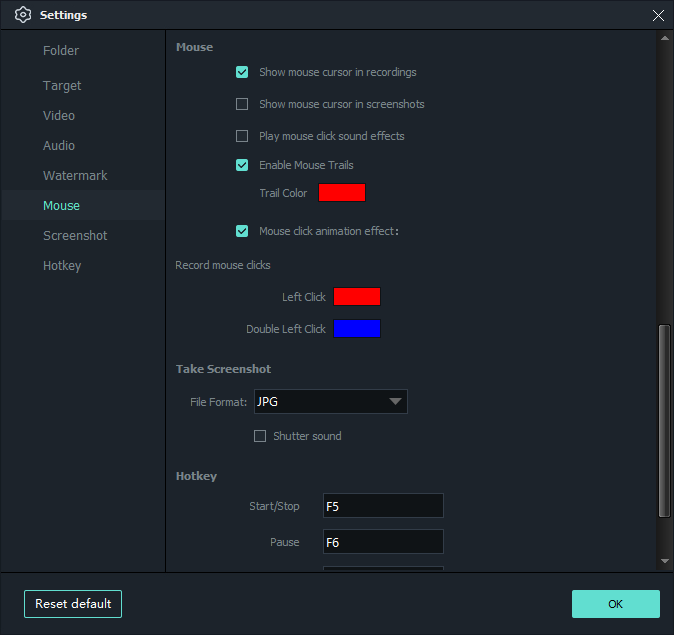
Cursor and click effects
Show the pointer and emphasize mouse actions so viewers can follow each on-screen step.
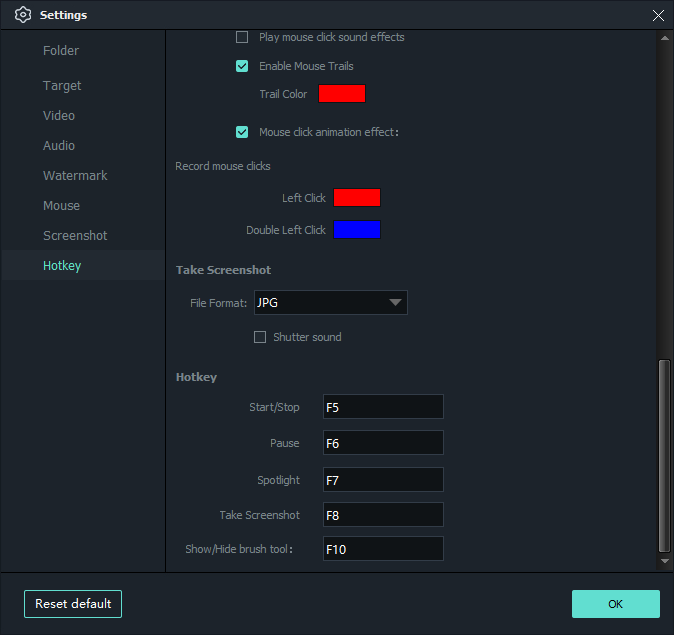
Recording hotkeys
Start, pause, stop, and take snapshots without repeatedly returning to the main window.
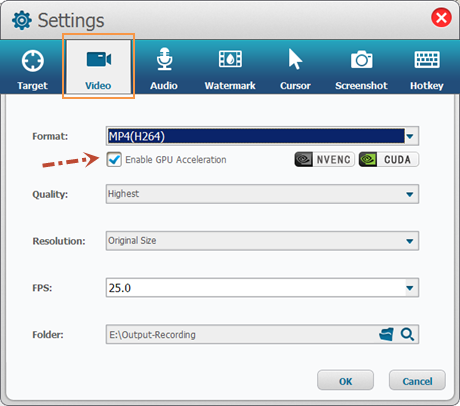
H.264 GPU encoding
Use supported hardware encoding to improve recording efficiency on compatible Windows systems.
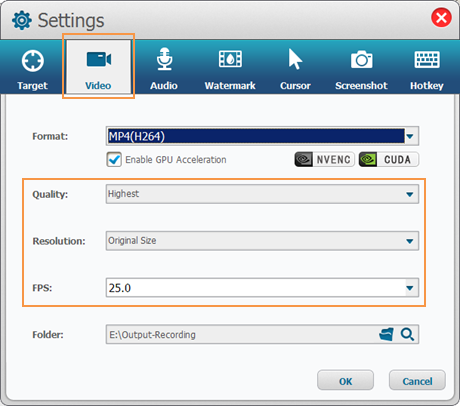
Quality and format settings
Configure MP4, AVI, WMV, or FLV output, frame rate, quality, and related capture settings.
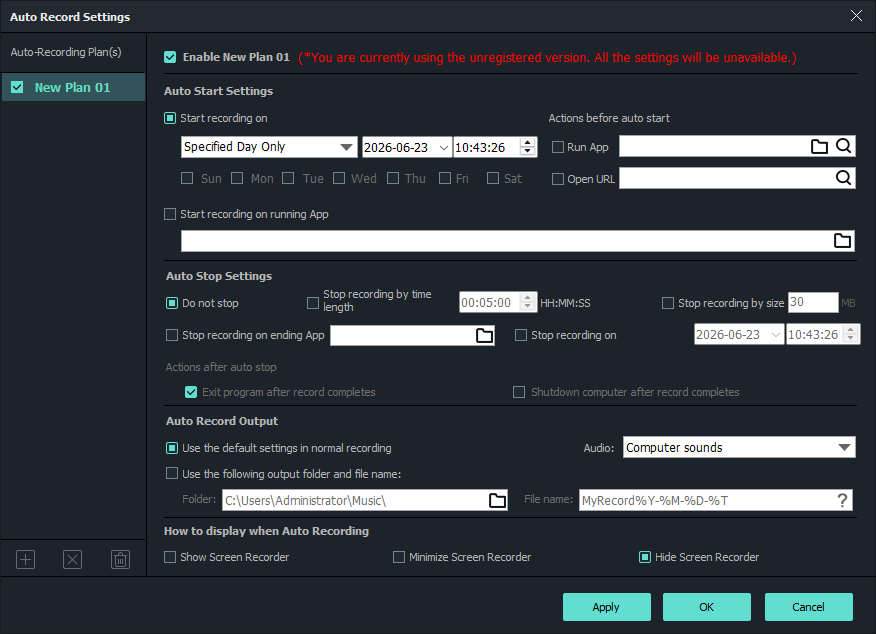
Scheduled recording
Prepare timed capture tasks for webinars, classes, meetings, streams, or unattended sessions.
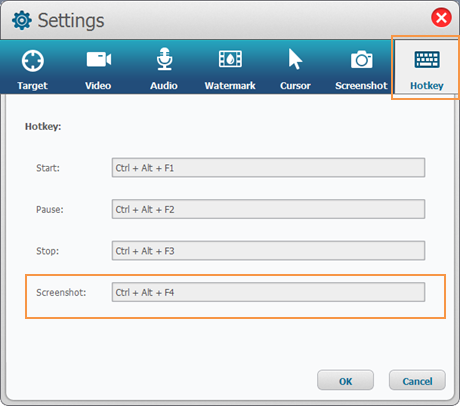
Snapshots during recording
Capture still images with a hotkey and save visual references for documentation or support work.
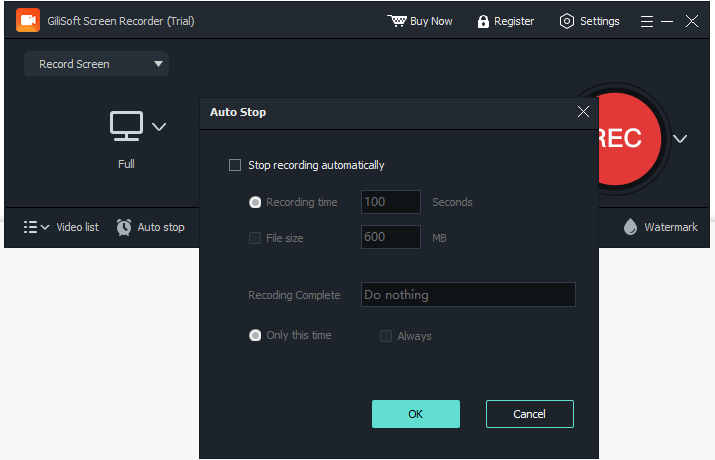
Auto-stop conditions
End a recording automatically by duration or another configured condition so capture does not continue indefinitely.
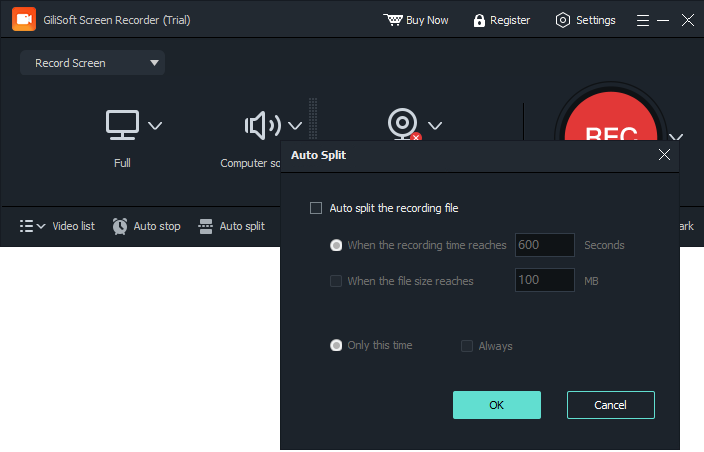
Automatic file splitting
Divide long recordings by time or file size so classes, meetings, and webinars are easier to store and review.
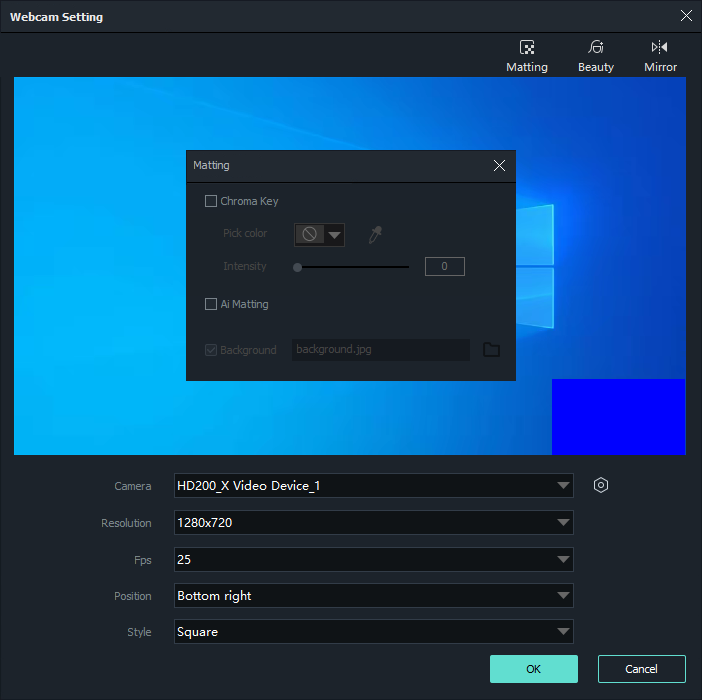
Webcam presentation controls
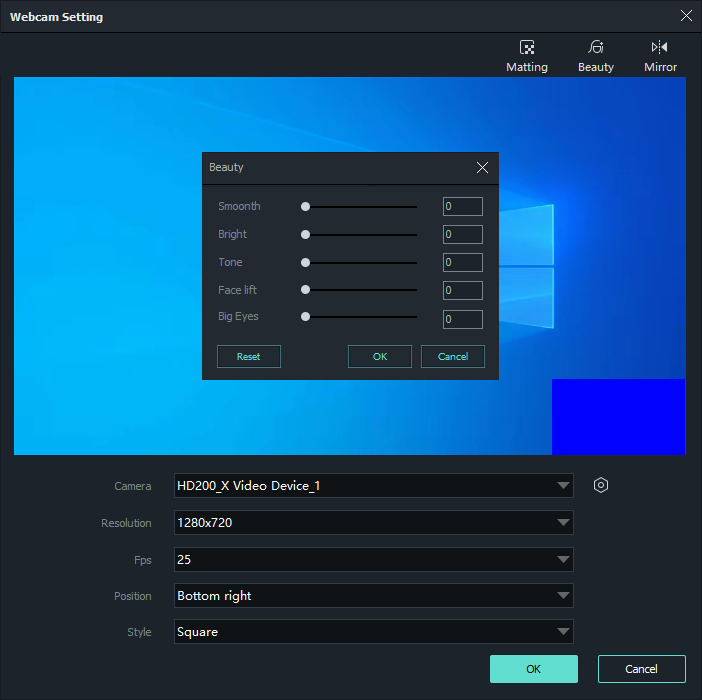
Use webcam beauty, skin smoothing, background removal, virtual backgrounds, or green-screen matting where appropriate.
Edit and finish the recorded video
Move into the Pro editing tools when a raw capture needs cleanup, clearer pacing, additional explanation, branding, or a different delivery format.
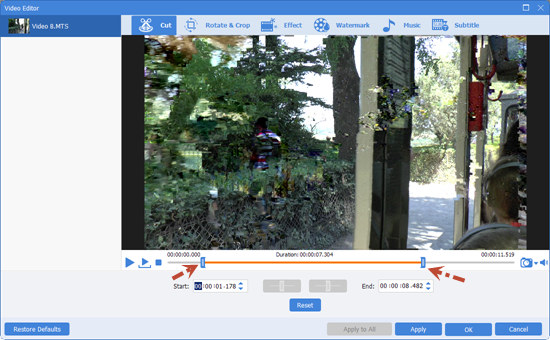 Trim unwanted openings, endings, pauses, or mistakes
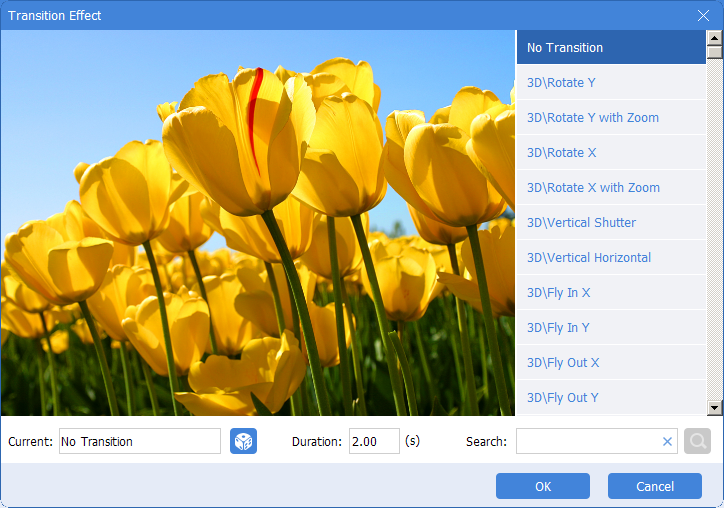 Combine clips and choose a transition where appropriate
Trim, crop, rotate, and adjust speed
Remove unwanted sections, correct framing or orientation, and change playback speed when a recording needs tighter presentation.
Join clips into one video
Combine several recordings, demonstrations, or lesson segments and use a restrained transition between related parts.
Effects, zoom, and volume changes
Apply visual effects, create timed zoom areas, and adjust volume over selected ranges to improve attention and clarity.
Text, image, video, and shape overlays
Add timed labels, logos, callouts, PIP video, or shape elements for instructions, branding, and visual explanation.
Add, remove, or record audio
Replace unwanted sound, add background audio, or record additional voice narration after screen capture.
Subtitles and visible-mark cleanup
Add or create subtitles for accessibility and explanation, and use the available cleanup tool on authorized footage when an unwanted visible mark must be removed.
Continue beyond recording with the Pro workspace
The Pro edition is for users who want capture and practical media preparation in one place. These tools complement recording rather than replacing the dedicated capture controls.
Video processing
Convert and prepare recorded videos when a project needs another format, size, orientation, or finishing step.
Authorized video download
Bring permitted online source material into a training, demonstration, or media project before editing or conversion.
Audio tools
Work with narration, extracted sound, recorded audio, and other media audio required by the final project.
Text and subtitle tools
Prepare captions, scripts, subtitle assets, and supporting text used alongside recorded video.
Move from capture to the right finishing tool
The main workspace keeps recording, video, audio, download, and text tasks close together. Choose only the tool needed for the current output instead of treating every utility as part of the recording step.
- Recorder for screen, webcam, system sound, and microphone.
- Video tools for trimming, joining, overlays, effects, and conversion.
- Audio tools for narration and soundtrack preparation.
- Download tools for authorized online source material.
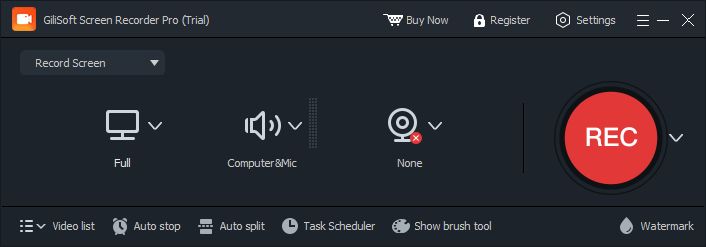 Open recording, video, audio, download, and text tools from one workspace
Screen Recorder Pro troubleshooting and FAQ
Why is system audio missing from the recording?
Confirm system sound is enabled, select the correct playback device, and make a short test recording before the full session.
How do I record screen and webcam together?
Select the screen target, enable the webcam layer, position the camera frame, then verify both sources in the preview.
How can I reduce recording lag?
Close unnecessary applications, lower demanding capture settings when appropriate, and use supported H.264 hardware encoding on compatible systems.
How do I divide a long recording?
Configure automatic splitting by time or file size before recording so long sessions are saved as more manageable files.
Where are finished recordings saved?
Check the configured output folder, then use the recorded video list to open or review completed files.
What does Screen Recorder Pro add beyond screen capture?
After recording, the Pro workspace provides video editing and conversion, audio preparation, subtitle and text tools, and access to authorized video downloads.
Screen Recorder Help by Topic
Choose the task or problem that matches your project. This guide hub keeps recording setup, audio, webcam, business use cases, finishing tools, and troubleshooting pages in one organized place.
Start Recording on Windows
Set up the recorder, choose suitable performance settings, and solve common Windows capture failures.
Record screen on Windows 11Best screen recorder for a low-end PCWhy can't I record the screen on Windows 11?Why is my screen recording not working?Why is the screen recording black?Screen, Webcam, and Picture-in-Picture
Combine screen activity with a presenter camera and keep the camera layer clear of important content.
Record screen and webcam togetherPicture-in-picture screen recorderScreen recorder with webcam and audioSystem Audio and Microphone
Select the right sound sources, record narration, and troubleshoot silent or incomplete recordings.
Screen recorder with audioRecord screen with microphoneRecord screen and system audioRecord system audio and microphoneWhy does a screen recording have no sound?Why is the screen recorder not recording audio?Screen recorder with audio toolsScheduled Sessions, Webinars, and Meetings
Prepare timed recording jobs for online events, meetings, webinars, and remote demonstrations.
Scheduled screen recorderRecord video conferences on WindowsRecord webinars on WindowsScreen recorder for webinarsRecord remote demo sessionsTutorials, Demos, and Walkthroughs
Record clear demonstrations with narration, cursor emphasis, and a practical publishing workflow.
Screen recorder for tutorial videosTutorial recording software for WindowsScreen recorder for training videosScreen recorder for product demosScreen recorder for software walkthroughsRecord release walkthrough videosOnboarding and Internal Training
Create reusable learning material for employees, teams, LMS delivery, procedures, and compliance work.
Screen recorder for onboarding videosScreen recorder for team trainingScreen recorder for LMS contentRecord SOP videos for internal teamsRecord compliance training videosSupport and Technical Documentation
Show reproducible steps and visual evidence for customers, knowledge bases, testing, and internal reviews.
Screen recorder for customer support videosScreen recorder for knowledge-base videosRecord bug reproduction videosRecord internal audit walkthroughsEdit, Convert, and Prepare the Recording
Move from raw capture to a finished video, another format, or an authorized source-media workflow.
Record and edit screen videos on WindowsScreen recorder with video editorScreen recorder with video converterScreen recorder with downloaderScreen recording software vs video editorScreen recorder vs screen capture softwareReady to record and finish screen videos?
Use GiliSoft Screen Recorder Pro to capture the screen, webcam, system sound, and microphone, then edit and export the result.