
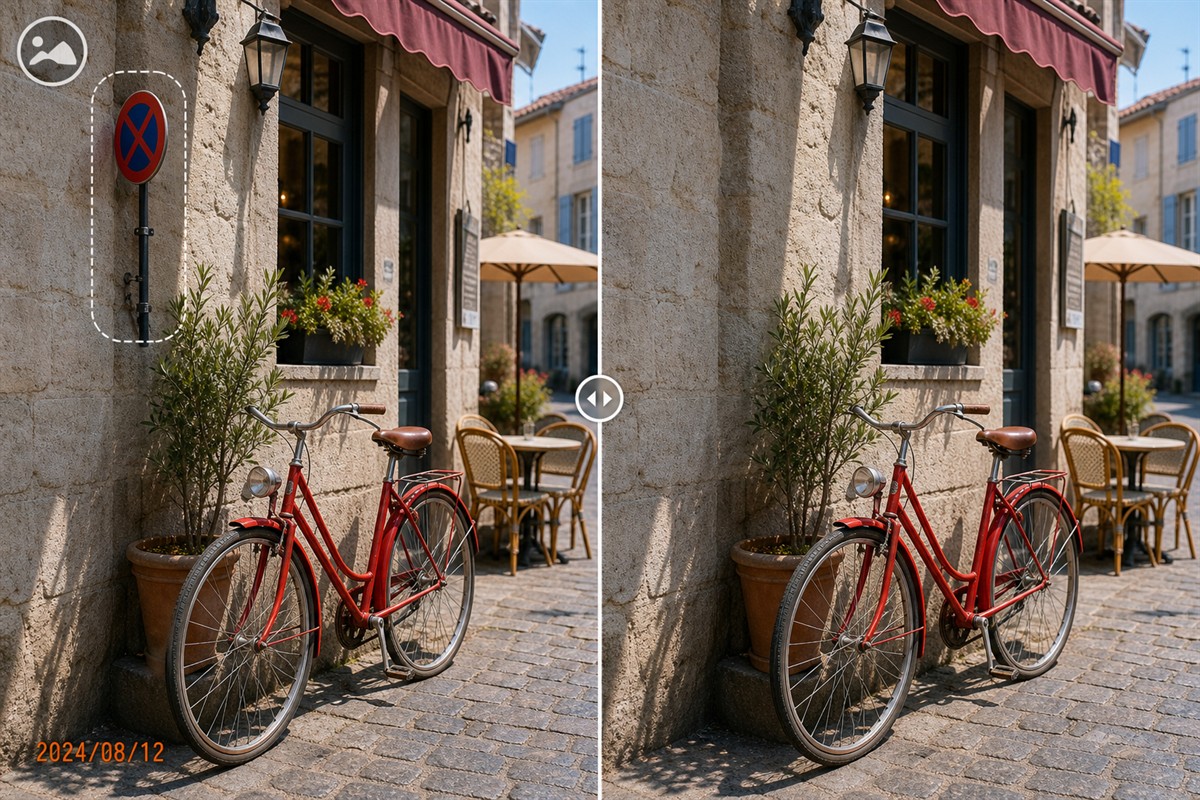
Can You Remove an Unwanted Object from a Photo?
Yes. Select the object and let the cleanup tool replace that region with an approximation built from nearby image color, texture, lines, and patterns.
Object removal works best when the item is relatively small and enough similar background remains visible around it. A plastic bottle on pavement, a cable against a plain wall, or a sign in open sky is usually more practical than a person covering a building entrance or a large vehicle hiding unique scenery.
Which Objects Are Easier or Harder to Remove?
The object itself is only part of the problem. The hidden background, connected shadows, reflections, nearby edges, and available image resolution usually determine whether the result looks natural.
Easier: small isolated objects
Litter, dust, a compact sign, cable, label, or distant item over sky, walls, grass, pavement, sand, or soft background blur.
Harder: objects covering subjects
Items across faces, hands, text, logos, product details, architecture, railings, patterned fabric, or another unique foreground element.
Easier: repeatable texture nearby
A clear supply of similar color and texture gives the reconstruction process relevant material for rebuilding the selected area.
Harder: large mixed regions
Objects spanning sky, trees, people, and buildings require several different replacements and are rarely convincing in one oversized pass.
Do not forget shadows, reflections, and disconnected parts
Removing a chair but leaving its shadow, removing a person but leaving a reflection, or erasing a cable without its attachment points creates an obvious inconsistency. Treat each related element deliberately, often as a separate selection.
How Photo Object Removal Rebuilds the Background
A finished JPEG or PNG contains only the pixels visible in the final frame. The exact scene behind an unwanted object is not stored elsewhere inside that flattened image, so cleanup software cannot reveal it like uncovering a hidden layer.
The selected area is filled from context
Adobe describes Content-Aware Fill as replacing a selected object with surrounding pixels and allows the user to control the sampling area. Microsoft provides brush size and mask controls for local Generative Erase. GIMP’s Heal tool uses a chosen source area while accounting for the destination surroundings.
Smaller selections give more control
A large mask can combine unrelated textures or bend straight edges. For an object crossing a wall and floor, repair the wall section first, then the floor, then inspect the boundary between them.
Automatic results still require inspection
Microsoft warns that an erase result may not be perfect or match expectations, and GIMP notes that repeated healing can risk smudging. Look for cloned patterns, doubled objects, broken perspective, soft patches, color seams, and inconsistent light.
Editing principles consulted: Adobe Content-Aware Fill, Adobe fill controls, Microsoft Photos editing guidance, and GIMP Heal documentation.
How to Remove an Object from a Photo with MarkEase
Begin with one image that represents the real object size and background complexity. A successful test is more useful than assuming the same settings will fit every photo.
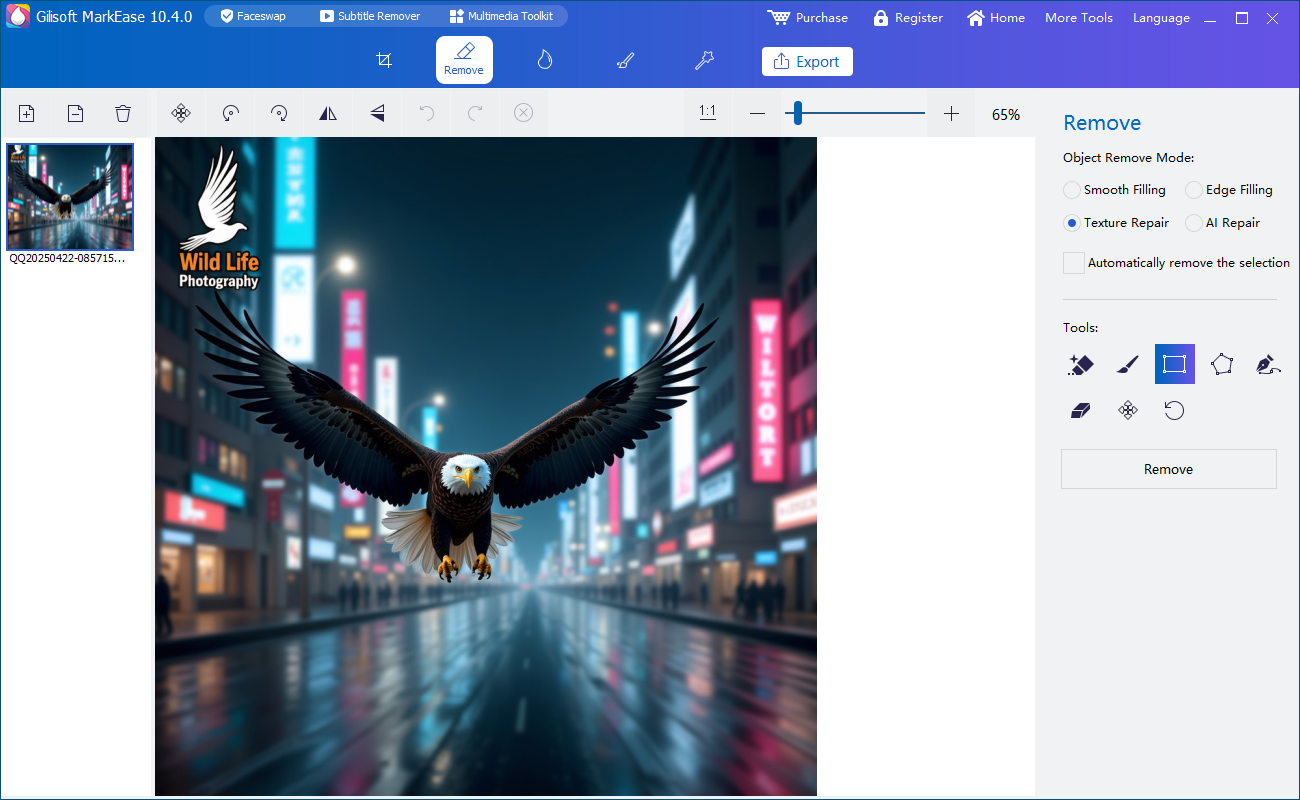
- Open the highest-quality authorized photoLoad the original or a working copy in GiliSoft MarkEase and keep the untouched source in a separate folder.
- Identify every part that belongs to the objectZoom in and check its complete outline, holes, shadow, reflection, cable, support, or disconnected pieces.
- Select the object without swallowing clean detailKeep the brush close to the visible boundary while including the pixels that clearly belong to the unwanted item.
- Divide mixed backgrounds into smaller passesProcess different surfaces separately when the object crosses sky, vegetation, people, pavement, walls, or geometric lines.
- Inspect the reconstruction at 100% sizeCheck texture direction, perspective, straight edges, lighting, duplicated patterns, blur, and any remaining object fragments.
- Export a separate resultOpen the saved image outside MarkEase and compare it with the original at both full resolution and the intended publishing size.
Test object cleanup with GiliSoft MarkEase
Use the Windows trial on one representative authorized photo and judge the actual background reconstruction before processing the rest of the set.
Download MarkEase TrialObject Removal vs Cropping, Retaking, and Manual Editing
| Method | Best use | Advantage | Trade-off |
|---|---|---|---|
| GiliSoft MarkEase cleanup | Small to medium distractions with usable nearby background | Preserves the original frame and provides a focused workflow | Reconstructs hidden detail rather than recovering it exactly |
| Crop the photo | An object positioned only on an expendable edge | Uses only authentic remaining pixels | Changes composition, dimensions, and possibly aspect ratio |
| Retake or replace the photo | A large object hides important subject or scene information | Provides real background detail instead of an approximation | May be impossible for events, archives, travel, or client-supplied assets |
| Manual clone and heal | Complex lines, textures, perspective, faces, or large mixed backgrounds | More control over source pixels and repair direction | Requires more time and image-editing skill |
Common Object Removal Examples
Signs and labels
Remove a small temporary sign or sticker while checking that nearby wall texture, printed text, and straight edges remain consistent.
Cables and wires
Use narrow selections and repair junctions separately so long lines do not leave repeated texture or broken attachment points.
Litter and ground clutter
Clean small bottles, bags, leaves, or debris when pavement, grass, sand, or flooring provides enough repeatable texture.
Background people
Distant figures can be practical; large foreground people are harder because they often cover buildings, furniture, scenery, and their own shadows.
Product-photo distractions
Remove dust, tags, props, or temporary labels without altering the product’s real features or making the listing misleading.
Reflections and shadows
Decide whether each belongs to the unwanted object. Removing the object while leaving its visual effect usually looks unnatural.
How to Improve the Final Object Removal
When to stop and choose another method
If the repair invents important product detail, changes a person’s appearance, breaks readable text, or produces an implausible scene, return to the original and use a crop, alternative source, retake, or manual editor. A clean-looking patch is not automatically an accurate reconstruction.
Use Object Removal Responsibly
Photo cleanup can improve composition, protect privacy, and prepare authorized marketing or archive images. It can also change the meaning of an image if a person, safety issue, defect, sign, timestamp, or contextual object is removed.
Remove Object from Photo FAQ
What objects are easiest to remove?
Small isolated items over repeatable backgrounds such as sky, walls, grass, pavement, sand, or soft blur are generally the best candidates.
Can the hidden detail behind an object be recovered exactly?
No. A flattened photo does not contain the covered pixels, so the software reconstructs a plausible replacement using surrounding image information.
Should the object’s shadow be selected too?
Yes, when the shadow belongs to the unwanted object. Reflections, support hardware, cables, and disconnected parts may also require separate selections.
Can MarkEase remove an unwanted person?
It can attempt the same cleanup workflow, but a person is often large and may hide complex background detail. See the dedicated remove unwanted person guide.
Is object removal better than cropping?
Use removal when cropping would discard important framing. Use cropping when the distraction sits entirely on an expendable edge and the new composition still works.
Should I overwrite the original photo?
No. Keep the original and export the cleaned result as a separate file for comparison, audit, and recovery.


