
Work from a copy when the photo is important, so the untouched source remains available for comparison.
GiliSoft MarkEase User Guide
MarkEase User Guide for Windows
Remove unwanted watermarks and objects, refine the photo, and export a clean new image.
- Select logos, text, date stamps, or distracting objects
- Preview difficult edges and refine the cleanup area
- Crop, mark, adjust, and export without replacing the original
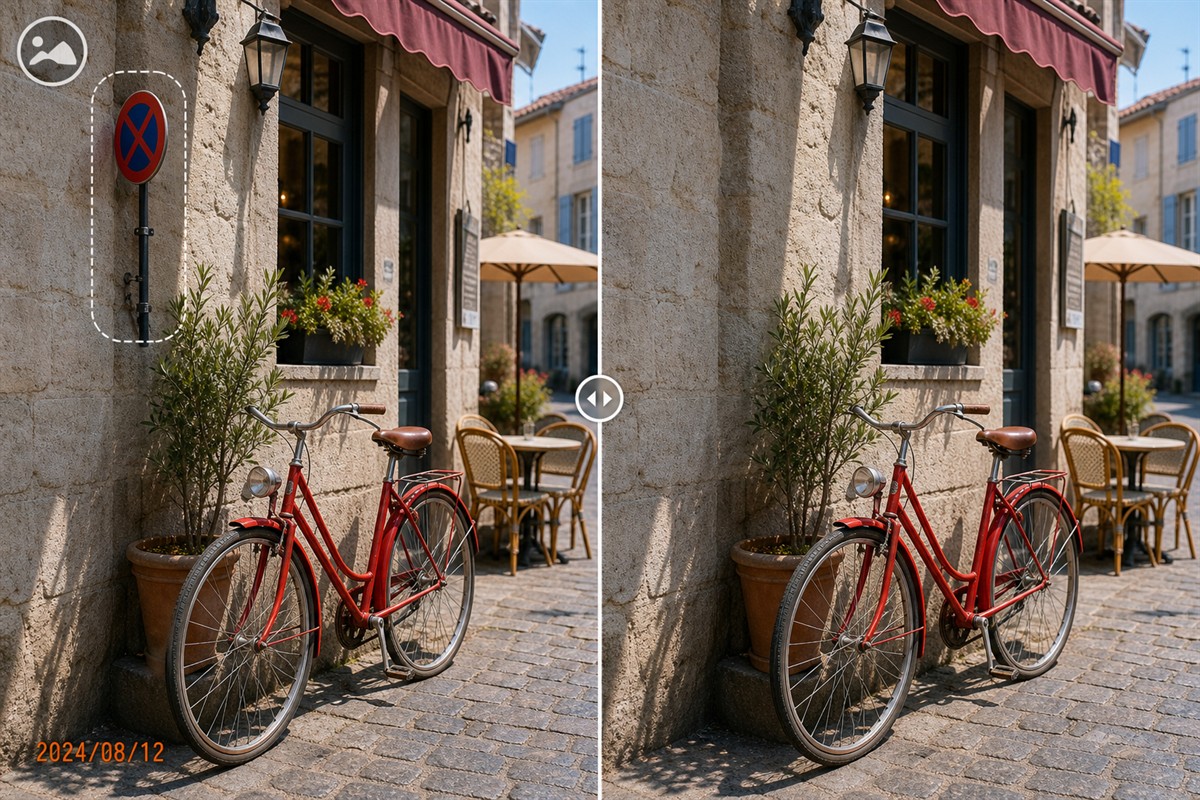
Before you edit a photo in MarkEase
Keep the original image available and decide whether the task is cleanup, reframing, visible marking, or a visual adjustment.
Note whether you are removing a logo, date stamp, text label, small object, or another distracting photo element.
A mark over a flat background is easier to clean than one crossing faces, hair, patterns, or detailed edges.
Select an output folder and decide whether the finished photo needs cleanup only or additional cropping, marks, shapes, or filters.
Zoom in before making a selection. A smaller, accurate cleanup area usually preserves more of the surrounding photo than one large selection.
Choose the Right Cleanup Approach
Match the edit to the position of the mark and the complexity of the surrounding image. The smallest effective change usually preserves the most original detail.
Brush over a compact stamp or logo
Use a close selection when the unwanted mark sits over sky, walls, fabric, pavement, or another texture MarkEase can reconstruct from nearby pixels.
Refine complex edges in smaller passes
Hair, faces, product outlines, railings, and patterned backgrounds usually need a tighter mask and more than one carefully reviewed cleanup pass.
Crop when the mark is only at the edge
If removing a corner stamp would not discard important content, cropping can produce a cleaner result than reconstructing a difficult background.
Keep the source and export a new file
Do not overwrite the only original. Compare the result at full size and check for repeated texture, blur, color seams, and missing detail.
1. Remove a watermark, date stamp, logo, or unwanted object
Select only the part of the photo that should be cleaned
- Open MarkEase and add the highest-quality authorized source photo.
- Choose Remove Watermark or the photo cleanup task.
- Zoom in and select only the unwanted text, logo, stamp, or object.
- Run the cleanup and inspect the reconstructed area at 100% size.
- Repeat with a tighter selection when complex edges need smaller passes.
- Export the result as a new file and keep the untouched original.
For several separate marks, clean one area at a time so each reconstructed section can be checked before export.
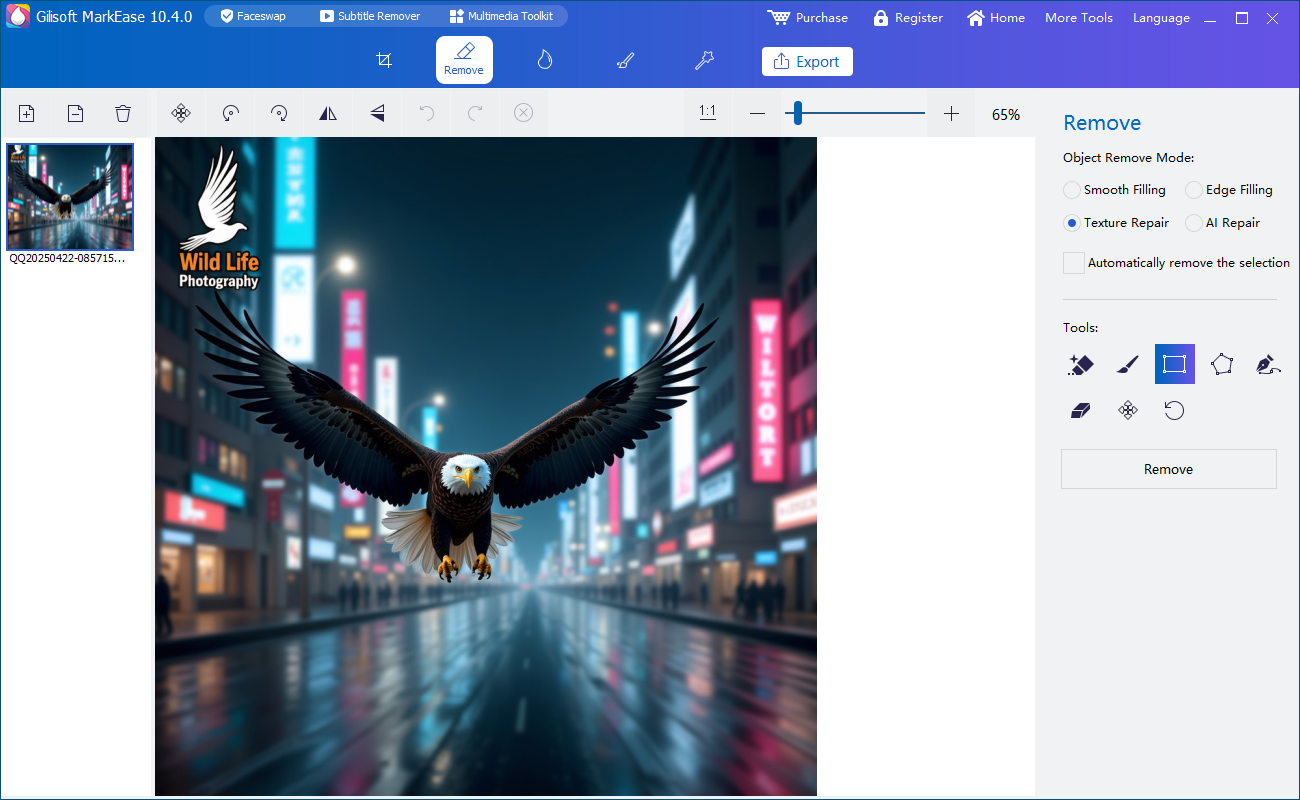 Select the unwanted image area and review the cleanup result
Text and date stamps
Use a tight region around visible dates, captions, labels, or repeated text marks.
Logos and image marks
Clean small corner logos or embedded image marks without selecting more background than necessary.
Distracting objects
Remove small unwanted photo elements when the surrounding area provides enough visual information for reconstruction.
Try this workflow with GiliSoft MarkEaseDownload the Windows trial, test one representative photo, and inspect the exported result before processing the rest of the image set.
Download MarkEase Trial2. Crop, rotate, and flip the photo
Reframe the image after cleanup
- Open the Crop workspace after loading or cleaning the photo.
- Drag the crop boundary around the content you want to keep.
- Adjust the composition so the main subject remains balanced.
- Rotate the photo when the horizon or source orientation is incorrect.
- Use horizontal or vertical flip when the intended direction needs to change.
- Apply the change and inspect the new image dimensions.
Cropping is useful for removing damaged edges, empty margins, scanner borders, or unwanted content near the outside of the frame.
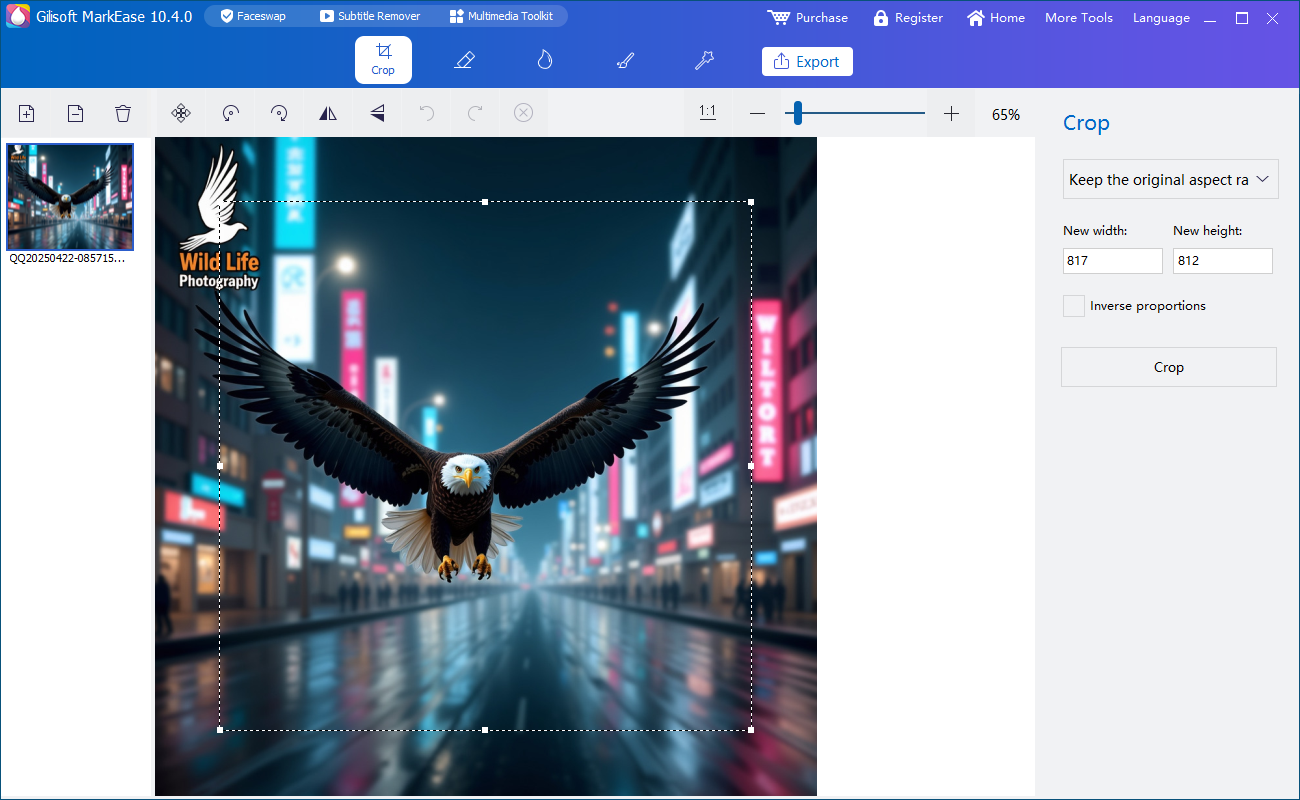 Reframe and correct the photo orientation
3. Add text, logo, or image watermarks
After cleanup, you can add a current ownership mark, campaign label, store name, project identifier, or other visible context.
Create a new visible mark
- Open the watermark workspace and choose a text or image mark.
- Enter the text or import the logo image.
- Position the mark where it remains visible without covering the main subject.
- Adjust size, color, style, transparency, and other available appearance controls.
- Preview the photo at its expected display size.
- Apply the watermark and export a test image before processing more photos.
Transparent PNG logos usually blend more cleanly with photographs. Keep text short enough to remain readable on smaller screens.
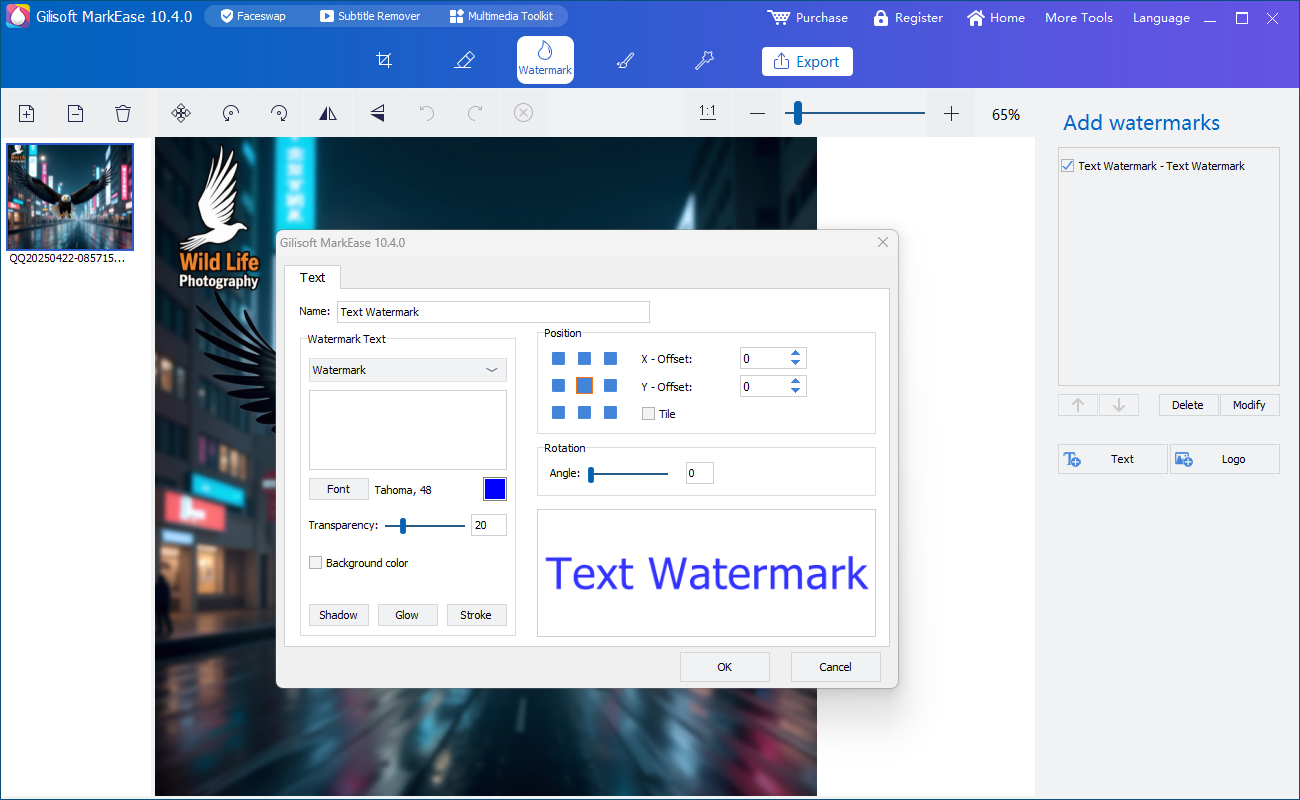 Add and position a new visible watermark
4. Add shapes, arrows, and callouts
Draw attention to important photo areas
- Open the Shapes workspace.
- Choose a line, curve, rectangle, ellipse, arrow, or another available shape.
- Draw the shape over the area that needs emphasis.
- Adjust its size, direction, color, and visual style.
- Keep callouts away from important text or faces unless the shape is intended to highlight them.
- Preview and apply the finished annotation.
Shapes are useful for product instructions, support screenshots, listing images, tutorials, review notes, and visual explanations.
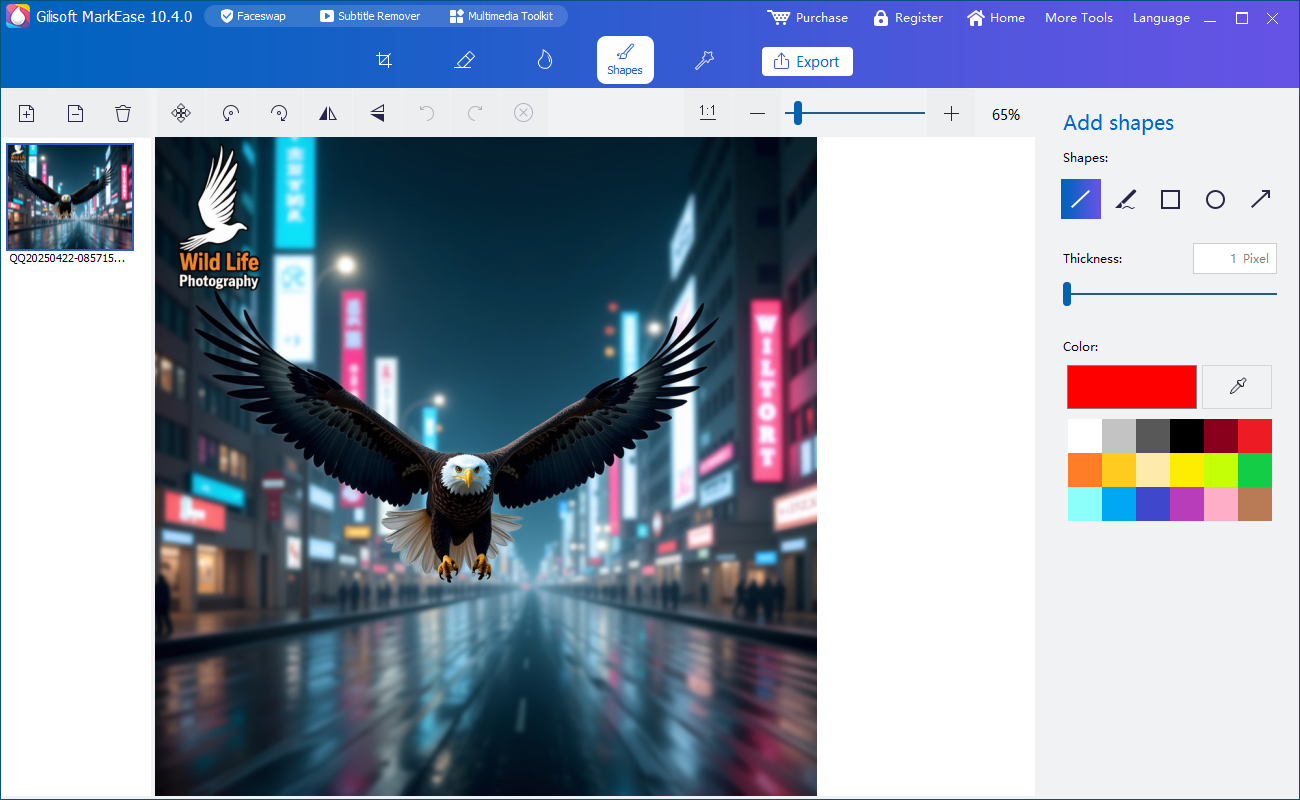 Create callouts and visual annotations
5. Apply filters and visual adjustments
Finish the photo without changing its purpose
- Open the filter or visual-adjustment workspace.
- Preview available looks on the current photo.
- Choose an adjustment that supports the subject instead of overpowering it.
- Compare the edited result with the original.
- Check skin tones, product colors, white backgrounds, and fine details.
- Apply the effect only after the full-size preview looks natural.
Use filters consistently when several photos belong to the same product listing, campaign, lesson, archive, or client delivery.
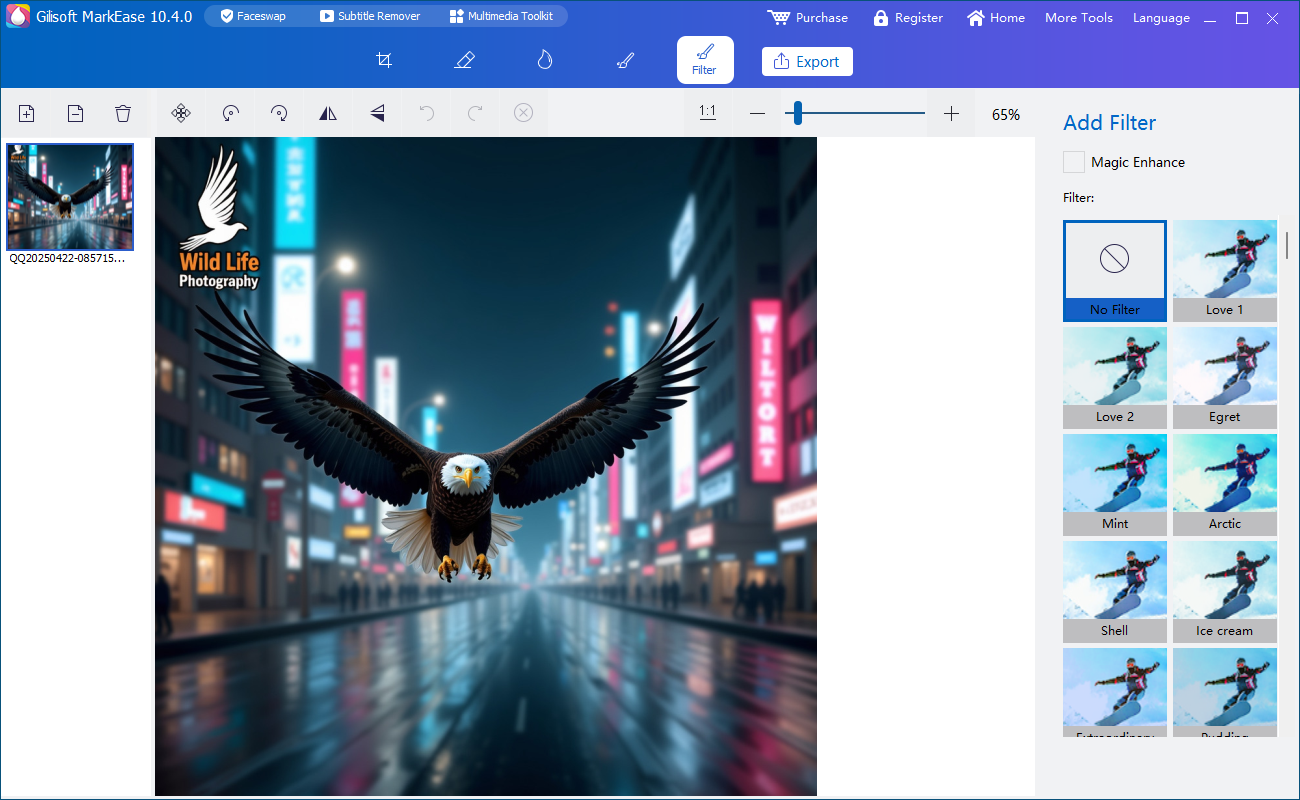 Preview filters before applying the final look
6. Review repeated photo tasks and export
Check one finished image before continuing
- Open the main workspace and review the selected photo or image set.
- Confirm that every unwanted mark or object was removed.
- Check crop, orientation, new watermarks, shapes, and visual adjustments.
- Zoom in around reconstructed areas, text edges, logos, and the main subject.
- Export one representative photo and open it outside MarkEase.
- When the test is correct, continue with the remaining photos that need the same treatment.
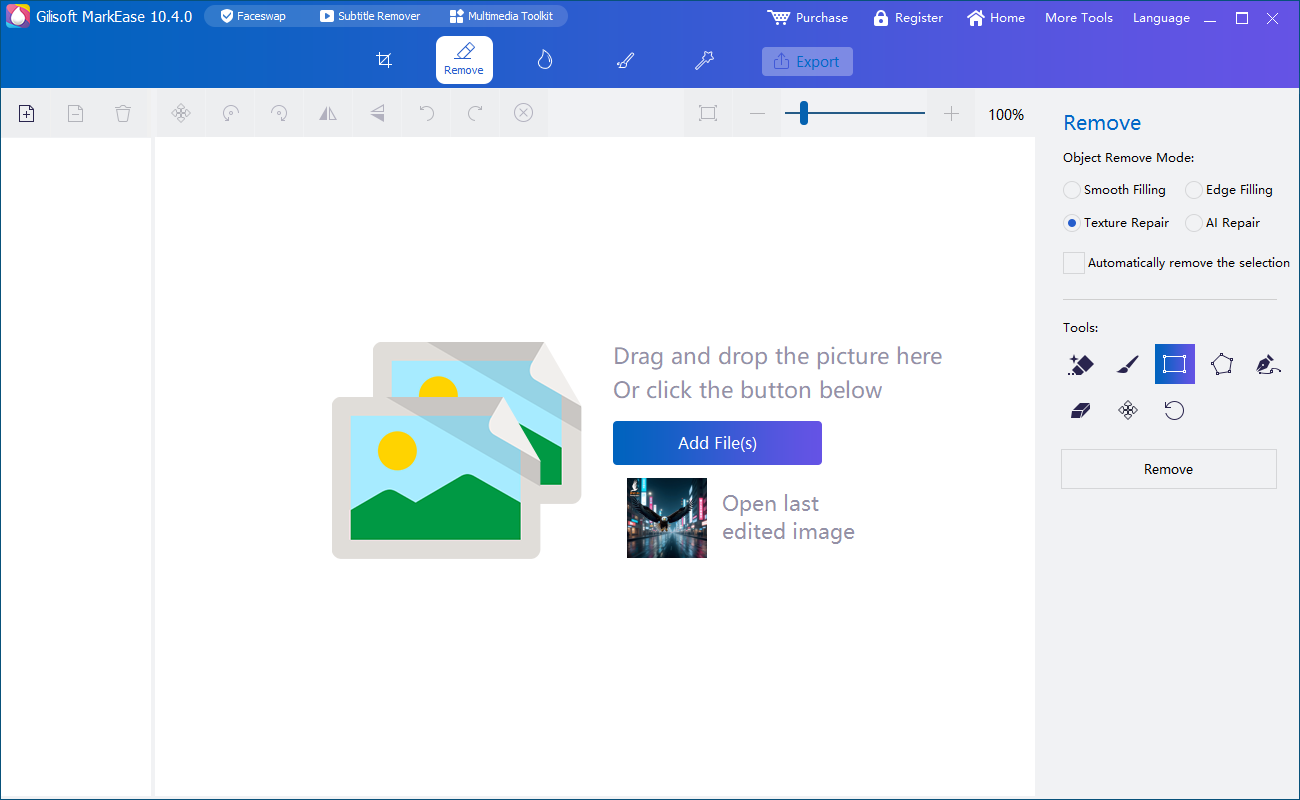 Manage photo cleanup and editing tasks from one workspace
MarkEase processes photos locally on the Windows PC. Keep output files separate from the original sources until the finished images have been reviewed.
Final MarkEase checklist
Confirm these points before publishing, sharing, or processing the remaining photos.
MarkEase troubleshooting and FAQ
Why does the cleaned area look blurred?
Tighten the selection around the unwanted mark and process a smaller area. Detailed textures, faces, hair, and strong edges may require several careful passes.
Can I remove several marks from one photo?
Yes. Select separate areas or clean them one at a time so each reconstructed section can be checked before export.
Why does an object-removal result look unnatural?
The selected object may cross a complex background. Reduce the region, avoid including nearby subjects, and clean the object in smaller sections.
Can I add a transparent logo?
Yes. Import a logo image with transparency when available, then adjust its size, placement, and opacity for the intended photo.
Does MarkEase process photos locally?
Yes. The photo cleanup and editing work described on this page is performed on the Windows PC.
Is MarkEase the same as ClipMark?
No. MarkEase is designed for photos and still images. Use ClipMark when the main task involves video watermarking or video-overlay cleanup.
MarkEase Tasks and Photo Cleanup Guides
Choose the guide that matches the actual photo job. These pages cover focused cleanup, repeated image processing, private local work, watermarking, portrait retouching, and image repair.
Remove watermarks, dates, logos, and text
Clean visible overlays from authorized photos and screenshots.
Remove unwanted objects
Handle small distractions with focused selections and careful review.
Keep private photo cleanup local
Work with portraits, business images, and client assets on the Windows PC.
Add text, logos, and new watermarks
Apply current ownership, campaign, or publishing marks after cleanup.
Enhance, repair, and retouch photos
Finish portraits and older images after the main cleanup task.
Ready to clean and prepare your photos?
Use MarkEase to remove unwanted elements, reframe images, add current watermarks or callouts, and inspect the result before delivery.


