
Select computer sound, microphone input, or both according to what the recording must contain.
GiliSoft Audio Recorder Pro Help Center
Audio Recorder Pro User Guide for Windows
Follow the real recording workflow to capture system sound, microphone input, or both, then configure schedules, voice activation, hotkeys, output files, and post-recording cleanup.
Before You Start Recording
A short input check prevents silent recordings, clipped speech, and files saved to the wrong location.
Confirm that the intended microphone or playback device is active before starting.
Speak or play a short sample and check that the input meter responds without staying at its maximum.
Choose the output settings and a folder with enough free space for the planned recording.
Choose a Recording Task
The main workspace keeps ordinary capture tasks together, so you can move directly to the correct input mode.
- Open Audio Recorder Pro.
- Choose system sound, microphone, or mixed recording.
- Confirm the input level and output location.
- Start a short test recording before the full session.
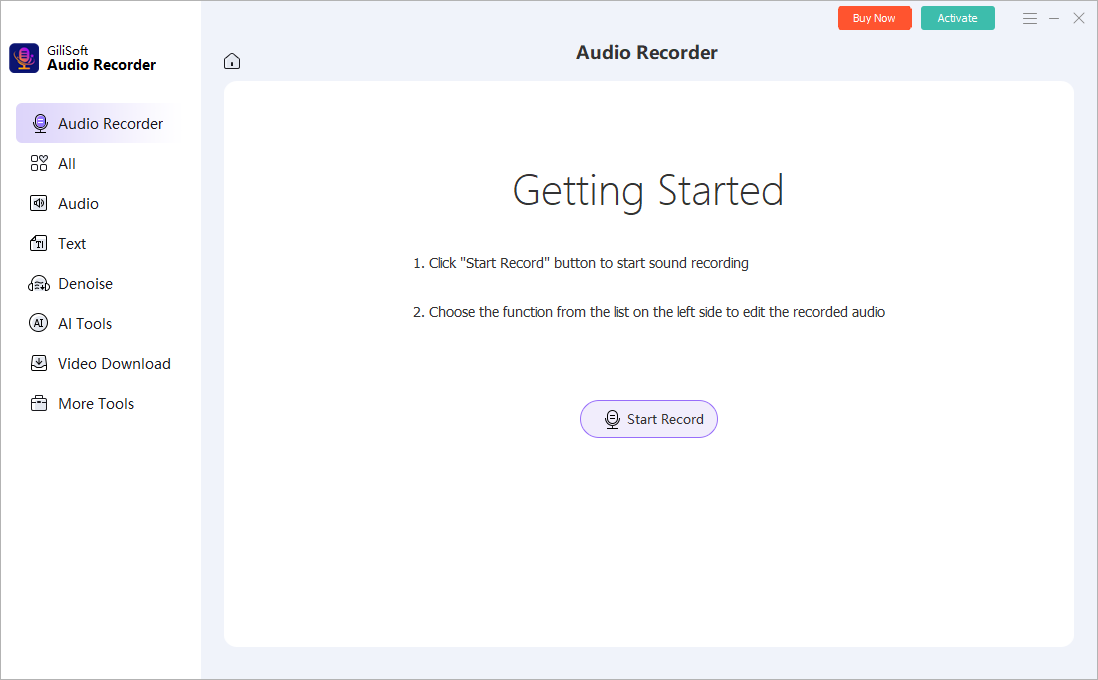 Main task hub. Click to enlarge.
Record System Audio
Use system-audio recording for application playback, online classes, webinars, streaming audio, and other sound produced by the Windows PC.
- Select the computer or system sound task.
- Play a short sample and confirm that the level meter moves.
- Start recording, then play the material you need to capture.
- Stop and listen to a short section before continuing with a longer session.
Use headphones when another microphone is active nearby. This helps prevent speaker output from returning through the microphone.
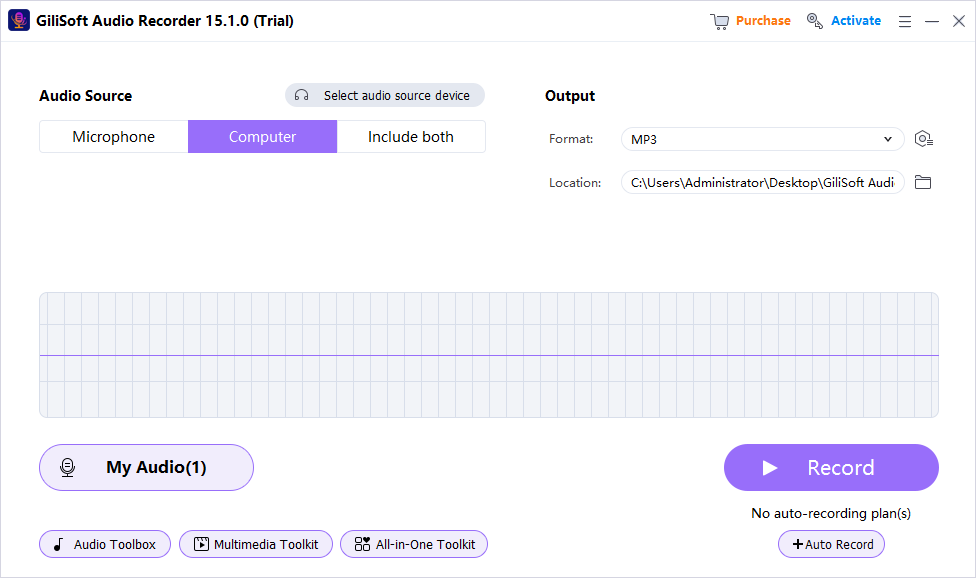 Computer sound recording source. Click to enlarge.
Record Microphone Input
Microphone mode is suitable for narration, interviews, lectures, voice notes, and spoken explanations.
- Connect or enable the microphone you want to use.
- Select microphone recording and speak at a normal distance.
- Adjust the level if the signal is too quiet or remains near its maximum.
- Record a short voice sample and listen for background noise.
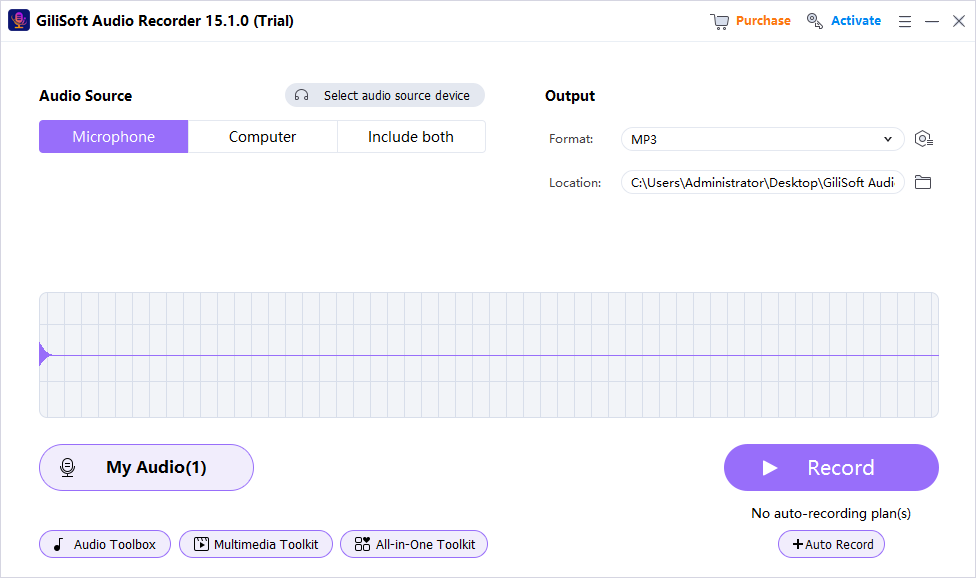 Microphone recording source. Click to enlarge.
Record System Audio and Microphone Together
Mixed recording keeps computer playback and spoken commentary in the same capture. It is useful for demonstrations, remote conversations, course narration, and reaction-style audio.
- Select Include both under Audio Source.
- Check both inputs and adjust microphone and computer volume separately.
- Choose automatic mixing, place the two sources on separate left and right channels, or save microphone and computer audio as separate files.
- Use headphones to reduce echo, then record and review a short test.
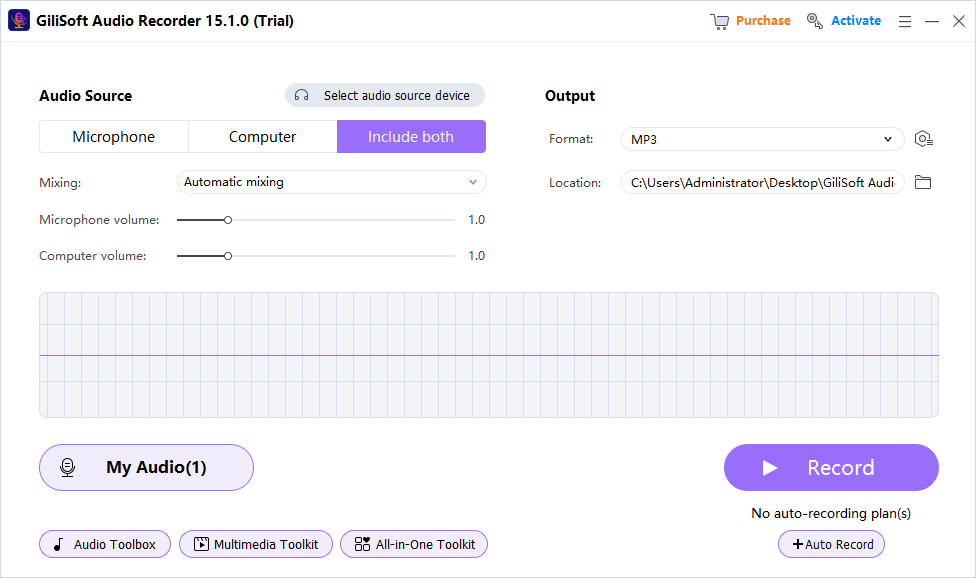 Combined source and volume controls. Click to enlarge.
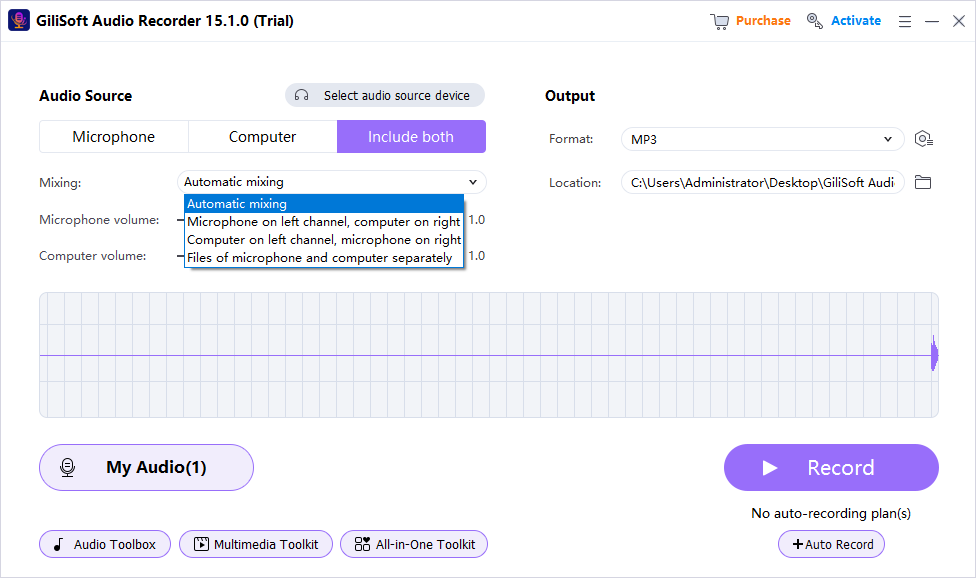 Automatic, channel-based, and separate-file output choices. Click to enlarge.
Schedule Recording Automatically
Create a recording plan when a class, broadcast, webinar, or other session must start without manual operation.
- Open the scheduled recording plan.
- Choose when the task should start.
- Set an appropriate stop condition, such as time, duration, or file size.
- Confirm the source, output folder, and after-recording action.
Leave the computer awake, keep the required audio device available, and run a short scheduled test before relying on an unattended session.
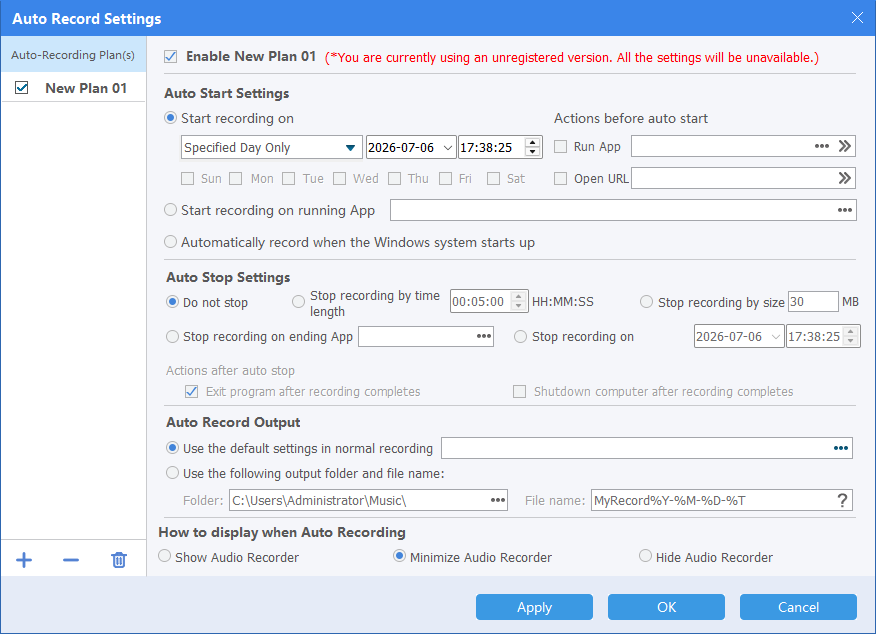 Scheduled recording plan. Click to enlarge.
Use Voice Activation and Silence Handling
Voice activation responds to detected sound, while silence handling can reduce long blank sections in meetings, dictation, and monitoring-style recordings.
- Open the voice activation settings.
- Set the detection level for the room and microphone.
- Speak at the quietest level you expect during the session.
- Test both speech and silence before starting the full recording.
A threshold that is too high can miss quiet speech. A threshold that is too low can react to fans, keyboard noise, or room ambience.
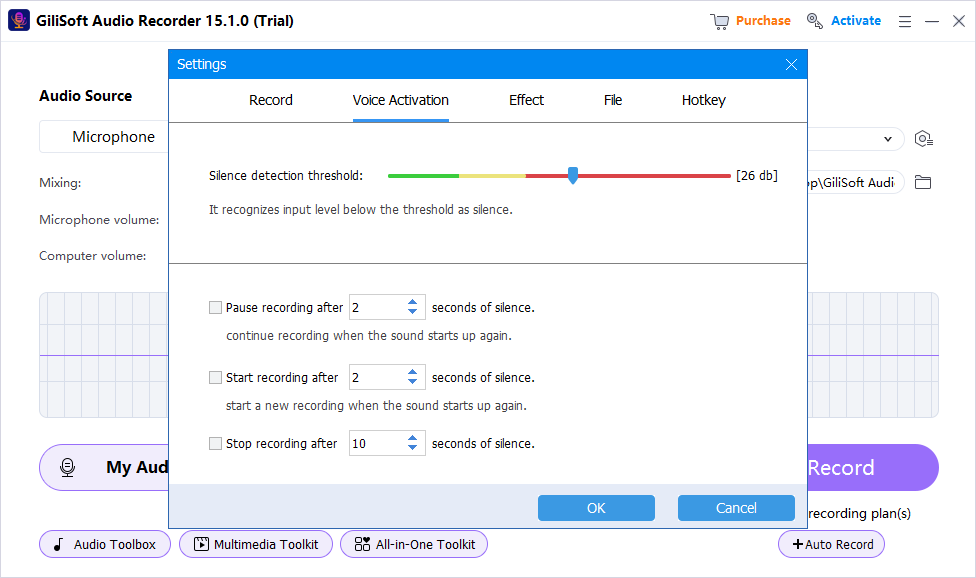 Voice activation settings. Click to enlarge.
Control Recording with Hotkeys
Keyboard controls are useful when the recorder window should stay out of the way during a presentation, demonstration, or full-screen task.
- Open the hotkey settings.
- Review or change the recording shortcuts.
- Avoid combinations already used by another application.
- Test start, pause, resume, and stop before the real session.
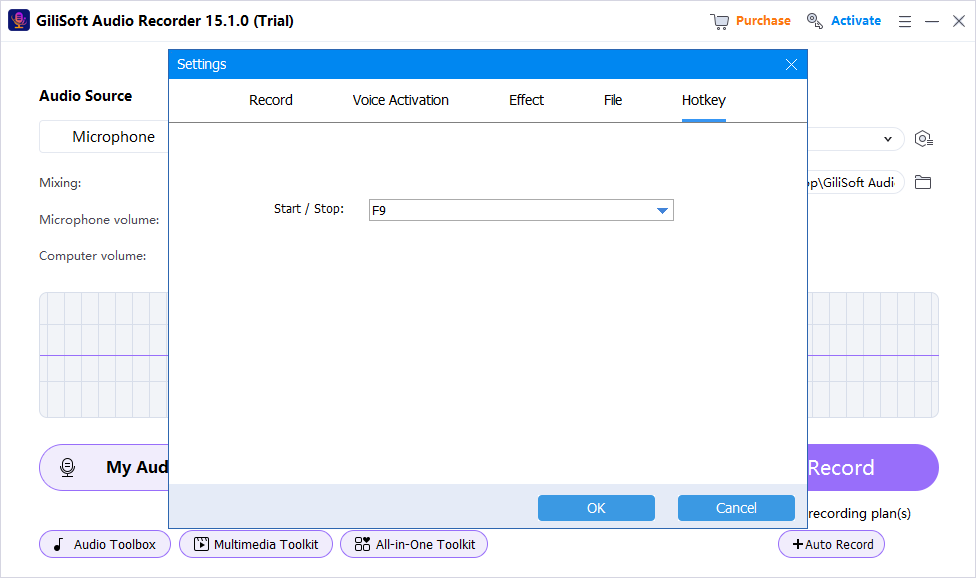 Recording hotkeys. Click to enlarge.
Manage and Improve Recorded Files
After capture, review the file list and use the available cleanup tools only where the recording needs them.
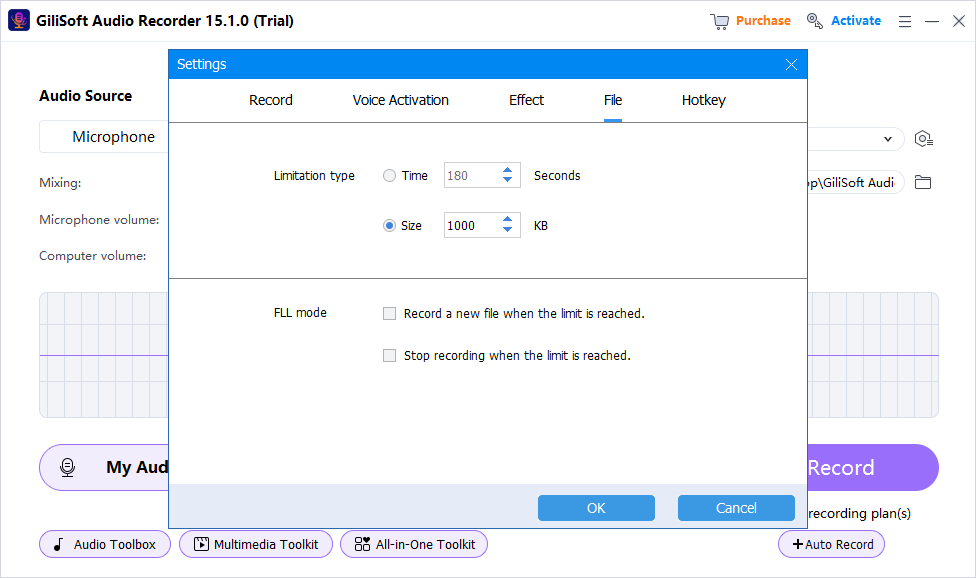
Recorded File Management
Review recordings, identify the correct output, and keep captured sessions organized for replay or later editing.
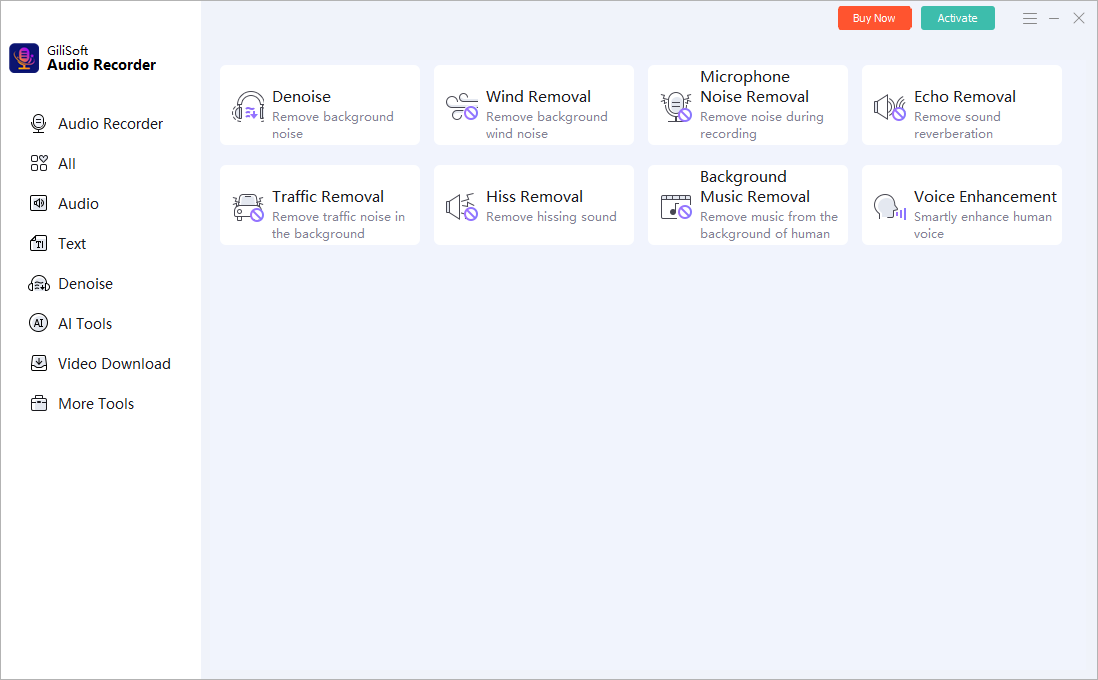
Noise Reduction
Use denoise tools when steady background noise makes speech or training audio harder to understand.
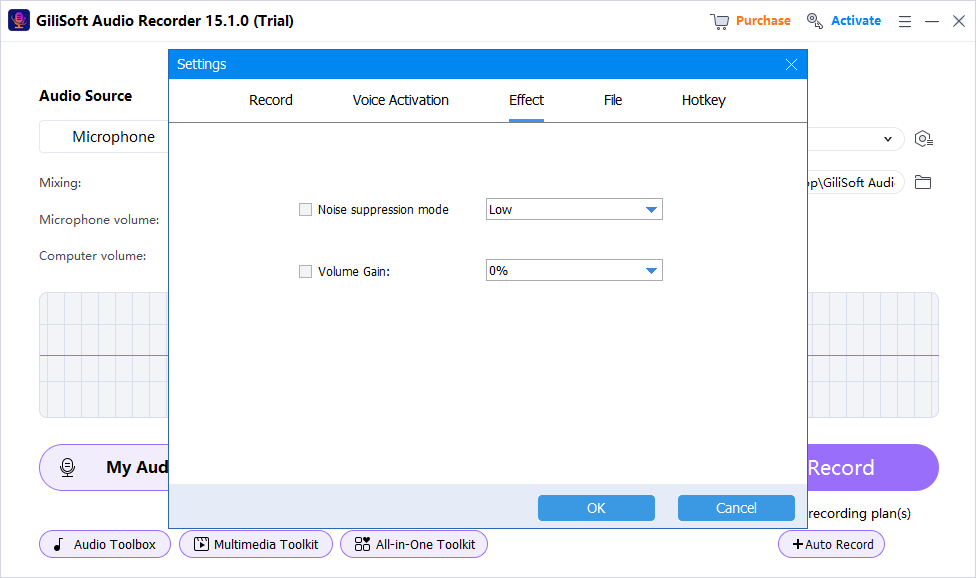
Audio Effects
Apply practical effects after recording when the captured sound needs adjustment before sharing or archiving.
Final Recording Checklist
More Audio Recording Guides
Choose a focused guide for the source, automation, or recording situation you need to handle.
System Audio and Microphone
Scheduled and Voice-Activated Recording
Meetings, Courses, and Interviews
Voice Notes and Recording Cleanup
Audio Recorder Pro troubleshooting and FAQ
Why is system audio not being recorded?
Confirm that system sound is the selected source, play a test sound, and check that the input meter responds before recording.
Why is the microphone too quiet?
Select the correct microphone, move closer, check the Windows input level, and make a short test before increasing gain further.
How do I record computer sound and microphone together?
Choose the mixed recording task, verify both input meters, balance playback and speech, and use headphones to reduce echo.
Why did a scheduled recording not start?
Check the plan time, system clock, selected device, and whether the computer remained awake with Audio Recorder Pro available.
Why does voice activation miss quiet speech?
Lower the detection threshold gradually and test with the quietest voice level expected in the recording environment.
Where can I find the recorded files?
Check the destination selected before recording, then use the recorded-file workspace to review and manage captured outputs.
Record system audio and microphone on Windows
Use GiliSoft Audio Recorder Pro for system sound, microphone, mixed, scheduled, and voice-activated recording tasks.
Download TrialBuy Now


